Standard Actions
The following actions are standard actions and we guide you through each one! All you need to do is click the link of the action you'd like to know more about (or set up) and you'll be good to go.
Create a standard action
The Standard Action is the action is the most commonly selected action. It is within the standard action where you'll find some of the most common actions such as Check Out, Transfer, Dispose, Request, Calibrate, and so forth.
To create the standard action:
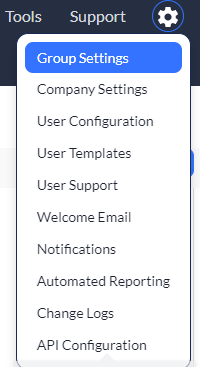
1. Click the settings ![]() icon, and then select Group Settings.
icon, and then select Group Settings.
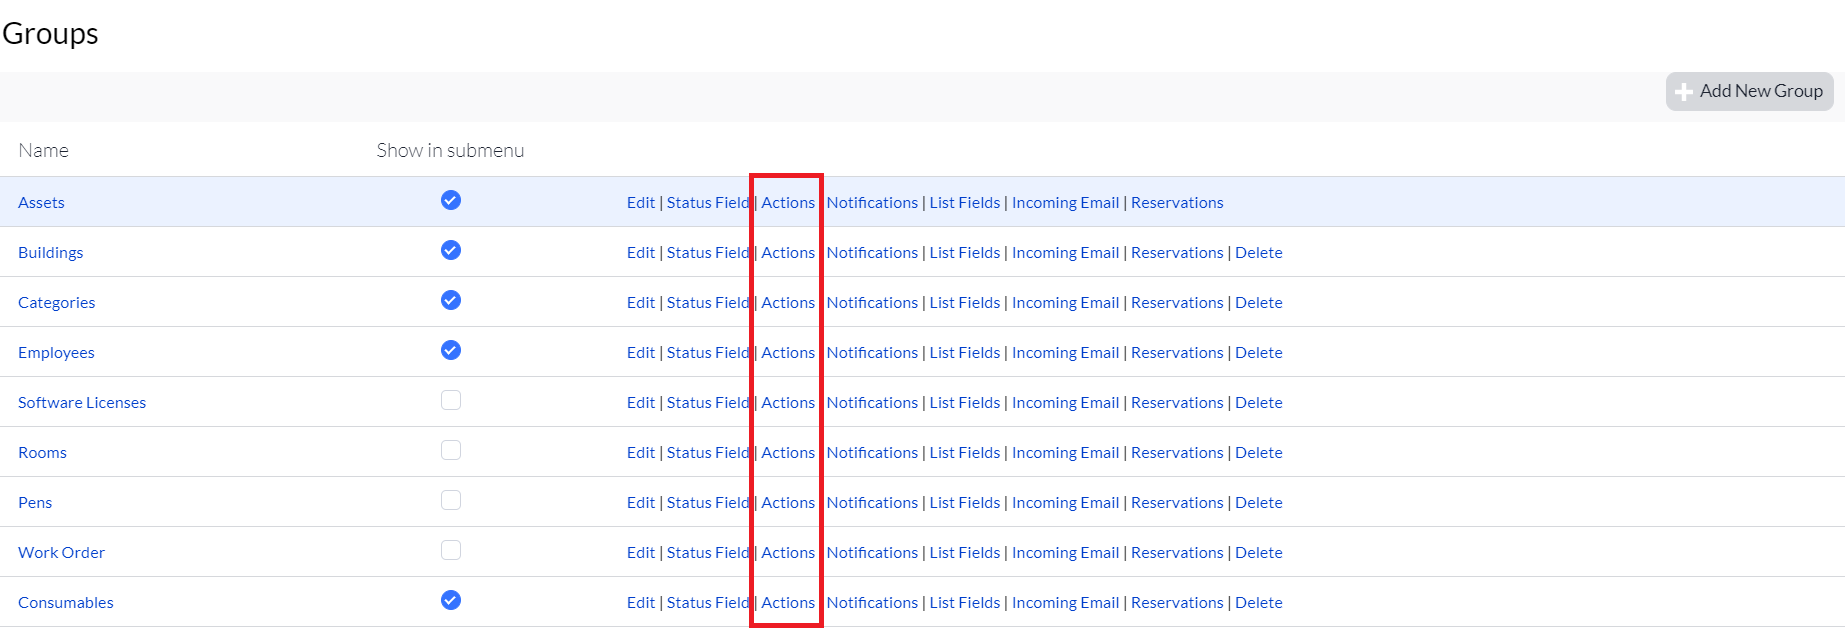
2. Select the group in which you intend to create the standard action, and then click Actions. (Keep in mind that your groups may differ from those shown in our example below.)
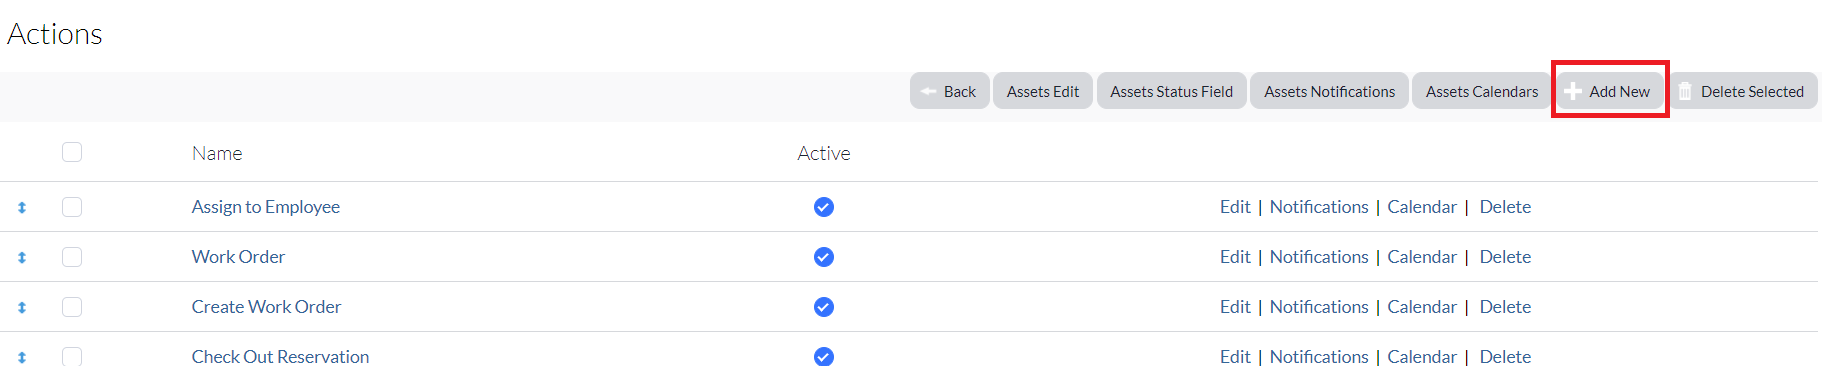
3. Click Add New.
4. Complete the following:
(Your options will change depending on what you select Yes or No to. As a result, you may not see all described below or, you may see some additional.)
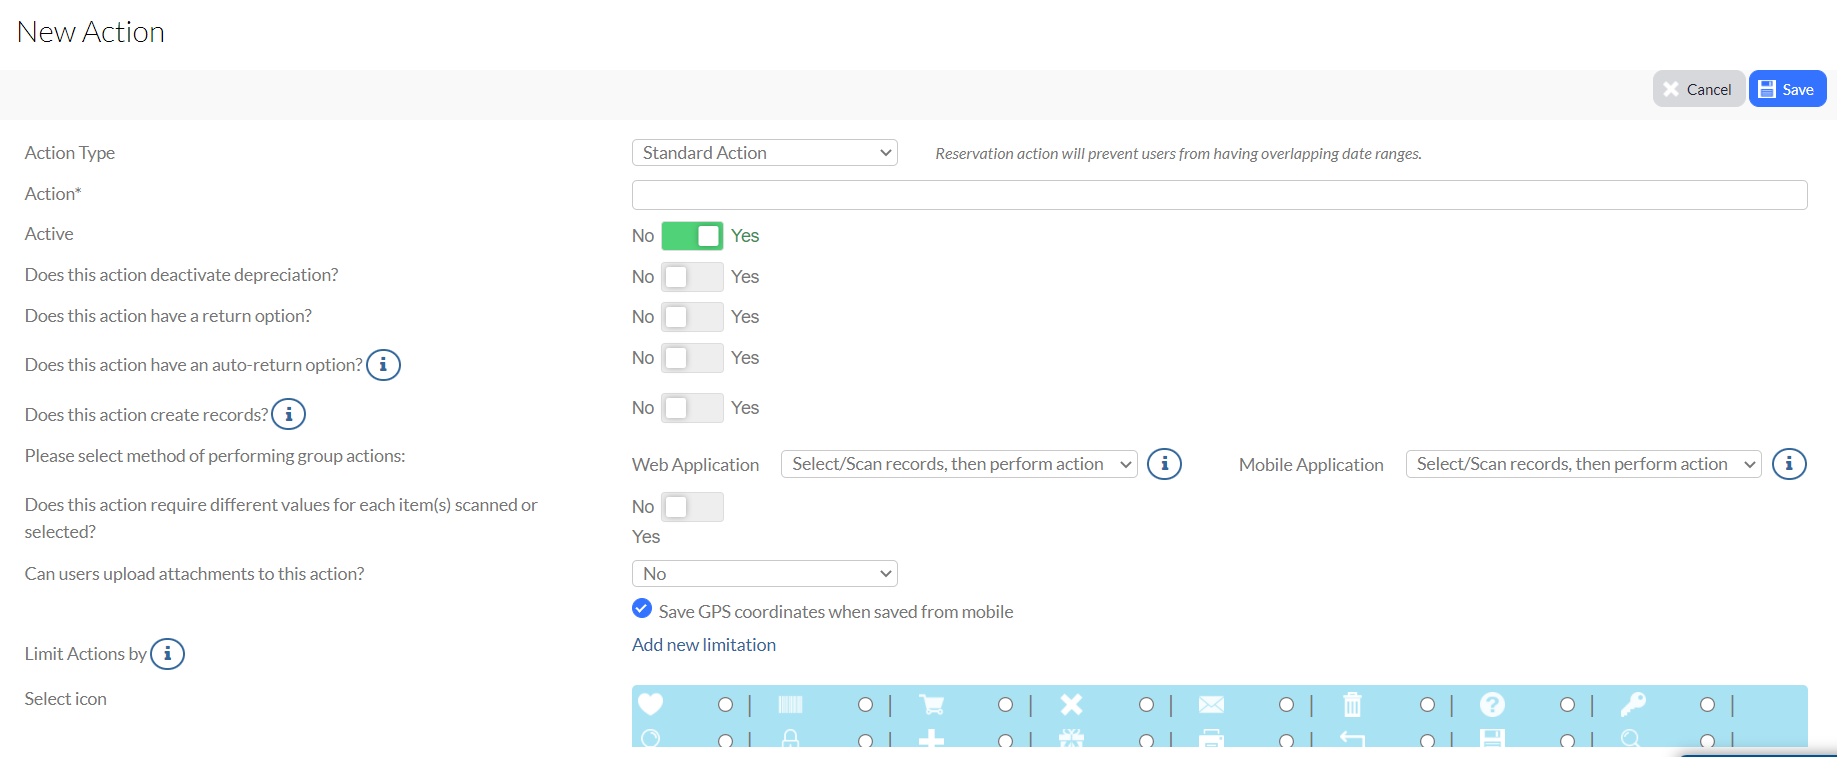
- Action Type: Select Standard Action.
- Action: Enter the title or name of the action. (This is required.)
- Does this action deactivate deprecation: Select Yes or No.
- Does this action have a return option: Select Yes or No. This option creates the portion of an action that allows you or the user to close an action that is open. (Example: When an item is Checked Out to an Employee, the Return option allows you to be able to log into Asset Panda and Return the item to its original state. This would typically consist of switching the Status back to Available and Removing the assignment data from the record. This does not remove the assignment data from the Action History, just the record itself.)
- Does the return option need a different label: This field displays if you select Yes to the above return option. This field allows you to change the name of the Return portion of the action to something such as Send Back to Warehouse or, Return to HQ.
- Return name: This displays if you select Yes to the field above, allowing you to enter a return name.
- Does this action have an auto-return option: Select Yes or No. Selecting Yes automatically returns the item on a designated date.
- Can this action be performed if previous action not returned: Select Yes or No. This field shows depending on the return options you choose, if any. If set to Yes, the user is able to complete the action before it is returned. (Example: If an Asset is Checked Out and Yes is selected for this option, it can be Checked Out to a second Employee while it is still checked out to the first Employee. In other words, you'll want to use this option with caution.)
- Can users upload attachments to this action: Select Yes or No.
- Save GPS coordinates when saved from mobile: This option logs the GPS coordinates of the location of the Asset when the action is initiated. (Example: Perry Panda Checks Out a laptop using his mobile device and the mobile device auto logs the coordinates of the laptop when the action took place. It does not keep a running GPS log of the whereabouts of the device.)
5. Click Save.
You'll likely get an error message letting you know that at least one field must be defined for the action. You can disregard this for now or scroll on down the page to begin to add your fields. (Check out Add New Fields for a refresher on how to add new fields.)