Add New Fields
Ready to add some new fields to your record(s)? I suppose you wouldn't be here otherwise, so let's get started. One quick thing to note (and then I promise we'll get started) is that your ability to add fields (or not) is based on your permissions. We've got you covered on that though. Check out Custom Permissions for more info on changing those if you need to.
What are we waiting for? Let's get started!
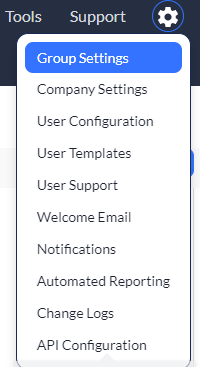
1. Click to select your settings ![]() icon, and then select Group Settings.
icon, and then select Group Settings.
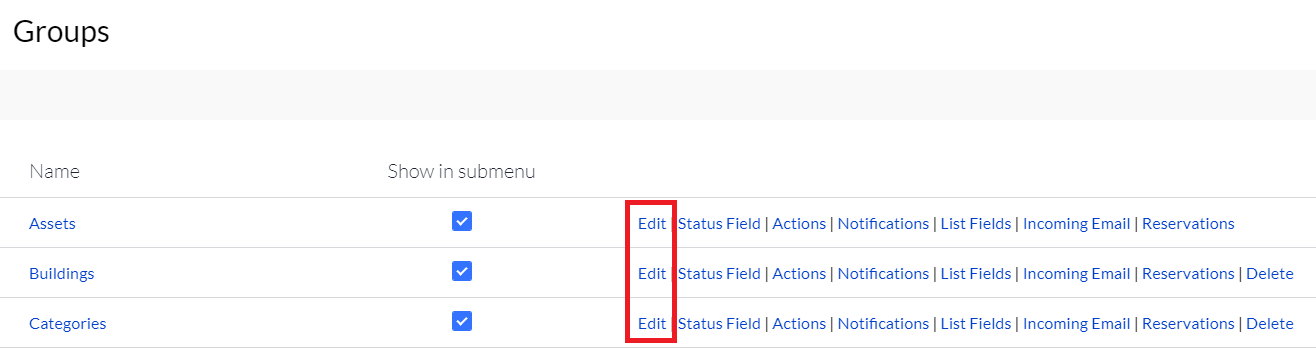
You'll notice that all of your groups magically appear on your screen.
2. Click Edit on the group you wish to edit. (It works the same in all groups so just rinse and repeat if you need to edit more than one.)
And what do you know...you know find yourself in edit mode. (You won't see edit mode on the screen because we just made that up, but just trust us that you can make the edits you need to make.)
3. Scroll down to the Fields section. (Our example contains some existing fields. Yours may or may not but it still works the same!)

4. Click Add New Field. (I bet you knew we were going to say that.)
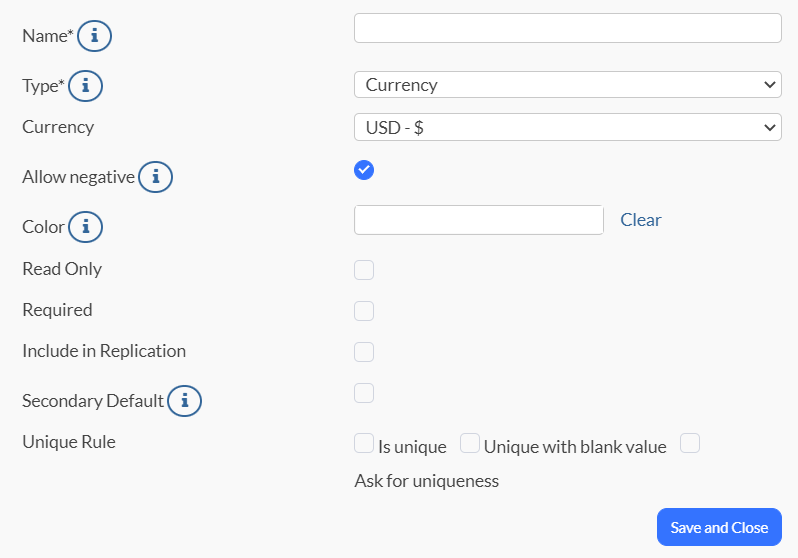
You'll see some really cool options on this screen. We also ask that you not be surprised because this screen may change before your eyes. Well, at least kind of. Your options will change as you go, depending on the options your choose and select. Give it a try if you have yours open right now!
We'll however explain what the options on this specific screen do. The Type of field you select is going to be key here, so you can view our nifty Field Type Descriptions for some additional help.
As for this specific screen (and of course anything with an asterisk * is required):
- Name* - Enter the name of your new field.
- Type* - Select the type of field you need.
- Color – This sets the color of your field. (Kind of neat, huh?)
- Allow Negatives – Use this for numeric or currency fields. One cool thing is that this option allows a negative integer to be entered into the field on the record.
- Read Only – Great to select if you wish for this field to NOT be modified.
- Required – Use if you wish for this field to be a required field.
- Include in Replication – This nifty option allows your new field to be replicated when using the replication action.
- Secondary Default – This options allows the field to display within any related drop-downs as a secondary identifier (within other groups).
- As an example: Let's say that you are adding a Name field to your Assets group and decide to make this Name field your secondary default, with the Asset ID as your primary default. You then create a work order, selecting the Asset to attach to the ticket. The Asset information will display in the drop- down as 100001 Name.
- Unique Rule: (See Unique Rule for more information.)
- Is Unique – Use when the field value is required to be unique.
- Unique with blank value - Use when the field value is required to be unique but can be left blank if needed.
- Ask for uniqueness – Use when a unique value is not required, but when the system is set to ask to make the value unique if possible.
5. Click Save and Close when finished and just like that, you are done!
Related Topics