Check Out Actions
Check out actions can be either standard or date driven. (See Standard Actions or Date Driven Actions for more information on these specific action types.)
We will first cover standard check out actions.
Create standard check out actions
Let's first discuss standard check out actions. We'll talk about actions that fit this description, along with how to create them.
Check Out to An Employee
This article is all about *drum roll* setting up actions that will allow you to check out records to the employees of your organization.
This article assumes that you know how to build an action but no worries if you don't. Simply check out Create or Modify an Action and you're ready to rock and roll.
First, it's important to note that check out actions usually have both open and closed fields. Both of these field types are important to check out actions because they contain both a check out and a return.
So what are we waiting for? Let's get started!
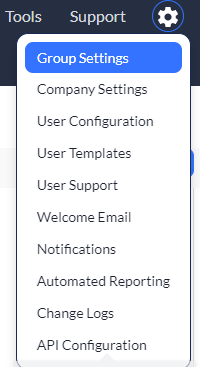
1. Click to select your settings ![]() icon, and then select Group Settings.
icon, and then select Group Settings.
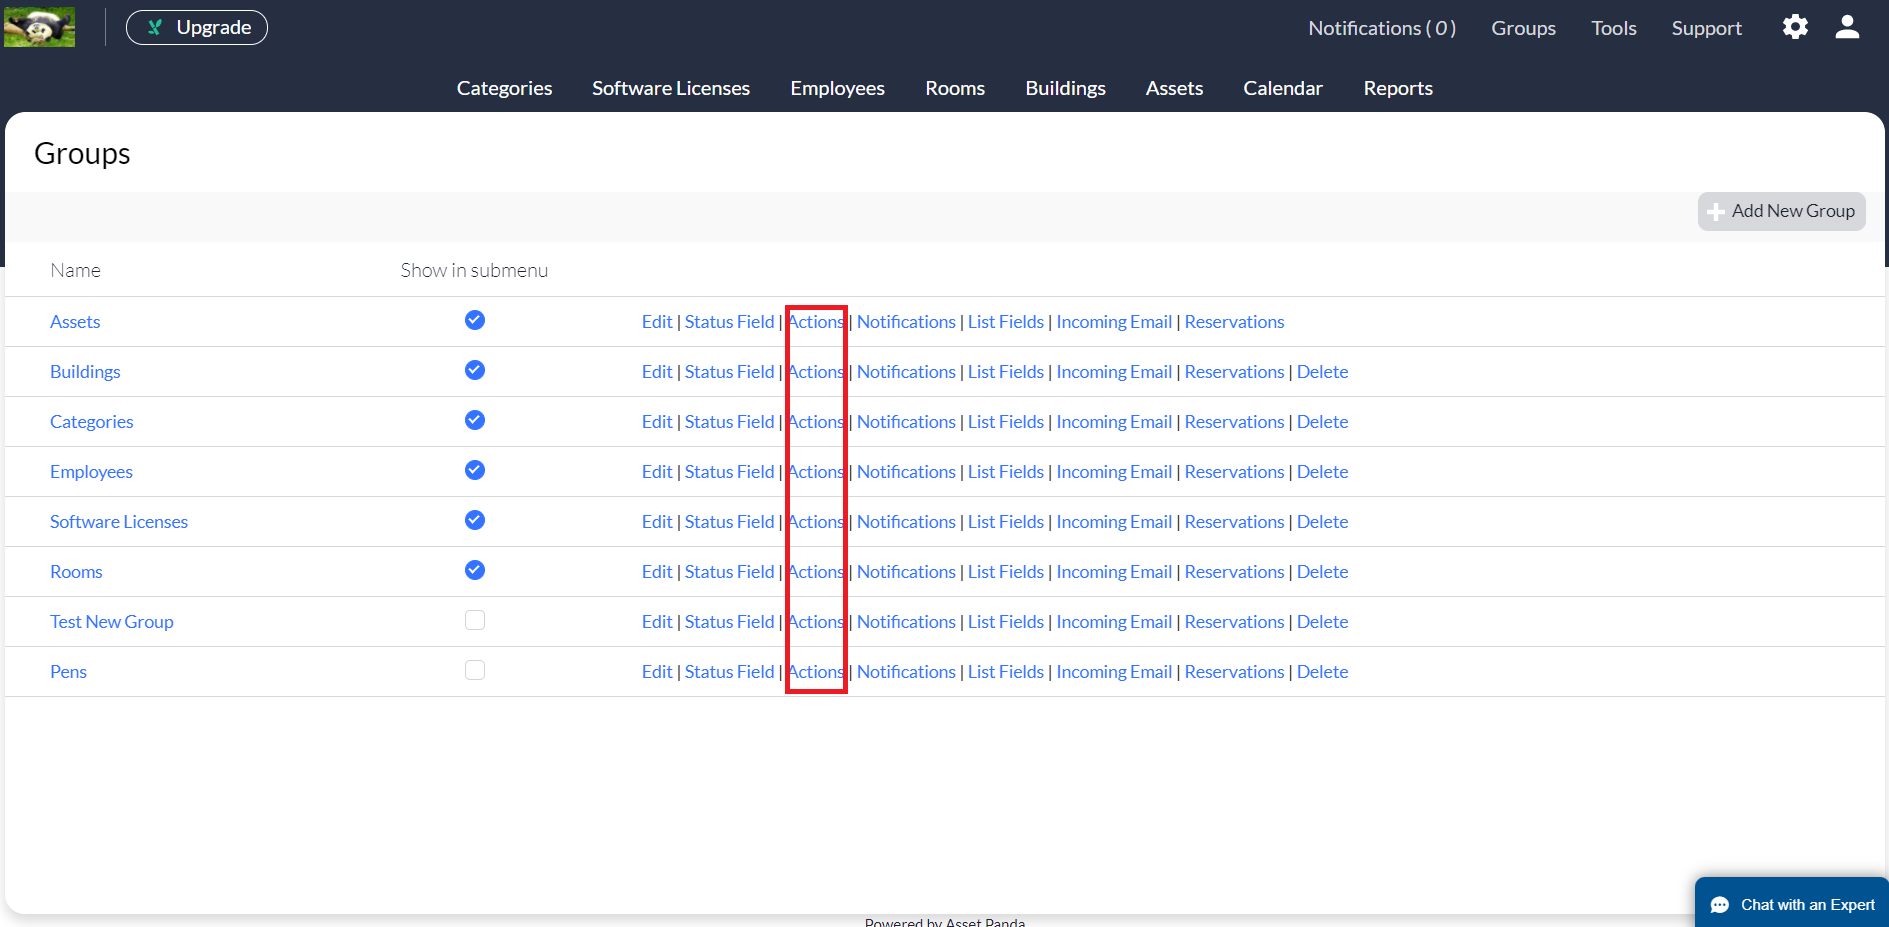
2. Select Actions in the group you want to create the action within.
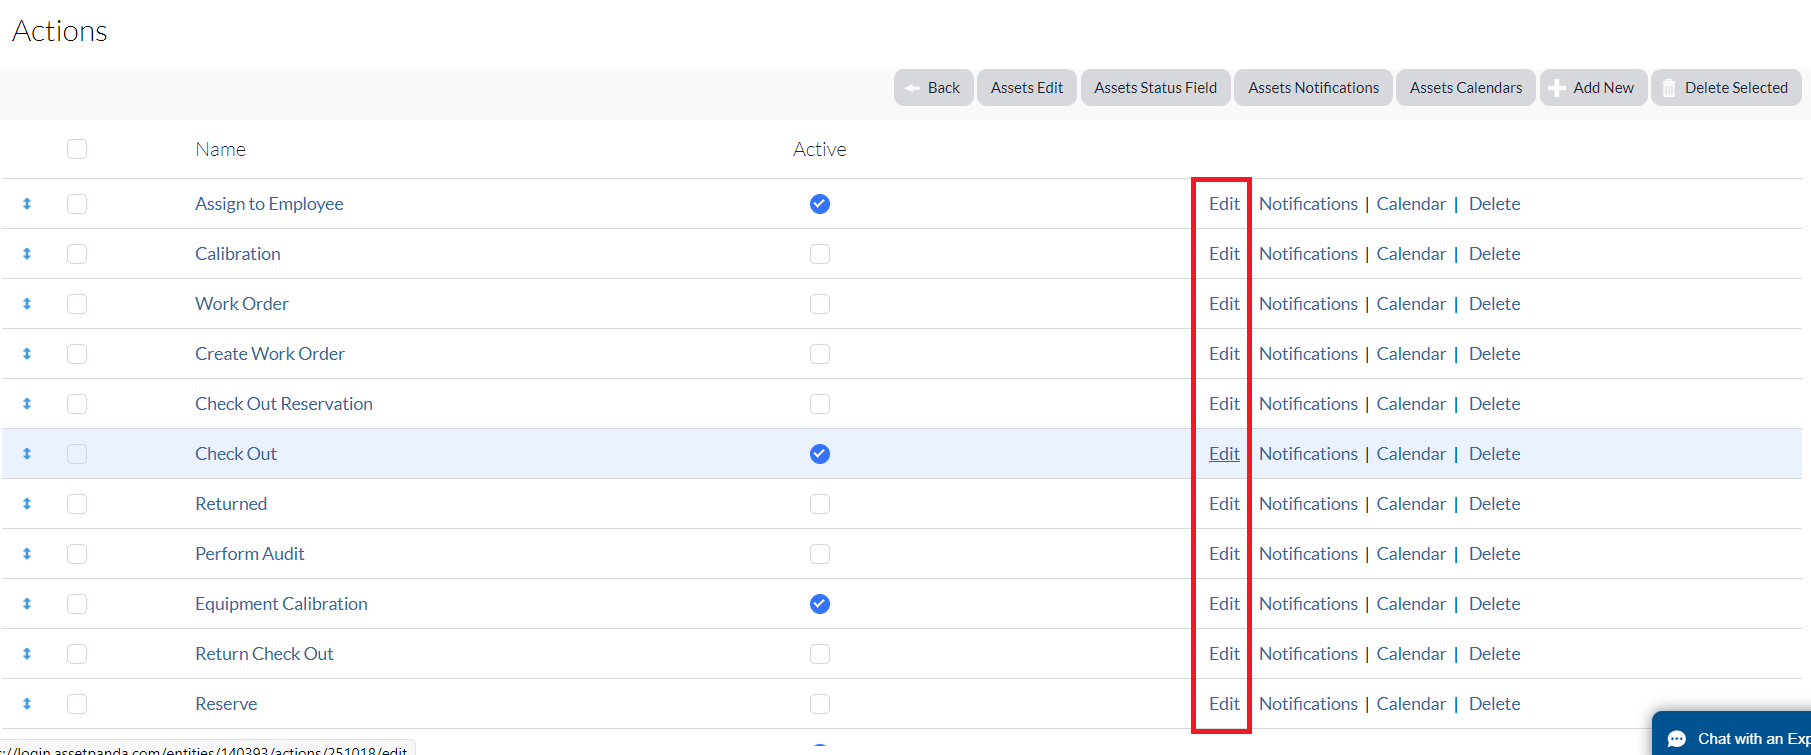
3. Click Edit on the action you wish to edit.
4. Proceed on to the Open and Closed Fields section below to add your fields!
Open and Closed Fields
Earlier we mentioned how check out actions usually contain both open and closed fields. Let's now talk about those fields.
Open Fields
(See Open Fields for more information on creating open fields.)
The main key ingredient is of course your group list of employees. You'll need this since you will be checking out assets to employees!
1. Scroll down to your Open Field section, and then click Add New.
We recommend adding Date Stamp, User Stamp, and Date Time Stamp fields for your open fields, but the main open field you'll need for this action to work is a group list of Locations.
2. Create your new open field using the parameters of the screenshot below.
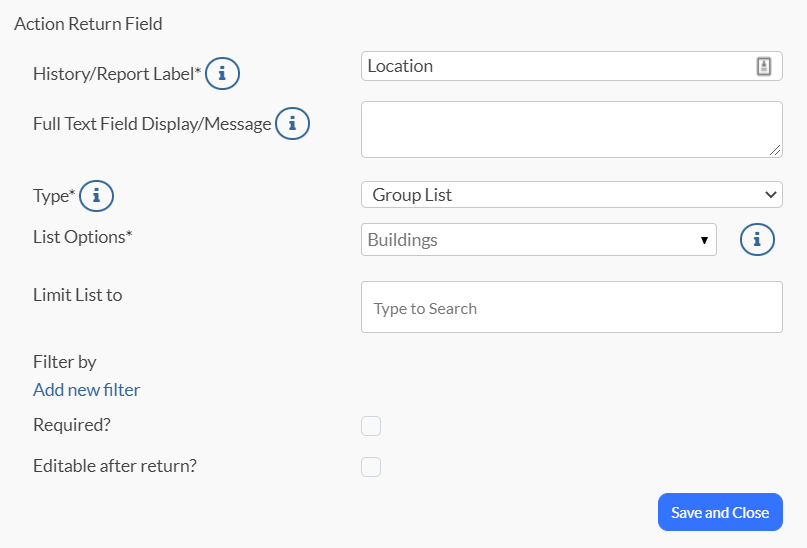
We named our field Location but of course, you can name yours whatever suits the needs of your organization.
Another thing regarding the List Options. You will just need to choose the group that contains the list of locations you want to assign records to. This is Buildings in our case. Yours may be titled something different.
3. Click Save and Close.
Closed Fields
(See Closed Fields for more information on closed fields.)
1. Scroll down to the Closed Fields section, and then click Add New.
2. Closed fields are basically set up the same as your open fields, so we recommend adding Date Stamp, User Stamp, and Date Time Stamp fields.
(One addition we recommend for your closed fields is to set-up a Notes field.)
Change Fields
(See Change Fields to learn more about change fields.)
Change fields are necessary for your action to work properly. This field will actually change the information within the Location field for the specific record. This allows us to tell the action to attach the correct location to the record, when the record is checked out. It also directs the action to delete the location off of the record when it is returned, so that the record becomes available again.
1. Scroll down to the Change Fields section, and then click New Change Field.
2. Select the Group and Field you wish to change (yours may vary from our example).
3. Use the remaining parameters below to create your change field.
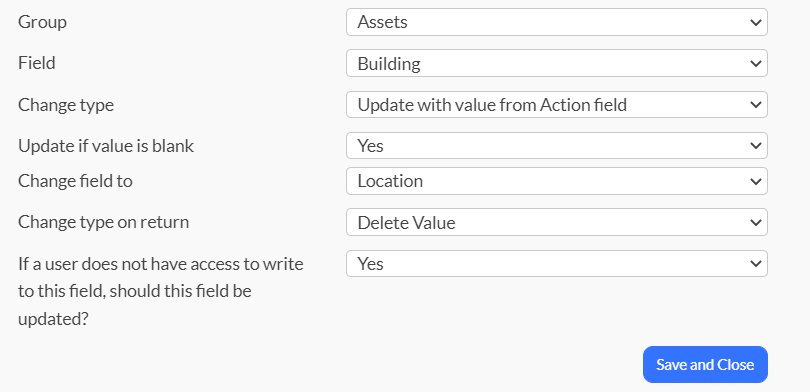
4. Click Save and Close.
Now when this action is performed the action will change the Location field to the Location that is entered in the Open or beginning part of the action. Then when the second (or return) part of the action is completed the value in the Location field is deleted so that it shows that it is no longer assigned to a Location.
Create date driven check out actions
We'll now cover date driven (also referred to as, date dependent) actions. (You can find more in-depth information on these action types at our Date Driven Actions article.)
Check Out an Action
Although the process for creating a Check Out action is very similar to creating a Reserve action, there are still some differences.
1. Click to select your settings ![]() icon, and then select Group Settings.
icon, and then select Group Settings.
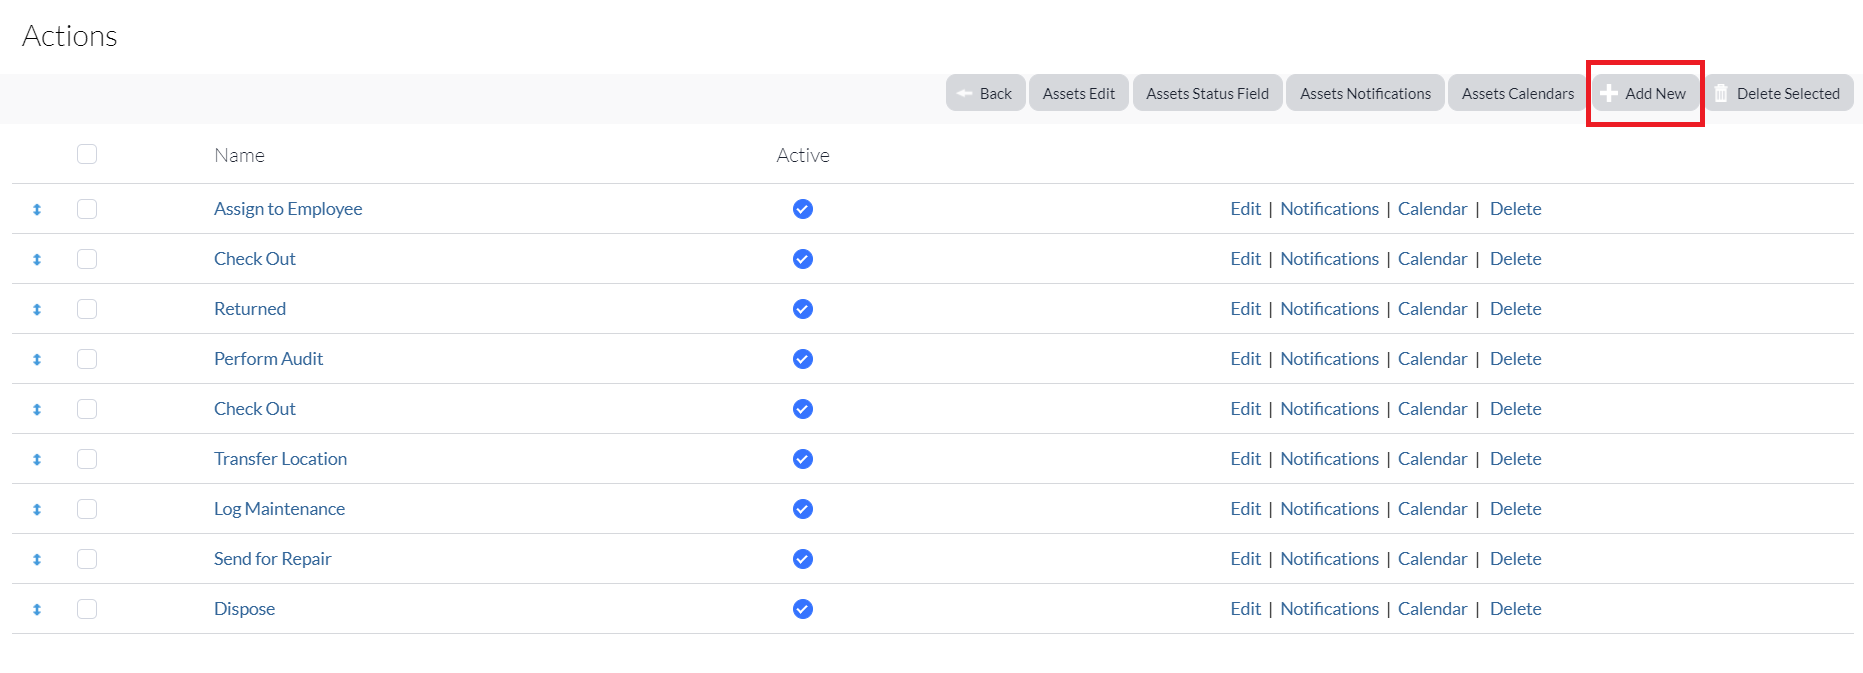
2. Select the Actions link from the group you wish to create a date dependent action, and then click Add New.
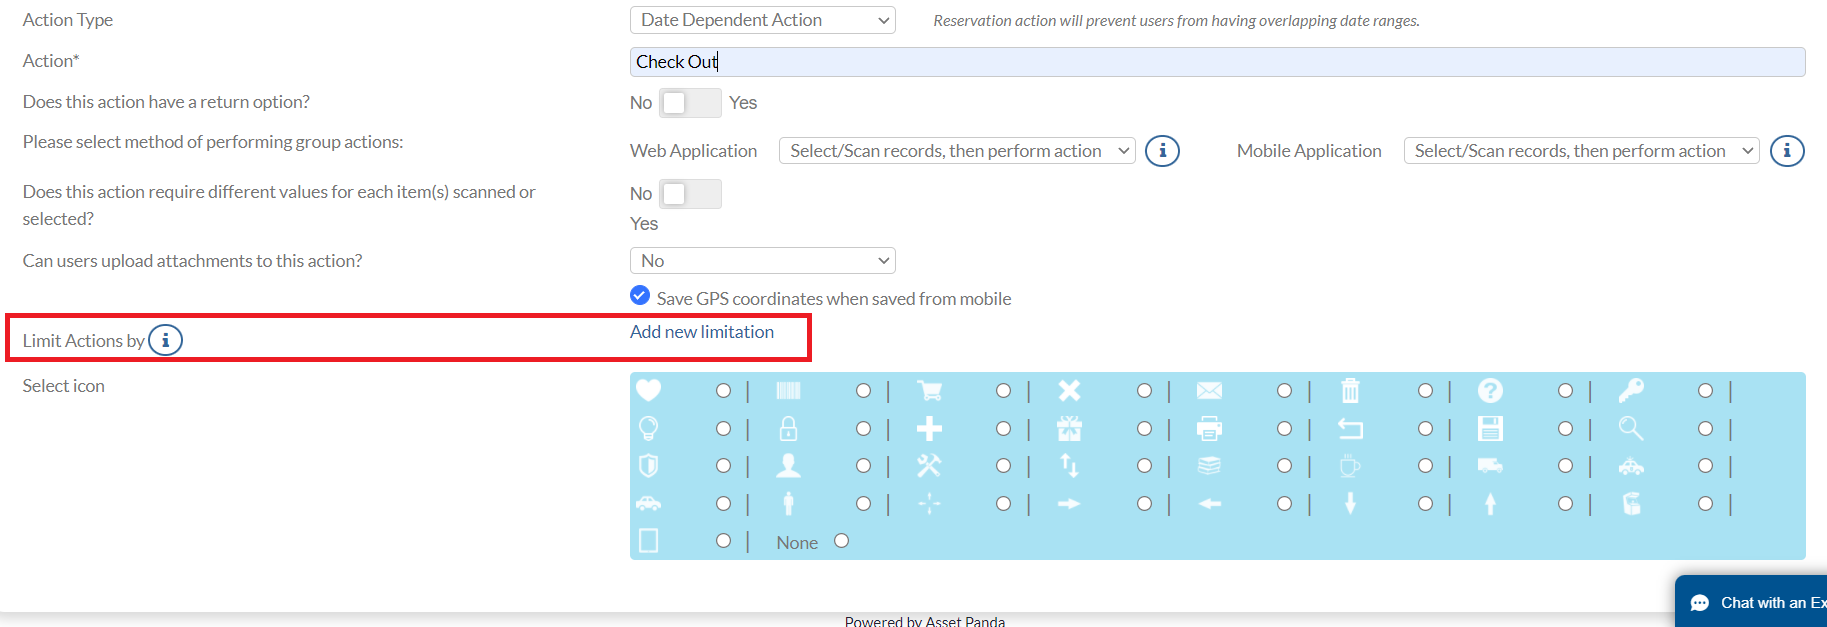
3. Select Date Dependent Action from the Action Type drop-down menu.
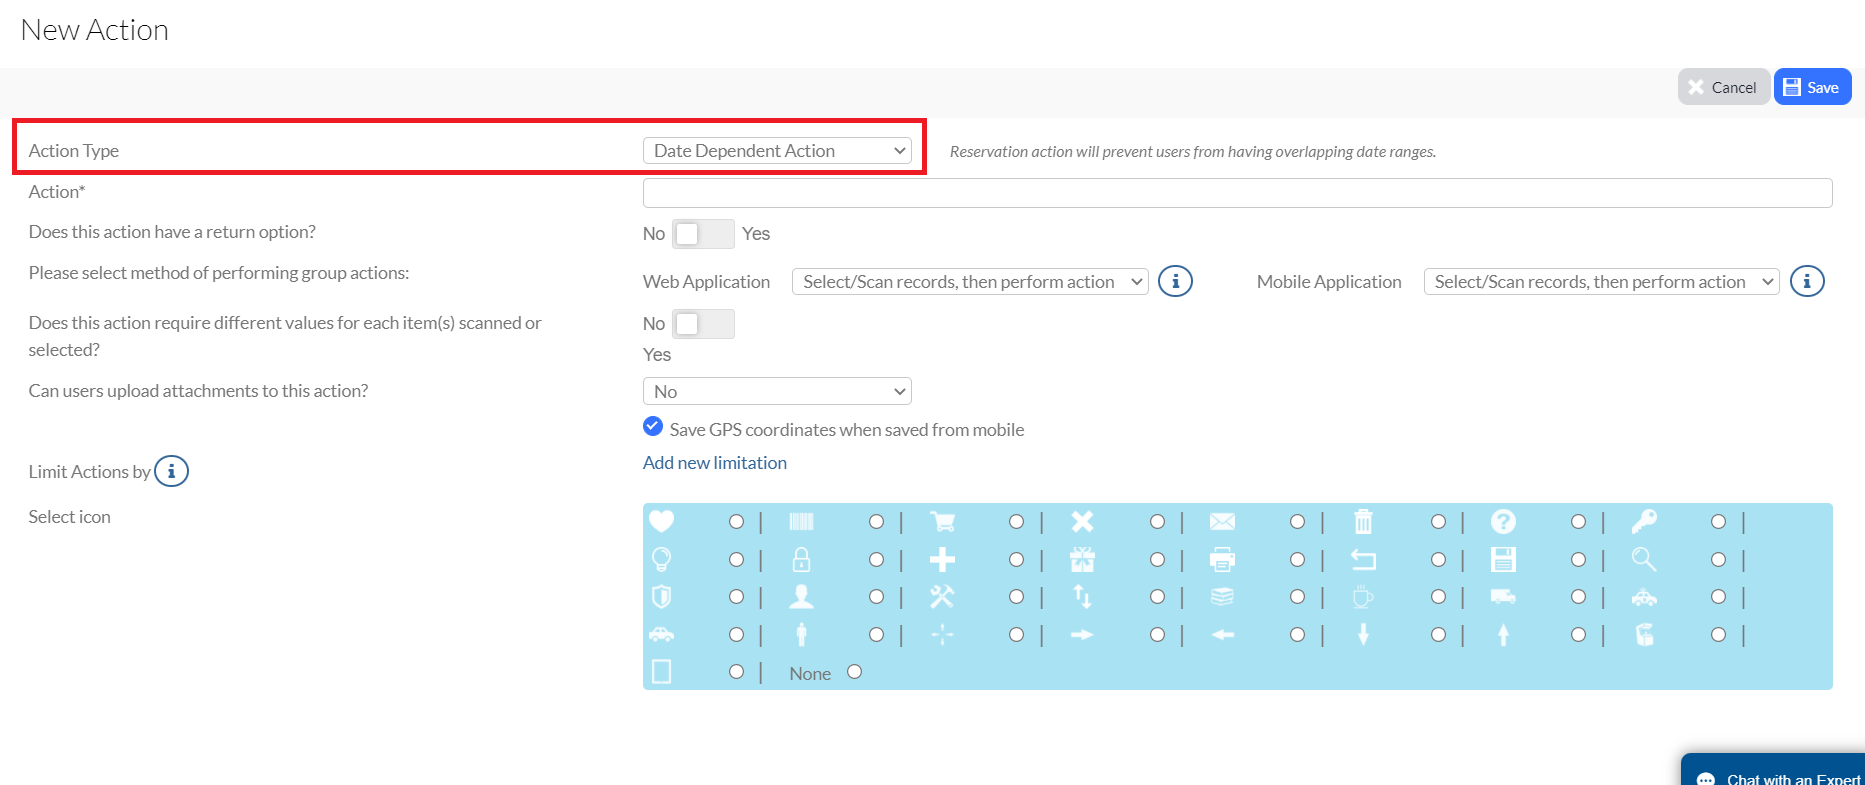
2. Type Check Out within the Action field. (This field is required.)

3. Click Save.
You will notice that the screen changes from the New Action screen to the Edit Action screen, providing you with new options.
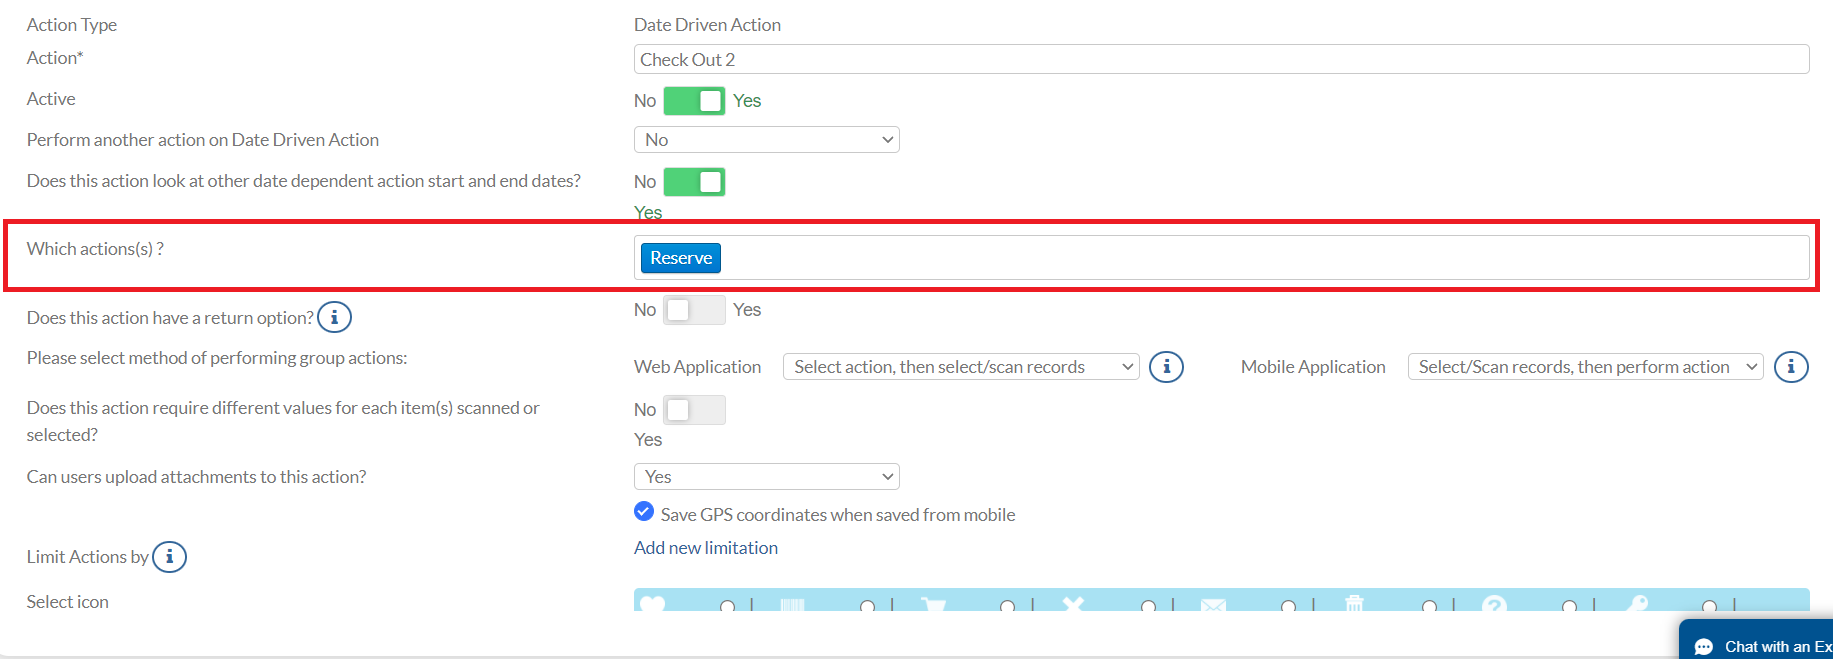
4. Use the toggle to select Yes for the Does this action look at other date dependent action start and end dates field.
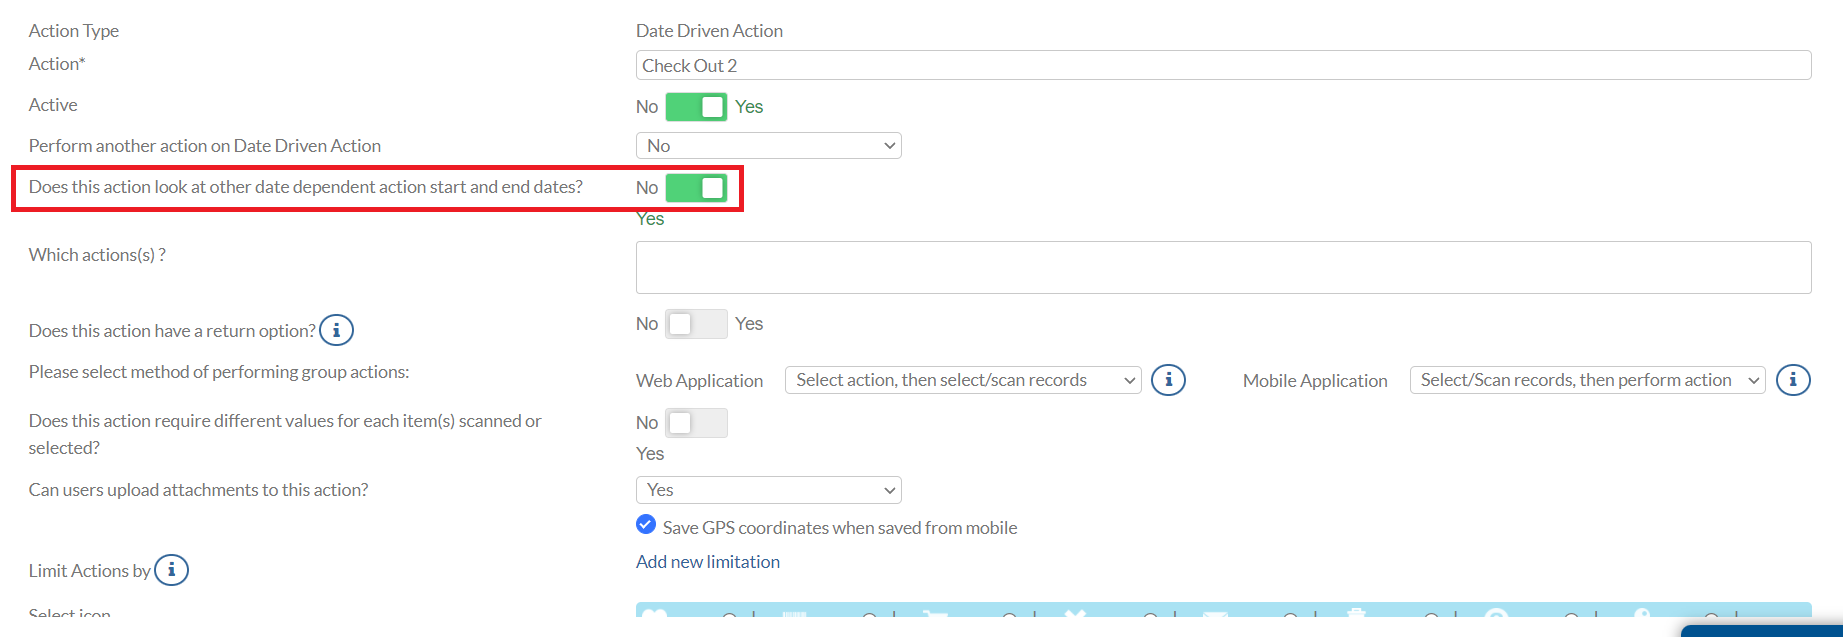
This selection prompts the Which action(s) field to display.
5. Place your cursor into the Which action(s) field, and then select Reserve. (You must create a reserve action prior to this step or Reserve will not be an option from this field. See Reserve Actions for more information.)
6. Click the Add new limitation link from the Limit Actions by option.
This is an important step because a status limitation must be set so that only available assets can be checked out.
7. Select Status, Like, and then enter Available (as shown below).
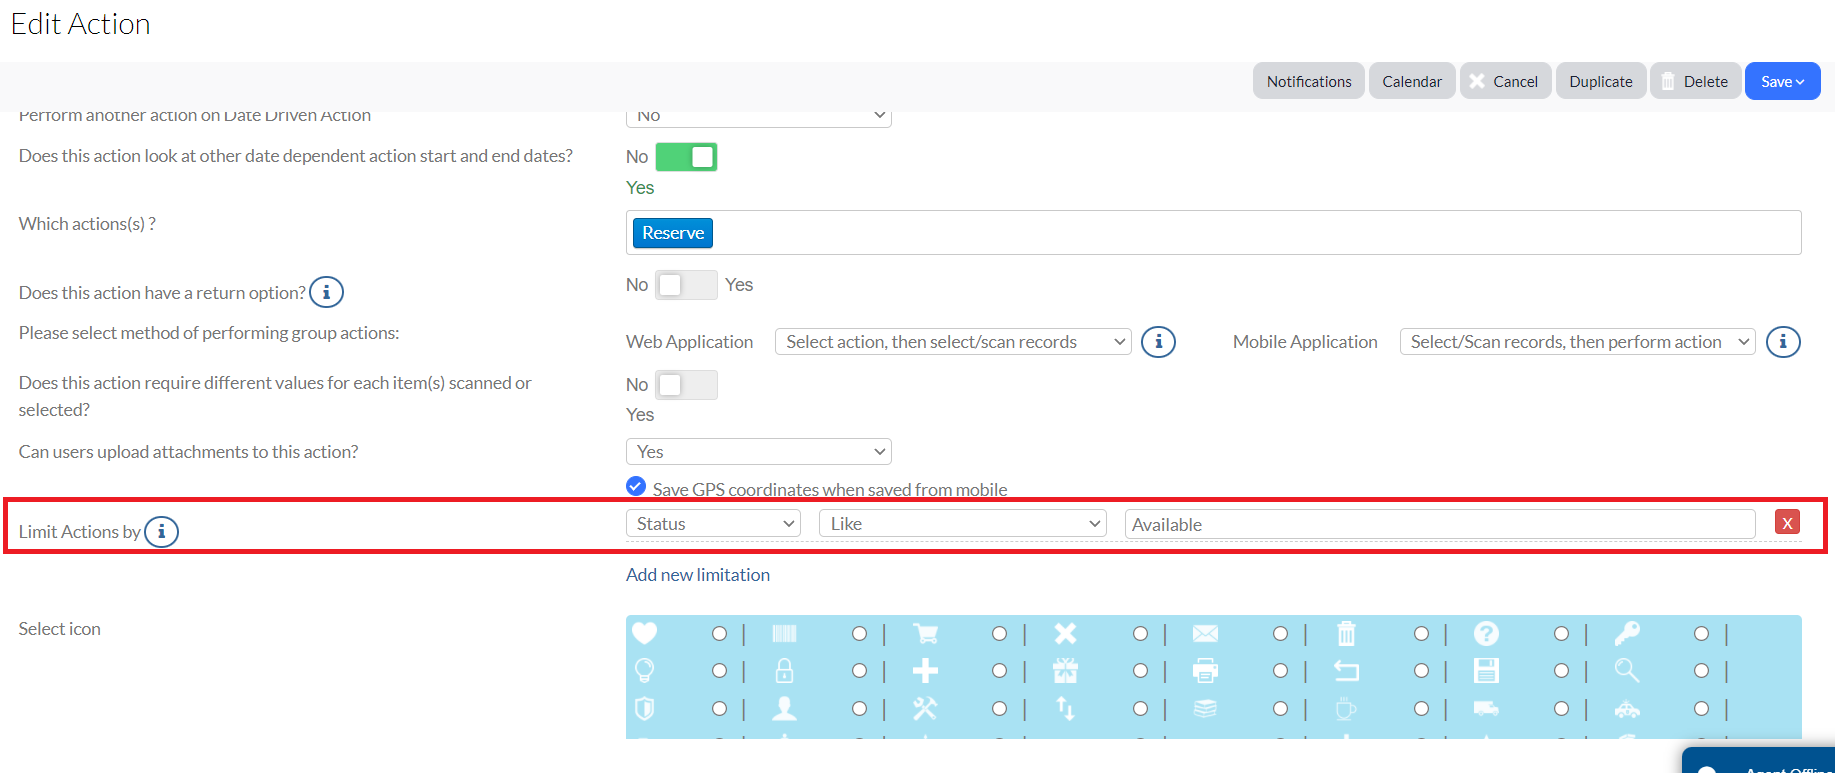
8. Click Save.
9. Scroll down to the Fields section, and then locate the Open Field section.
10. Click Add New to add new fields of information.

The defaulted fields of Start Date/Time and End Date/Time are renamed to Check Out Date and to Due Back By Date.
11. Scroll down to Change Fields, and then click New Change Field.
12. Enter the following:
- Group: Assets
- Field: Assigned To
- Change type: Update with value from Action field
- Update if value is blank: Yes
- Change field to: Employee Check Out To
- If a user does not have access to write to this field, should this field be updated: Yes (This means that even if the field is currently blank, the change will still be made.)
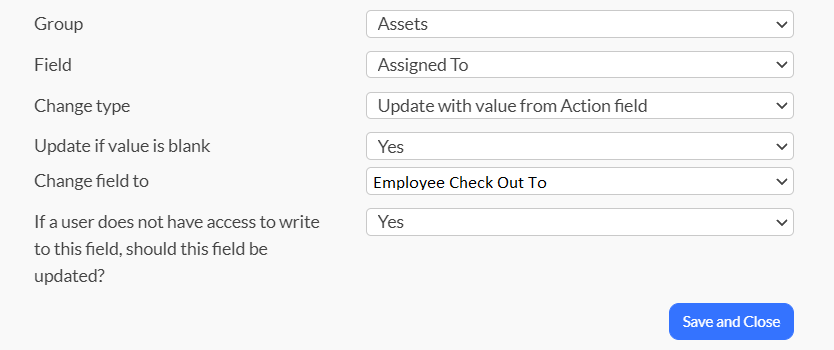
13. Repeat these steps to create a Status change field.
14. Click Save and Close to close this action.
15. From your Actions page, click Add New to create a new Return Check Out action.
The action will be a Standard Action and should look like the one in the screenshot below.
(See Create or Modify an Action for a refresher on how to create and/or modify actions.)
Related Topics