Change Fields
What exactly is a change field and what in the world does one of these fields accomplish? Well, the title of the field kind of says it all. Change fields allow for change!
Simply stated, a Change Field creates a record of changes that occur during an action. For instance, lets say you sell an asset. A change field automatically updates the status of that asset to Sold. (We told you it was simple!)

Create a change field
First, it helps to know how to actually create a change field. I mean, it's kind of difficult to use one if you haven't yet created one, so let's delve into first things first.
To create a new Change Field:
1. Scroll down to the Change Fields section of an action, and then click New Change Field.
![]()
NOTES: Most of the selections within this setup window will be made using drop-down menus.
Your options may differ from ours, depending on your Change type selection.
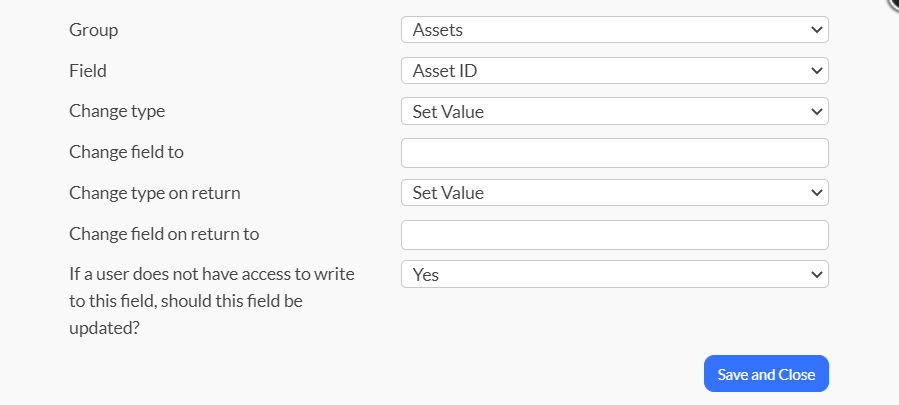
2.Select the Group in which your change will occur.
3.Select the Field in which your change will occur.
4. Determine the type of change you would like to occur within the Change type field, along with what you would like your field to change to within the Change field to text field. You will need to do the same for the return fields (Change type on return and Change field on return to).
And...we've created a nifty table that should help you to choose the change type that best suits your need.
Change Type Table
| Change Type | Change Result |
| Set Value | This option is the default option, allowing you to choose what you wish your field to change to. (For instance, allowing you to set the status value to Sold.) |
| Prompt User | This option prompts and requires the user starting the action to enter or choose a value for the field. |
| Update if value is blank | This option allows you to update the chosen field with a value from a matching field value from the open fields. (For instance, you may have an open field that asks users to input the location within a check out action. This change field type will allow you to pull the location value chosen by the user into the assigned to field on your asset record.) |
| Update with value from Action field | This will allow you to update the chosen field with a matching field value from the open fields. |
| Delete Value | This option will delete the value of your chosen change field. (For instance, you may want to return an asset and then delete the data of the assigned to field, enabling it to be replaced with the next person the asset is checked out to.) |
| No change | Selecting this option means that nothing will happen to this field. This field is typically used for the change field on return to. |
| Update with Value from Group Field | This is very similar to the Update with value from Action field, but is specifically used to pull in group list fields. (For instance, you may have an open, Employee field that allows the user to choose the employee (pulling from the Employees Group List) in a check out action. This change field type will allow you to pull the Employee value chosen by the user into the assigned to field on your asset record.) |
| Change type on return | Select the type of change you wish to happen when the action is complete. |
5. Select Yes or No for the If a user does not have access to write to this field, should this field be updated field. It is recommended that you select Yes for this option so that all users have the ability to update specific fields (see below). See Custom Permissions for more information on security permissions.
Selecting Yes will allow the user to update the field, even if they do not have the permissions to do so. (For instance, the user does not have the permissions to manually edit fields within a record. Selecting Yes will allow the user to still be able to complete the action, updating the fields on the backend.)
Selecting No will only allow the user the ability update the field depending on their permissions. (For instance, the user would not be able to use actions to update certain fields such as Status and Assigned to.)
6. Click Save and Close. You have just created a change field. Need more than one? No problem. Just rinse and repeat!
Related Topics