Kits
You may find yourself wondering about kits and what they are here at Asset Panda. Simply put, a kit is a record that can have multiple assets associated to it. Think about it like a virtual toolbox that contains multiple assets that move together.
Let's use a cool example. Say a photography school assigns items to its students. Each student will always receive a camera, tripod, lens, etc. in one kit. The items in this kit are highly valuable and all individually barcoded. We want to ensure that all these pieces move together. If the kit is assigned to the student, the asset records for the associated camera, tripod, and lens will also show as assigned to that student. They will always be returned together as well.
In short, kits allow you to move multiple assets at a time without having to complete an individual action for each asset. (You know, the whole, "work smarter, not harder" philosophy!) The concept of having these assets stick together and basically move around as a unity can also be applied to assignments, and deployments.
Create a Kit group
First, the group itself must exist so...let's set one up!
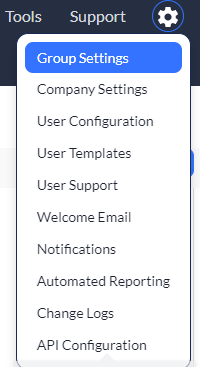
1. Click to select your settings ![]() icon, and then select Group Settings.
icon, and then select Group Settings.
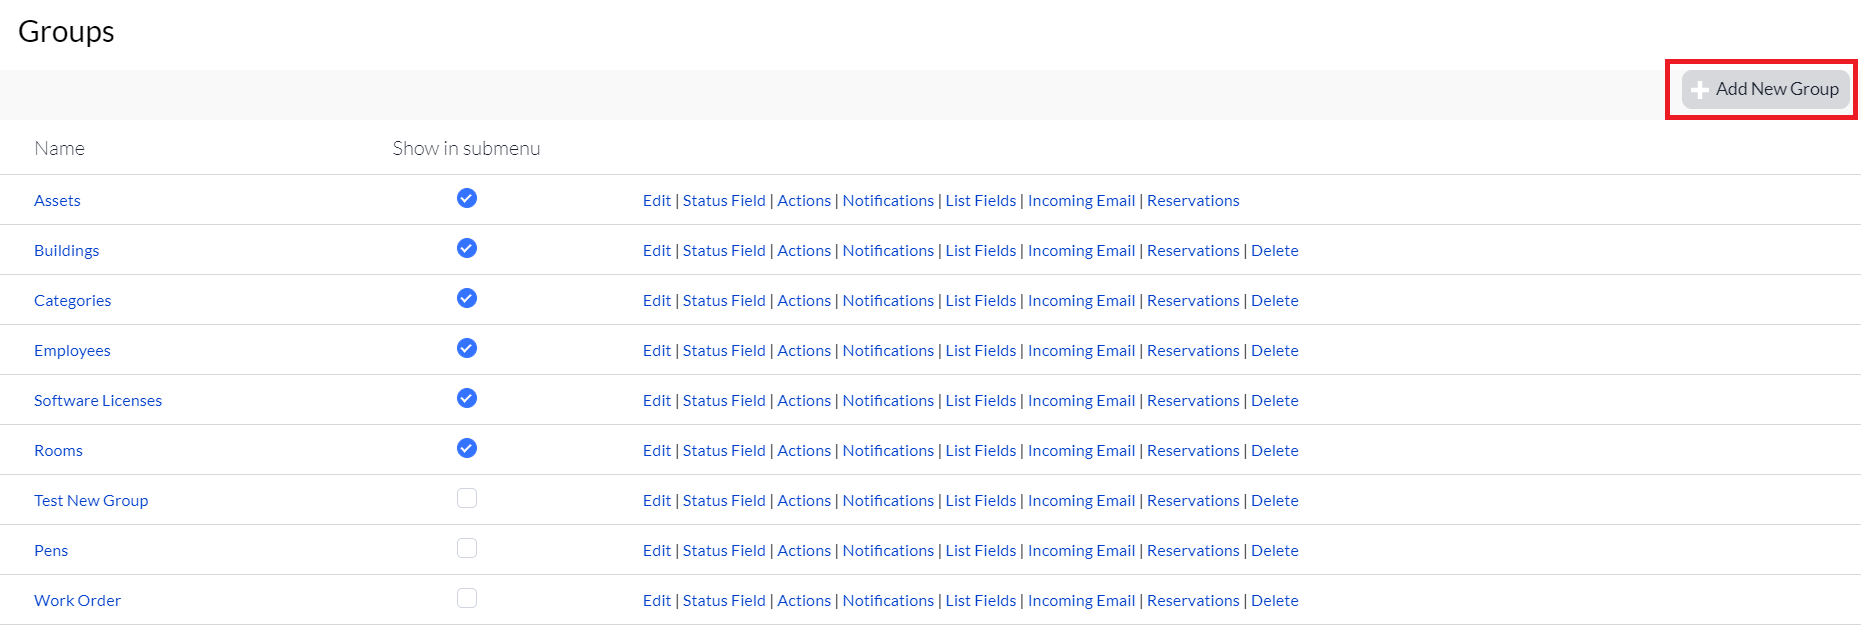
2. Click Add New Group.
3. Create your group, and name it Kit, or some other similar name depending on the needs of your organization. (See Add Groups more information on creating groups.)
4. Make sure to select Show Linked Objects, and Show Associated Objects. These options allow you to see which assets are associated with, or assigned to the kit.

5. Click Save to save your new Kit group.
Add fields to Kit group
(See Field Type Descriptions for more information on the various field types here at Asset Panda, and Add New Fields for more information on how to add these field types.)
Note that in every group you create in Asset Panda, you will always need fields and one must always be Unique and Primary Default.
We recommend that you set up the most commonly used kit field types:
- Kit ID (field type: Text)
- Location (field type: Group List < Locations)
- Assigned To (field type: Group List < Employees)
- Status (field type: Status )
- Notes (field type: Memo)
Add statuses to Kit group
So now you've got that great new Kit group. It's got fields and you're almost ready to rock and roll. (Yeah, we did say, "almost.") One of the things you'll need are statuses. Statuses of the kits are needed to know what's available and what's not.
Let's jump in, shall we?
1. Click to select your settings ![]() icon, and then select Group Settings.
icon, and then select Group Settings.
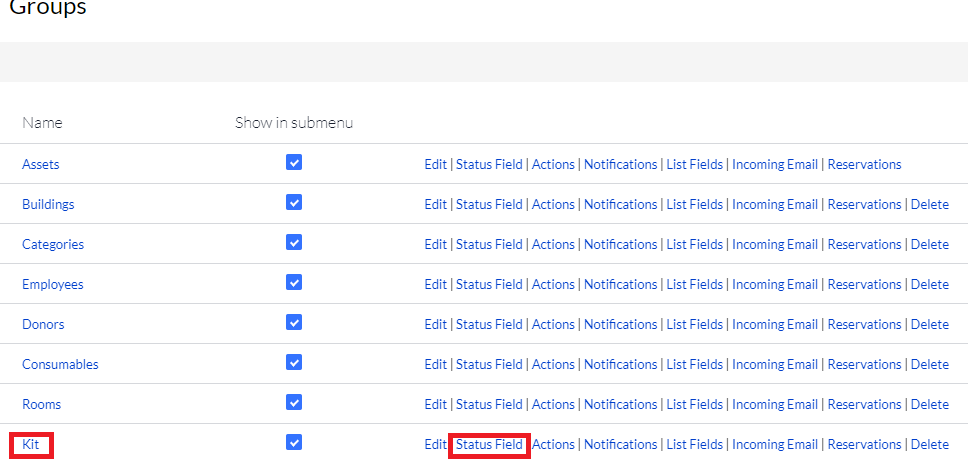
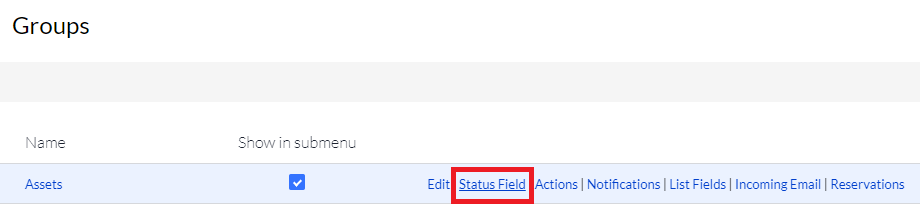
2. Locate your Kit group, and then select the Status Field link. (Once you click on this field, you will be able to add statuses.)
3. Select Add New.
4. Enter the information needed for your new status. (We suggest one of the most commonly used which are Available, Checked Out, Assigned to Employee, and/or Inactive.)
5. Click Save to save your new status.
Add Kit group list to the Assets group
Now that you've built out your Kit group, you'll be able to associate the assets to the kit by adding a Kit group list to the Assets group.
1. Click to select your settings ![]() icon, and then select Group Settings.
icon, and then select Group Settings.
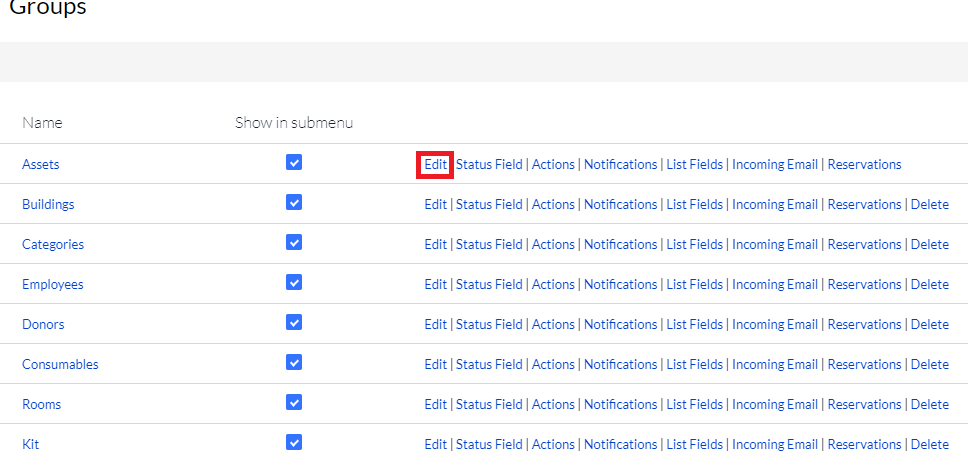
2. Locate your Assets group, and then select the Edit link.
3. Scroll down to your Fields section, and then click Add New Field.
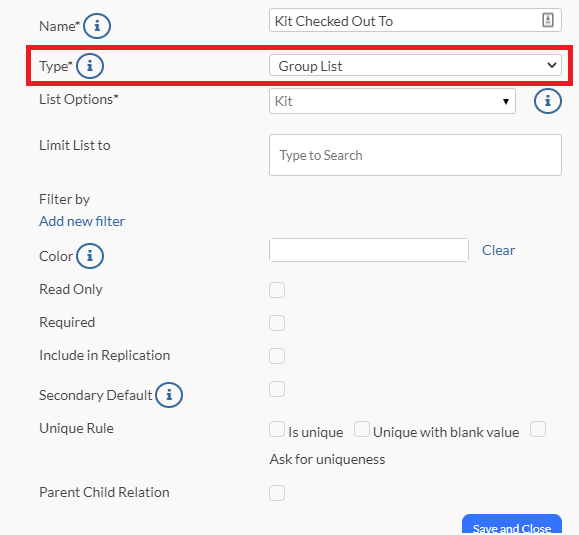
4. Enter your preferred field information, while making sure to select Group List from your Type drop-down menu. (We named ours, Kit Checked Out To in our example, but it's okay to name yours something different.)
5. Click Save.
Next, we need a status to show it’s in a kit.
6. Head back to your settings ![]() icon, and select Group Settings once again.
icon, and select Group Settings once again.
7. Click the Status Field link from your Assets group.
8. Select Add New Field.
9. Name your field Assigned to Kit (or something similar based on the needs of your organization), and then select Yes for Is default for listing, and No for is default for new assets.

10. Click Save.
Add actions to Kit group
Let's now throw a bit of complexity into the mix (not really, but it does make things interesting). Basically, assets within a kit must follow along with whatever happens to the kit. As a result, we need to make sure an asset has the ability to be assigned to a kit (from the Assets group), and make sure the kits have actions with properly configured change fields. (See Change Fields for more information about these field types.)
The following instructions provide information as to how assets can be assigned to a kit, along with the check out action within the Kit group.
Let's first assign an asset to a kit. You can then build an action to assign assets to a kit within the Assets group.
1. Let's once again select the settings ![]() icon, and then select Group Settings.
icon, and then select Group Settings.
2. Locate your Assets group, and then select the Actions link to create an action.
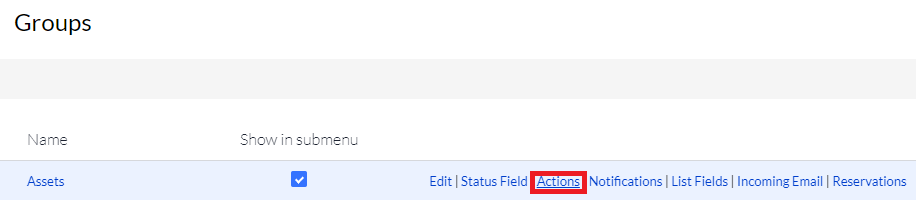
The action you create here will function similarly to an assignment action. Typically, this action is named something similar to Assign to Kit. (See Create or Modify an Action if you need a refresher on how to build actions.)
(Remember that you won’t be able to add a field for the action until after you save it.)
A couple more things we need are:
- a Group List within the action
- a change field to update the Kit Checked Out To field on the asset based on what is chosen from within the action.
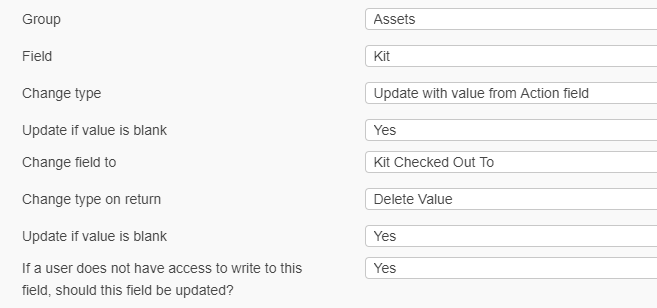
- an update to the Asset status to show that it is now assigned to a kit.
3. Let's proceed on to our How do I check a kit out to an employee section.
Check a kit out to an employee
Kits are often checked out and expected to be returned. As a result, the Check Out action is one of the most common actions for a kit.
1. Once again, select your settings ![]() icon, choose Group Settings, and then select the Actions link from the Kits group.
icon, choose Group Settings, and then select the Actions link from the Kits group.
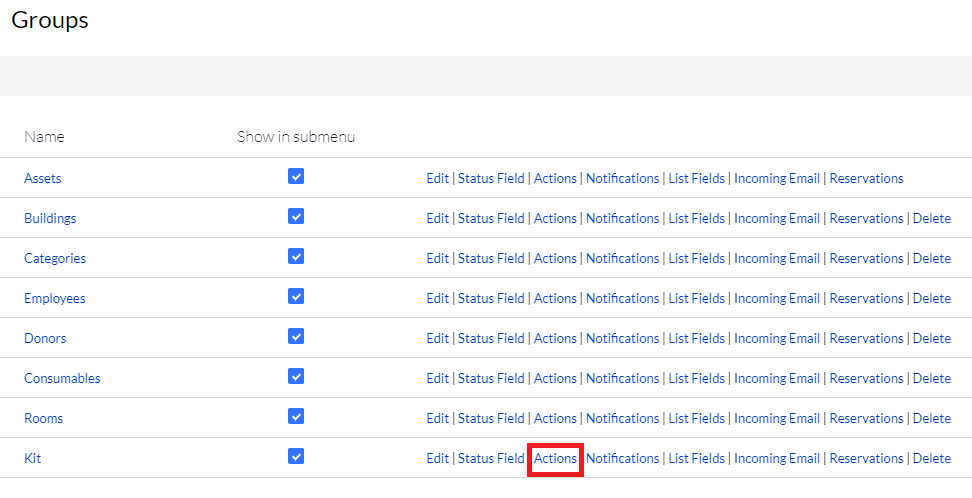
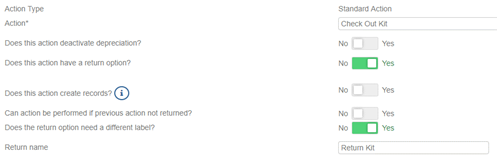
2. Click Add New to add a new action. (See Create or Modify an Action for more information on how to create a new action.)
3. Make sure your action has a return.
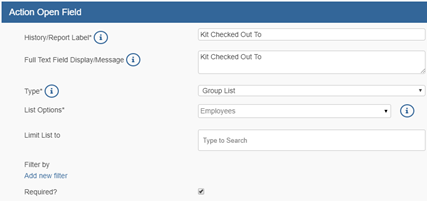
4. Select a person from an Employees group from within your Open Fields.
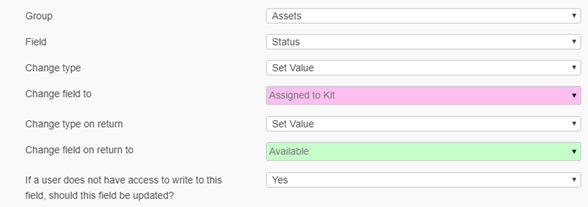
5. Update who the kit is assigned to within your Change Fields.
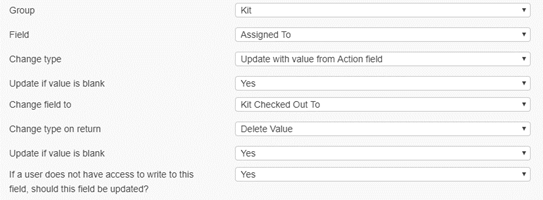
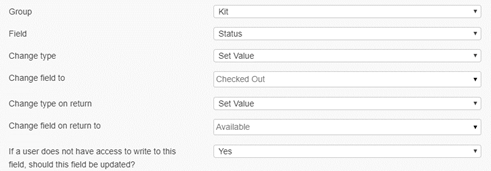
6. Update the status of the kit when it is checked out and then returned.
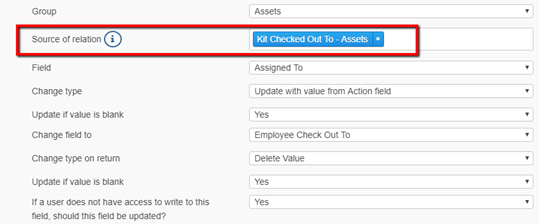
Note that the Source of relation must be filled out to change asset record fields.
7. Click Save and just like that, you are now ready to begin assigning assets to kits!