About Notifications
Let's now talk about notifications. They're everywhere. Right? Well, Asset Panda is no different because we give you the option to create multiple notifications, helping you to make sure that your workflow is set up as efficiently as possible.
Our standard notification types are:
- Group: Such as when a record is added, modified, or deleted from a group.
- Action: Such as when someone transfers an asset to someone else.
- Field: Such as when a warranty expiration date is approaching.
- Reservation: Such as when a reservation is about to begin or end.
We'll first discuss where you need to go to get started on your notification creation (see the Create notifications section below. We'll then jump into more detail on how you actually build one (see Build a Notification).
Create notifications
We're glad you asked. Let's get started!
1. Click to select your settings ![]() icon, and then select Group Settings.
icon, and then select Group Settings.
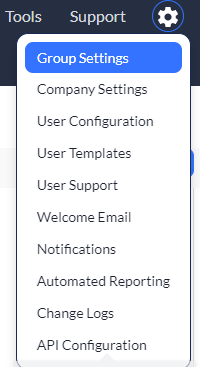
2. Proceed to the
Group level notifications
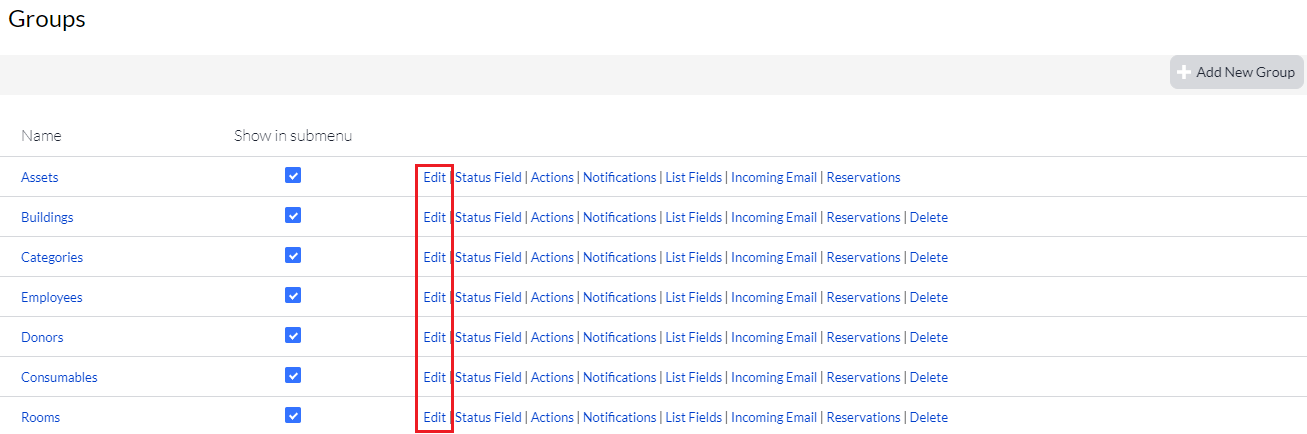
To set group level notifications:
1. From your Group Settings page, click the Notifications link for your desired group.
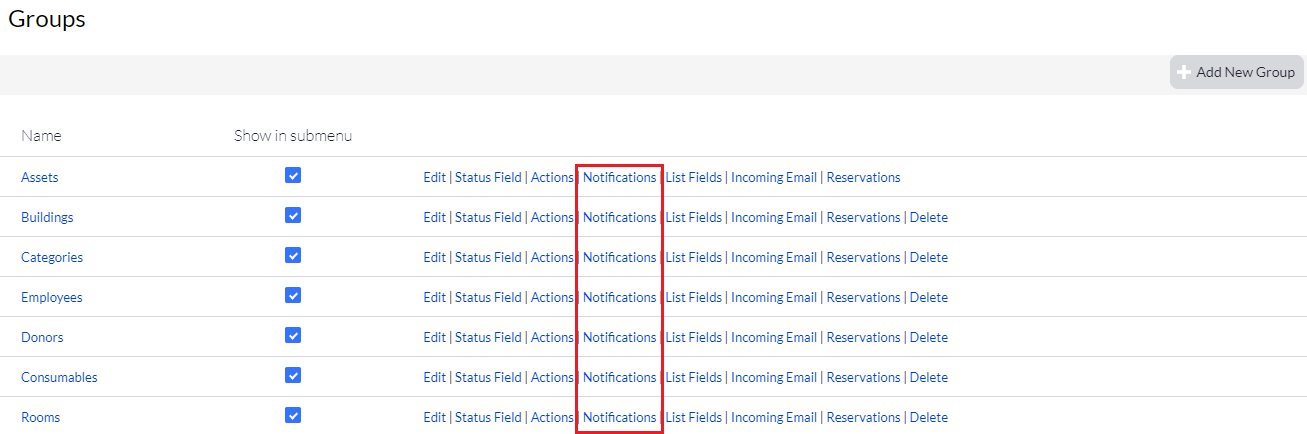
2. Click New Notification, and then set your preferred notifications. (See Build a Notification for help in building your notification.)
3. Click Save.
Action level notifications
To set action level notifications:
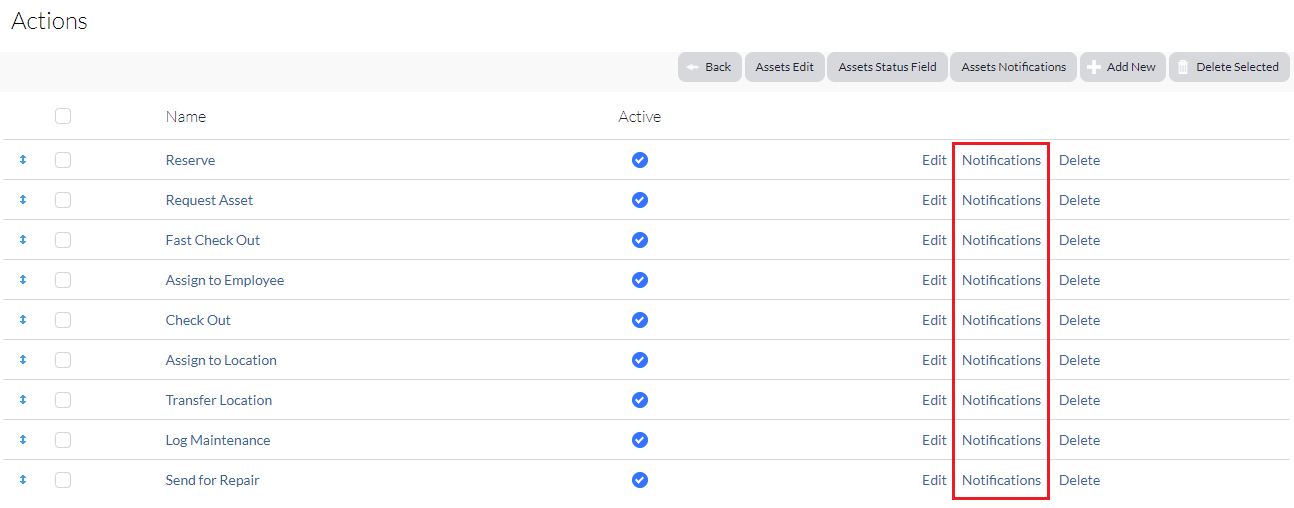
1. From your Group Settings page, click the Actions link for your desired group.
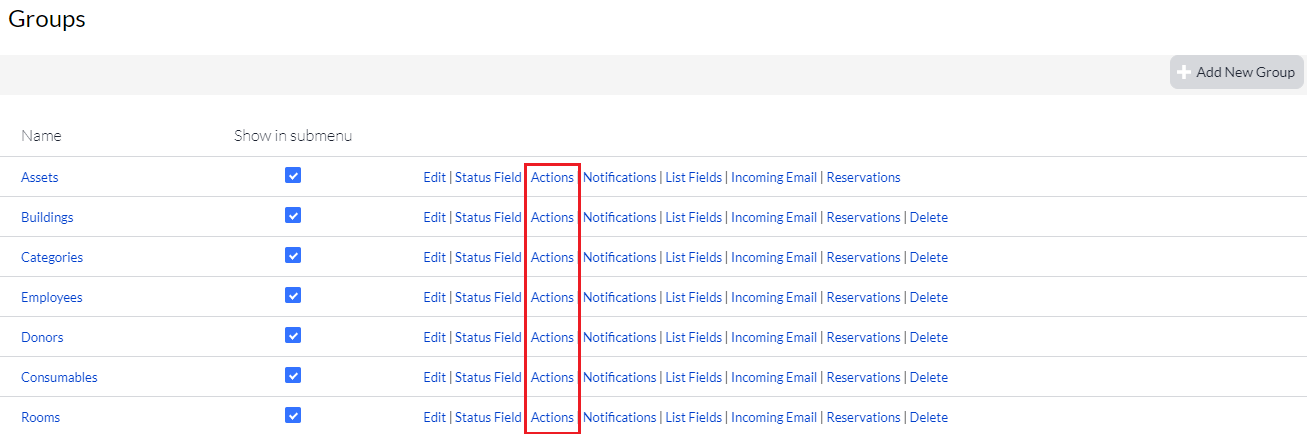
2. Select the Notifications link for the action in which you wish to create a notification.
3. Click New Notification, and then set your preferred notifications. (See Build a Notification for help in creating your notification.)
4. Click Save.
Field level notifications
To set field level notifications:
1. From your Group Settings page, click the Edit link for the group in which you want to set your field notification.
2. Scroll down to your Fields section, and then click Notifications on any fields in which you'd like to create notifications (your fields will likely vary from ours in the example below).
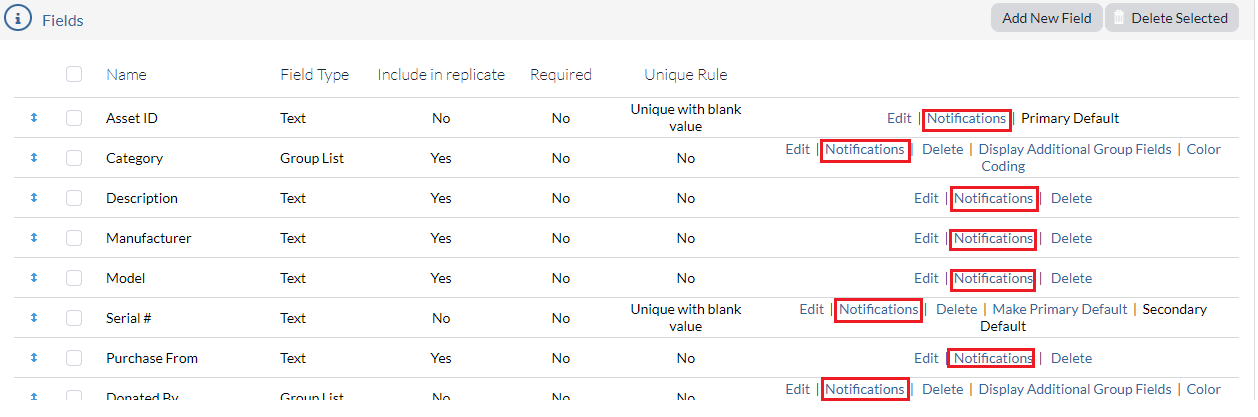
3. Click New Notification, and then set your preferred notifications. (See Build a Notification for help in building your notification.)
4. Click Save.
NOTE: Deleting a notification does not delete notifications that have already been sent. It only prevents future notifications from being triggered.
Reservation notifications
Reservation notifications can be created when you create, edit, or delete a reservation (check out Reservation System if you need some help with this one.) Proceed to Build a Notification once you have created your reservation.
Reservation notifications can also be date-based notifications (check out Build a Notification for more info on this notification type).
Related Topics