DocuSign Integration
This article will help you successfully integrate your DocuSign and Asset Panda accounts.
NOTE: DocuSign is a third-party application and Asset Panda does not control updates made by DocuSign. As a result, your screens and options may vary from those you see in our DocuSign API credentials examples below. See DocuSign Developer Information for the most up-to-date information regarding the DocuSign application.
DocuSign API credentials
This section guides you through the process of obtaining the DocuSign API credentials you need to successfully integrate with Asset Panda. We recommend using a .txt file (such as Notepad) to save the information you'll need for the Asset Panda Integration section.
To obtain your DocuSign API credentials:
1. Navigate to, and then log into your DocuSign account.
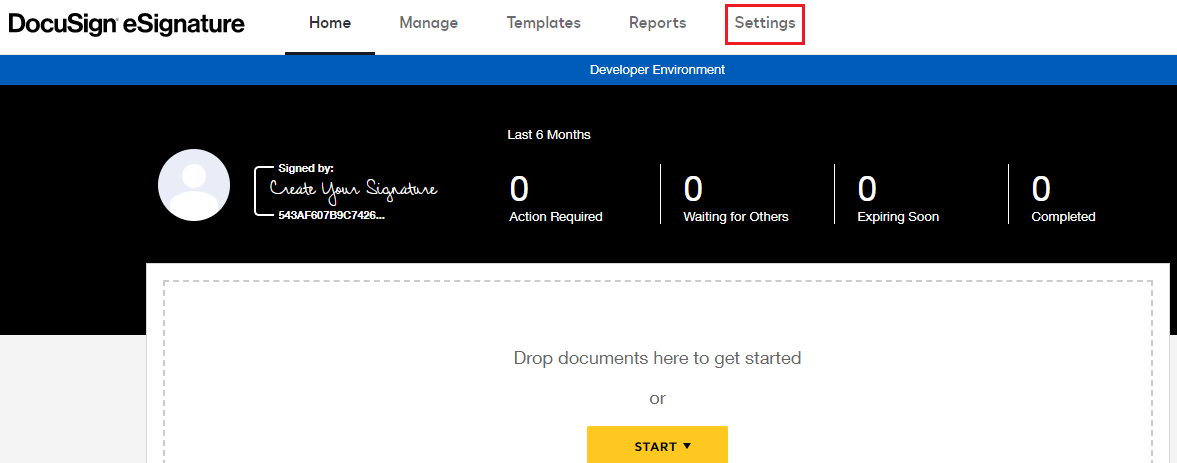
2. Select the Settings tab.
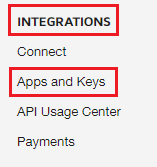
3. Scroll down to the Integrations section located on the left side of your page, and then select Apps and Keys.
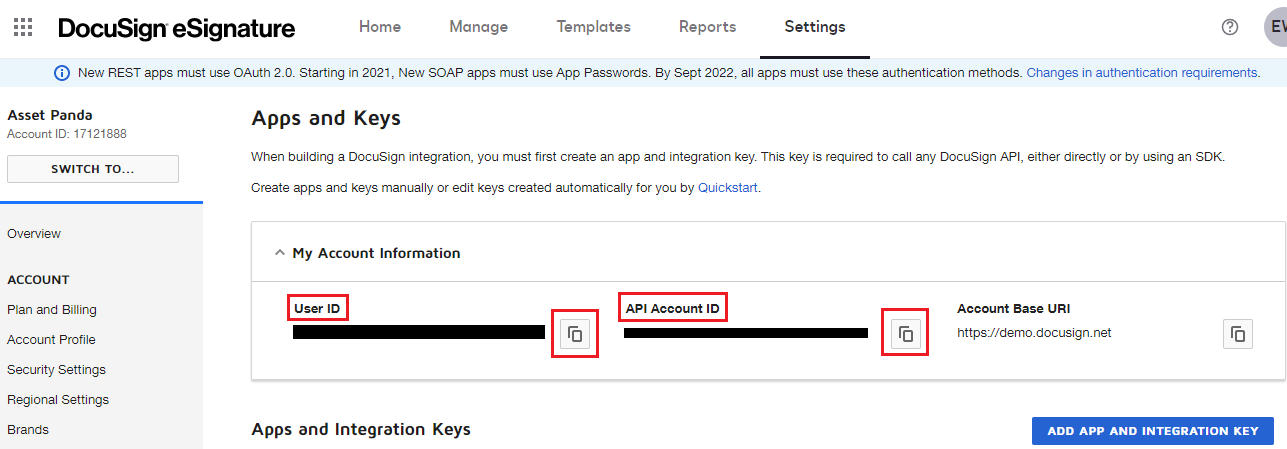
4. Select the copy ![]() icon next to both the User ID and API Account ID to copy these IDs. (We recommend pasting them into your .txt file for later use within Asset Panda. See the Asset Panda integration section for additional information.)
icon next to both the User ID and API Account ID to copy these IDs. (We recommend pasting them into your .txt file for later use within Asset Panda. See the Asset Panda integration section for additional information.)
(Note that our information is intentionally redacted in the examples below.)
5. Proceed to the Asset Panda Integration section.
Asset Panda integration
Use the following instructions to successfully link your Asset Panda and DocuSign accounts.
Settings
Use the following instructions to integrate your Asset Panda and DocuSign accounts.
1. Log into your Asset Panda account, select your settings ![]() icon, and then select Integrations.
icon, and then select Integrations.
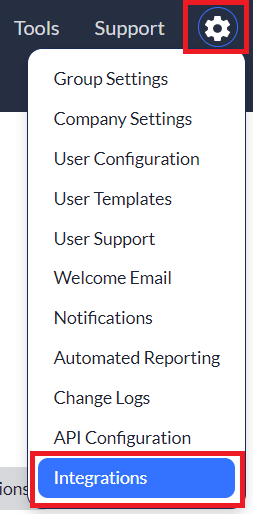
2. Select DocuSign from your integrations menu, located on the left side of your screen.
3. Open your .txt file (from the DocuSign API Credentials section above), and then enter the User ID within the User ID field, and the API Account ID within the Account ID field.

4. Select Get Activation URL.
The activation URL displays within the Activation URL field. This URL allows Asset Panda permission to access your DocuSign account.
5. Select Allow Access when the DocuSign permissions page displays. (You may need to first log into your DocuSign account before you see the screen below.)
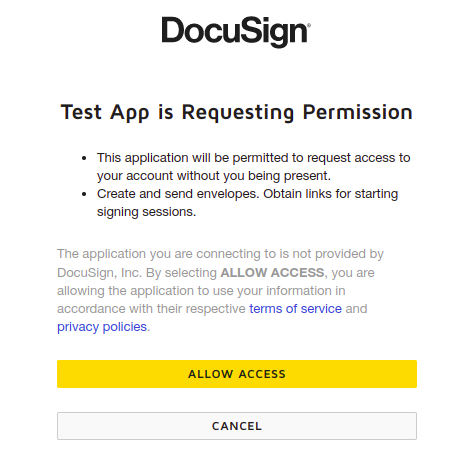
6. Click Save once you've allowed access. (Our information is intentionally redacted in the screenshot below.)

Your Asset Panda and DocuSign accounts are now integrated.
Connect DocuSign form
NOTE: DocuSign forms work much like triggered (predefined) forms. (See Predefined Forms to learn more about these form types and how they work.)
Docusign forms are connected to your actions when you either set up, or edit an action. (See Create or Modify Actions for additional assistance in creating or editing actions.)
To connect a new Docusign form to an action:
1. Navigate to your action, scroll down to your Docusign Forms section, and then select Connect New Form.

2. Use the Form drop-down menu to select the DocuSign form you wish to connect.
NOTE: Your fields will likely differ than those shown in the following examples.
3. Use the Trigger On drop-down menu to select when you would like the form to trigger.
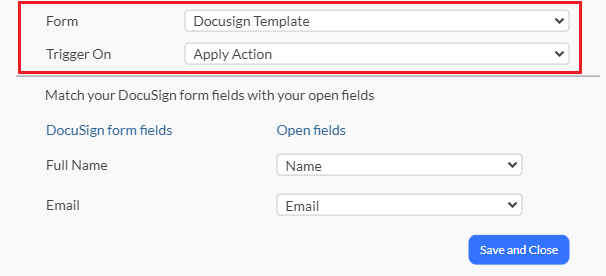
You'll notice that your DocuSign fields are listed within the DocuSign form fields columns, and your Asset Panda fields are contained within the drop-down menus within the Open fields columns.
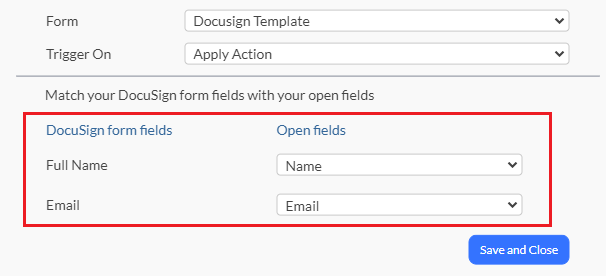
4. Use the drop-down menu within the Open fields column to map the fields you wish to map to your DocuSign form fields.
5. Click Save and Close.
Your newly connected form now displays within the DocuSign Forms section.

6. Proceed to the Perform Docusign action section.
Perform DocuSign action
You are ready to perform an action once you have integrated your accounts (see DocuSign API credentials and Asset Panda integration), and connected your DocuSign form within Asset Panda.
1. Select the asset you wish to perform the action on. (See Perform an Action for more information on how to perform your action.)
The DocuSign action screen and fields display.
NOTE: The fields on your action will likely differ than those shown in the following examples.

2. Use the drop-down menus and text fields to select and enter the information you need to complete your action.
3. Select Sign on to DocuSign.
4. Review your form from within DocuSign, and then select Save and Close.
The system automatically redirects you to your DocuSign account, and to your connected form. (You'll notice that the Save and Close button changes to Redirecting during this process.)
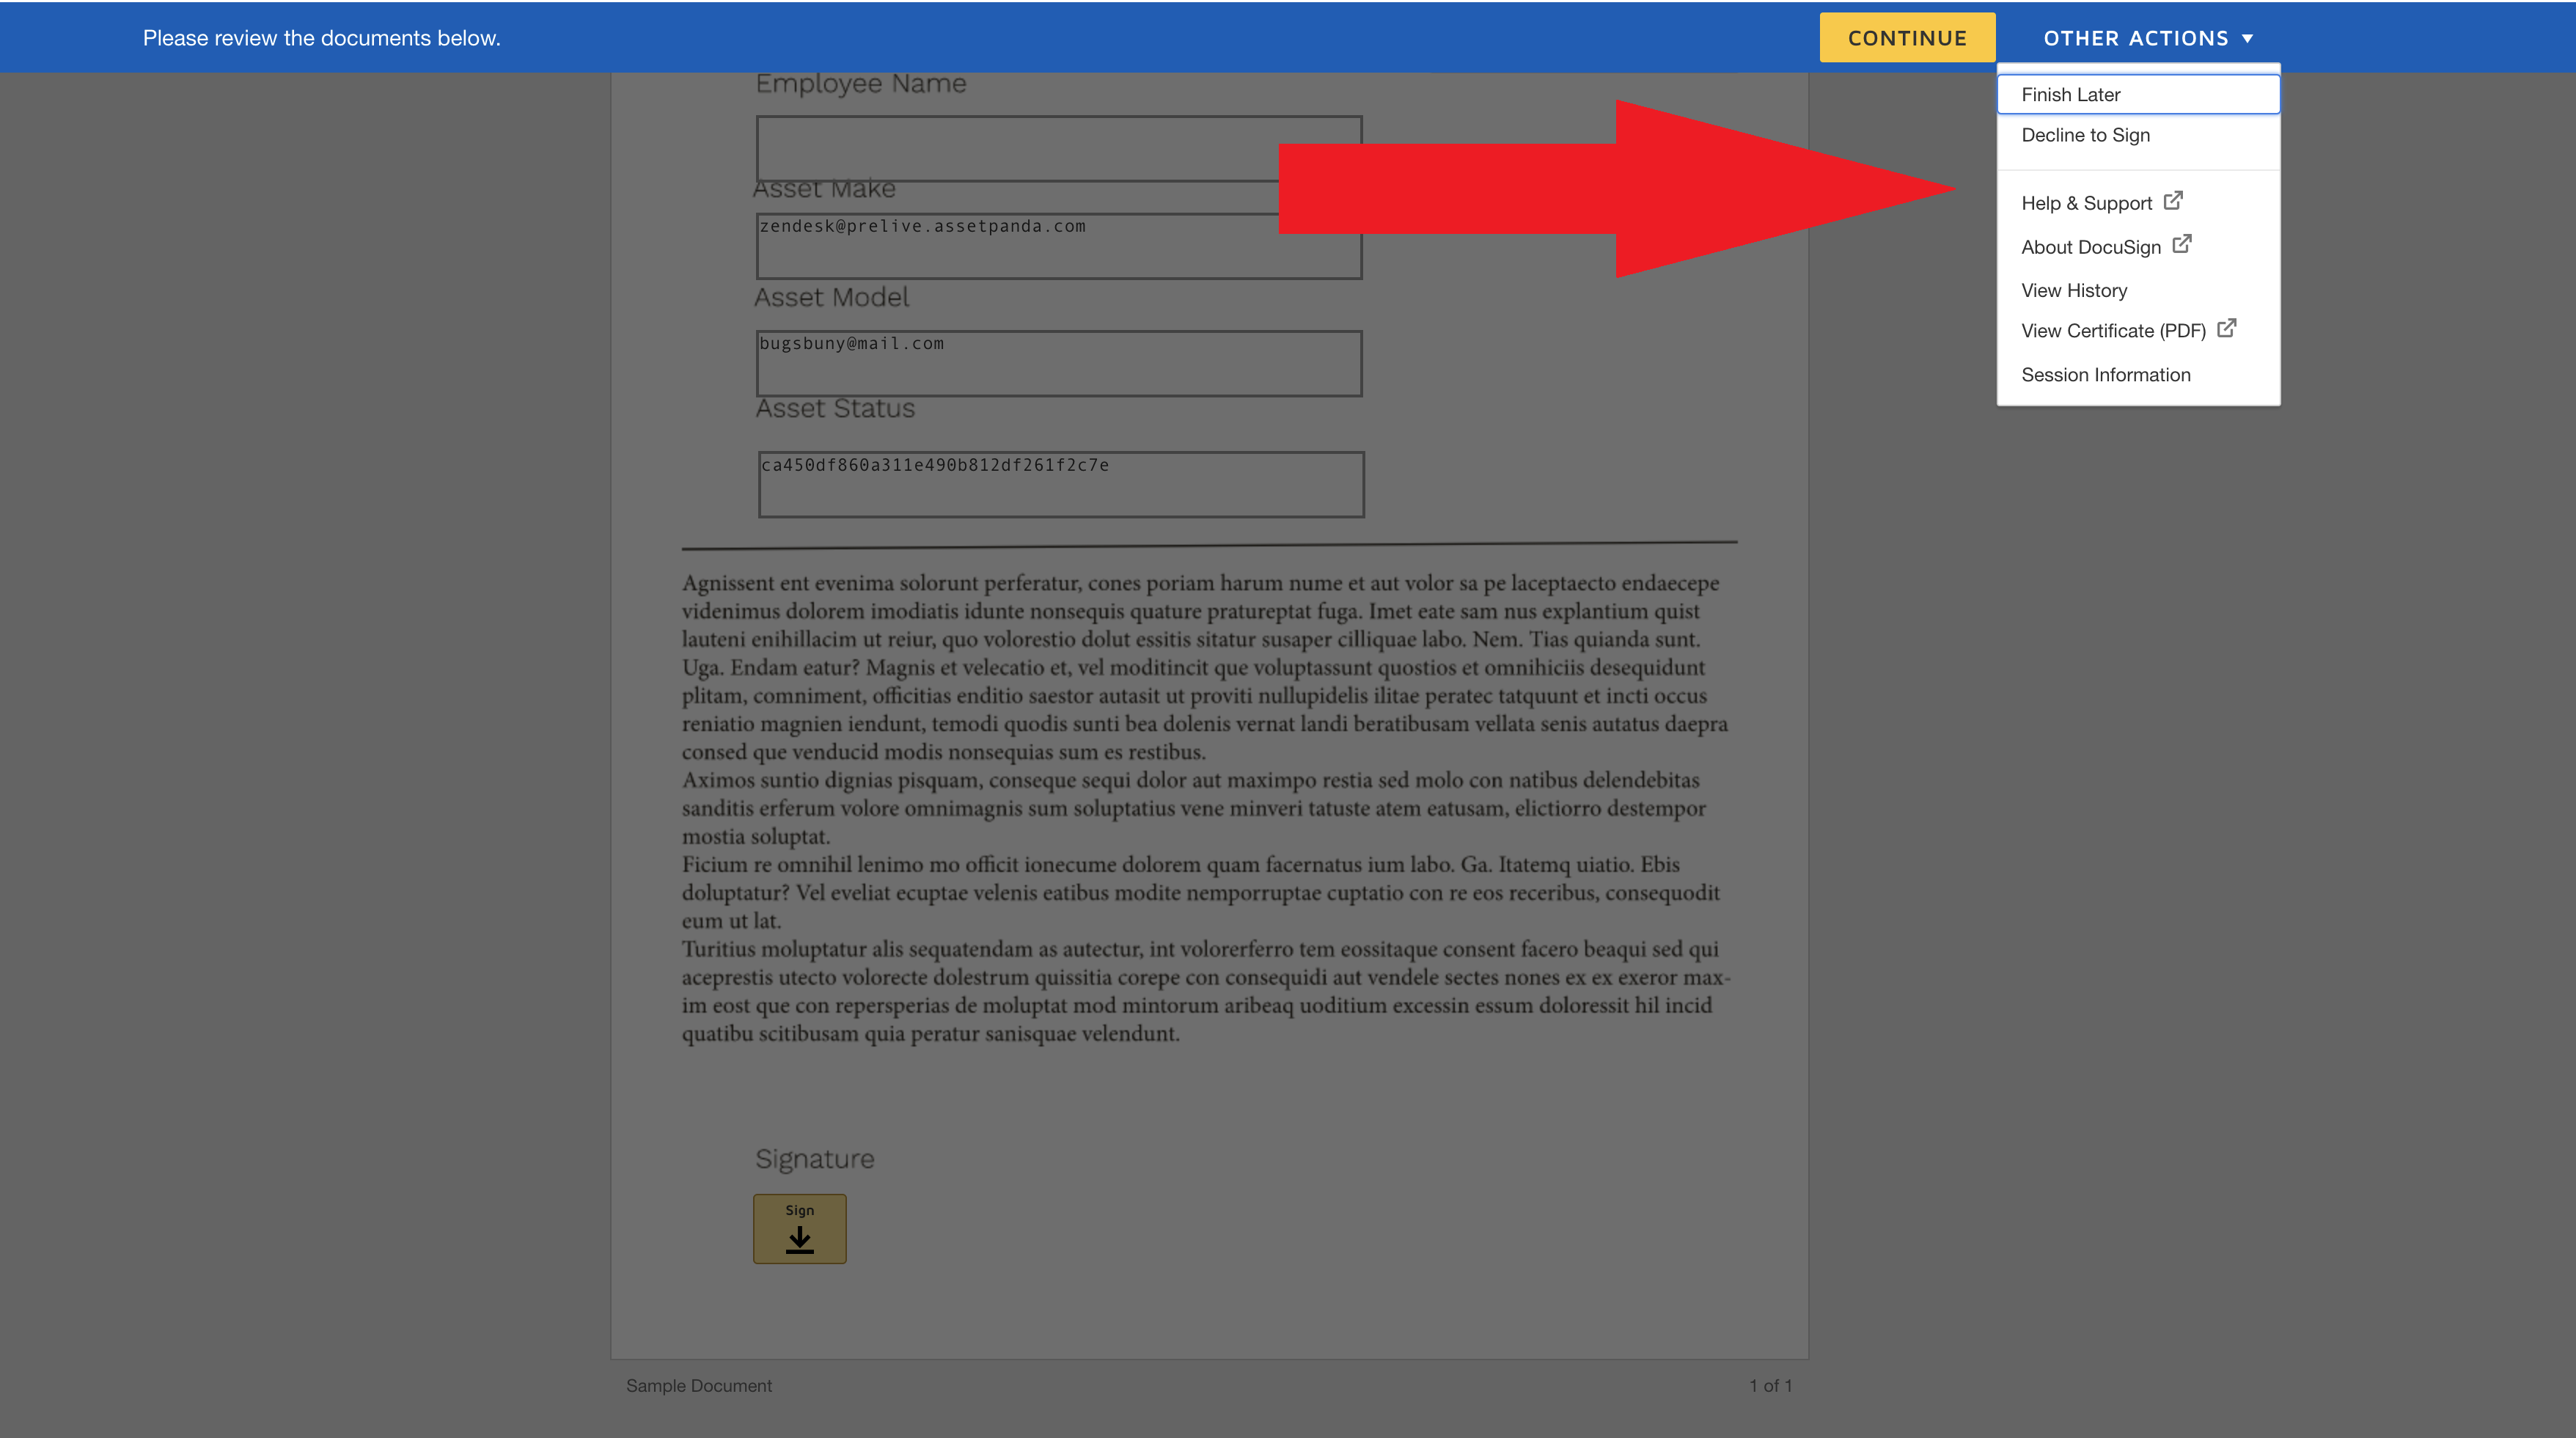
5. Sign the bottom of the form if you wish to go ahead and sign and complete the form:
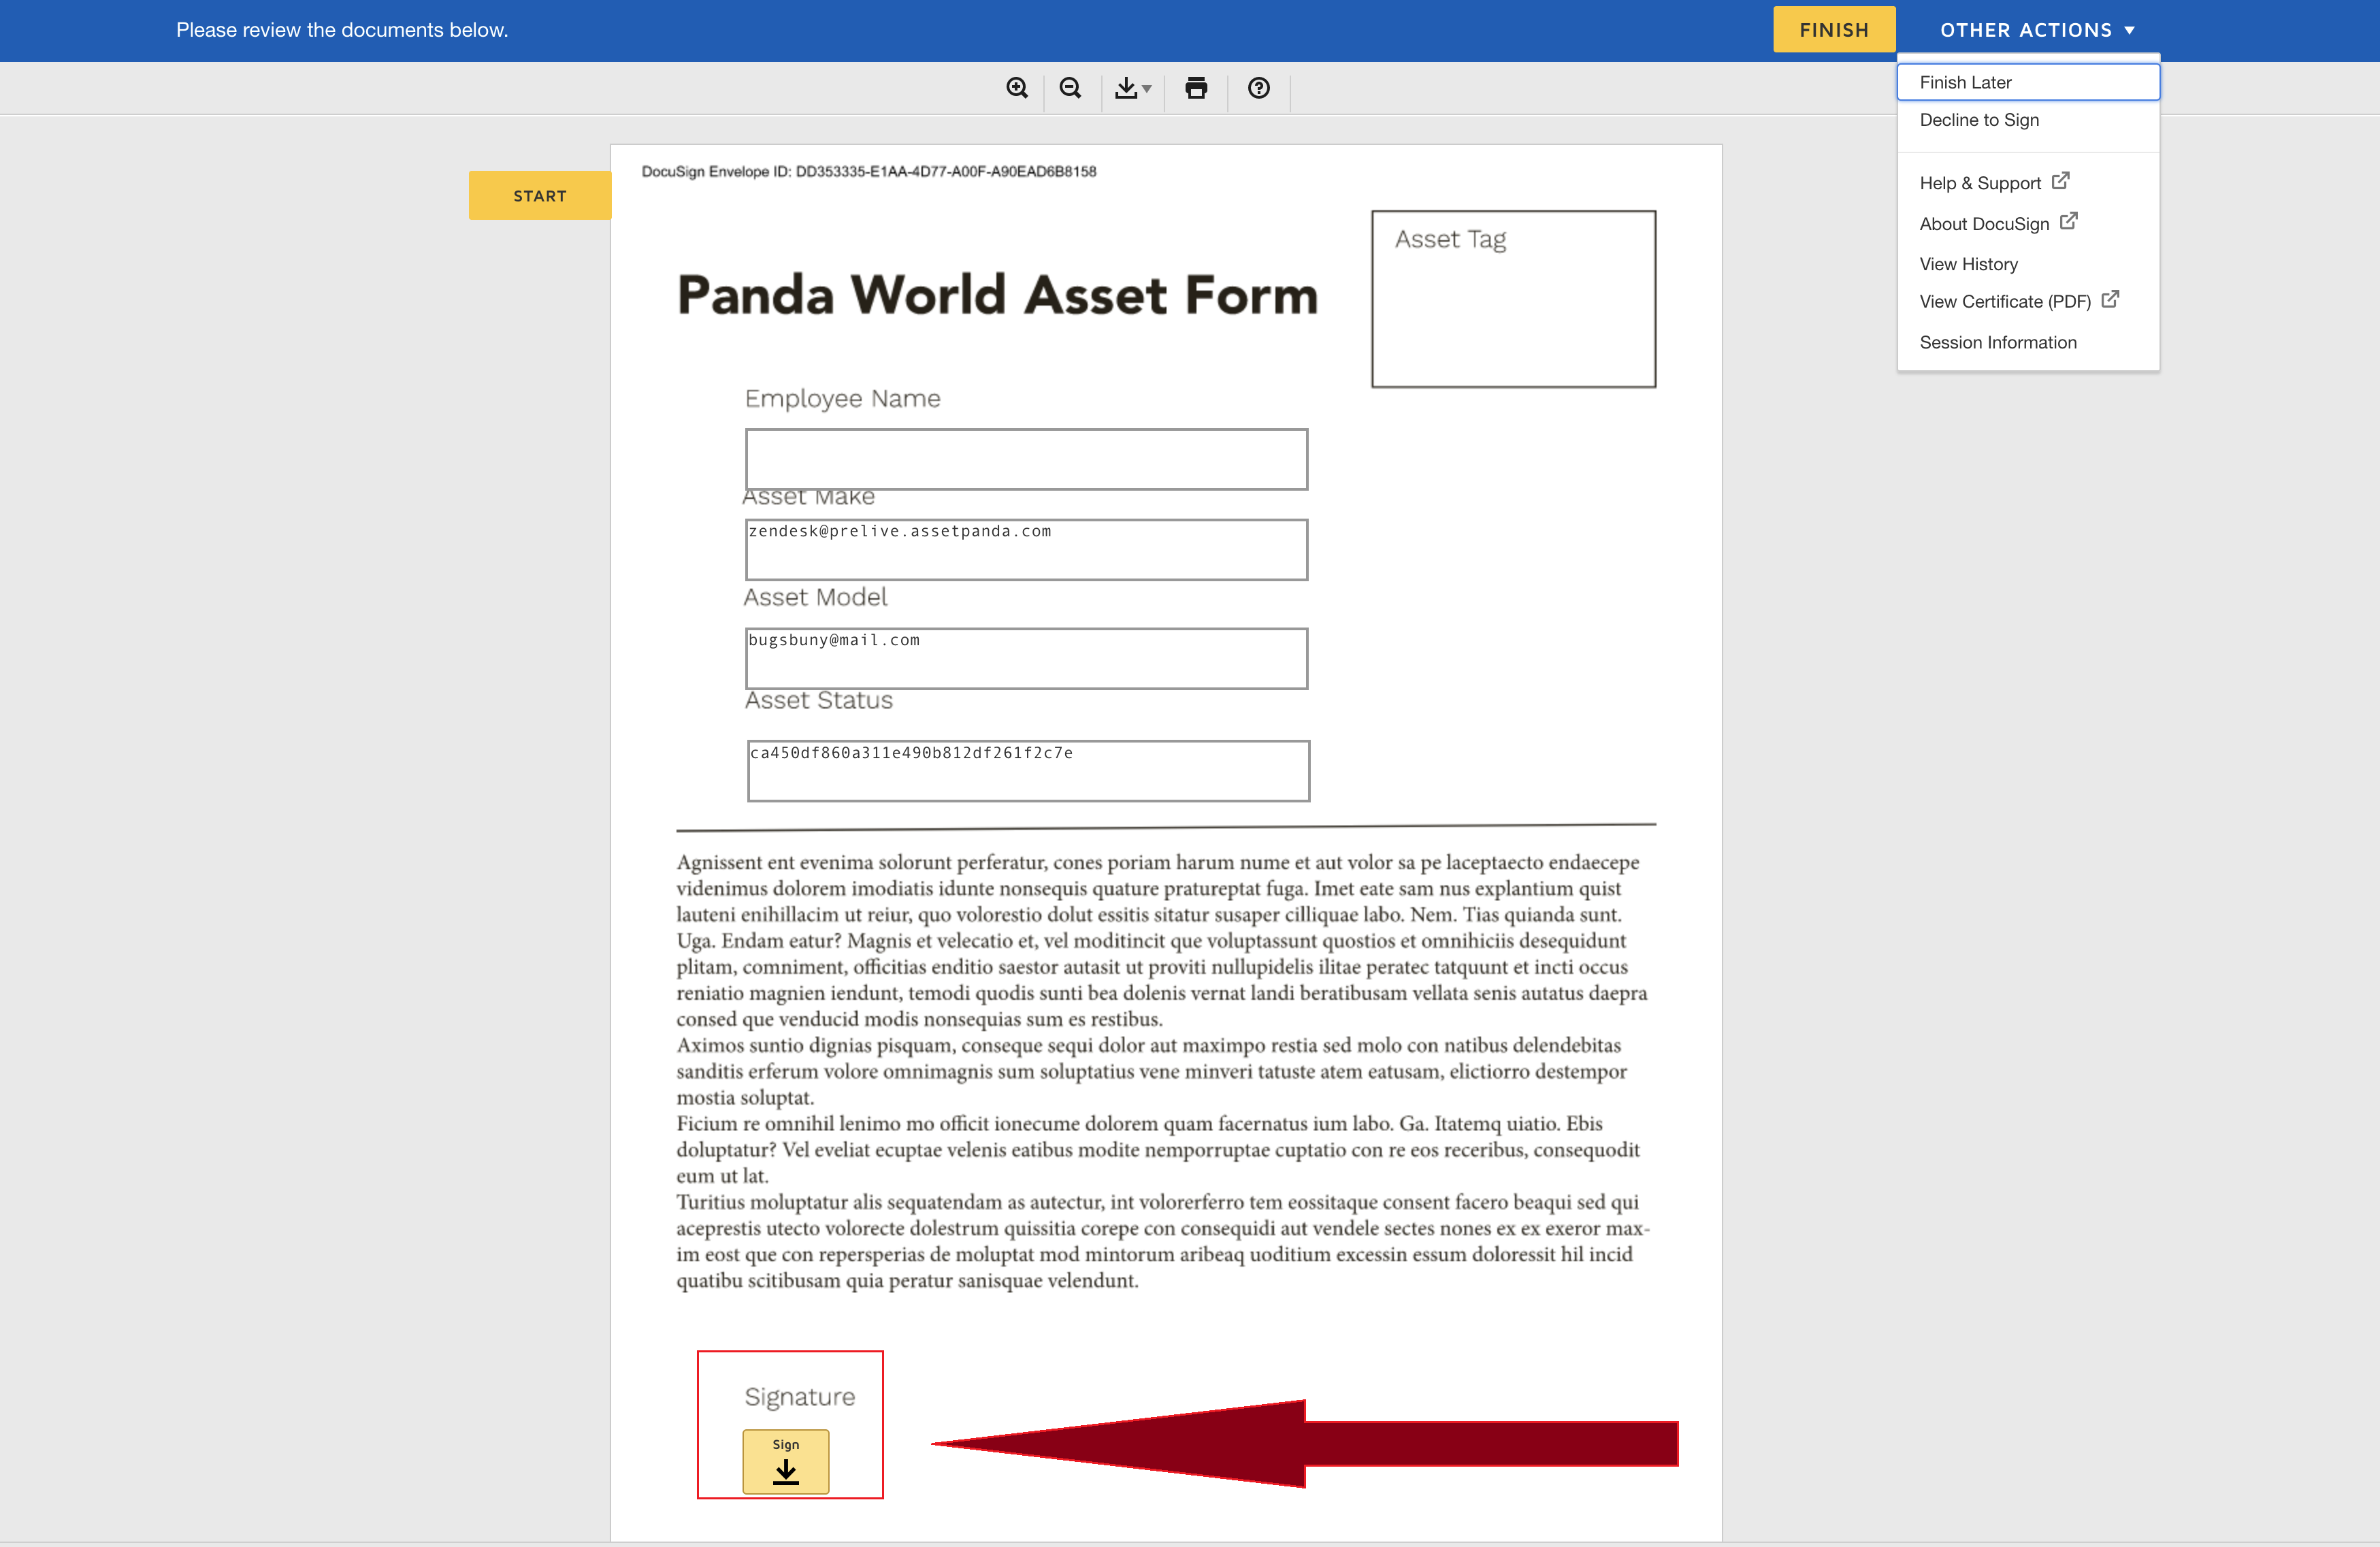
or, select Other Actions, and then select Finish Later to send to others for additional signatures (and to finish later).
Note: When a new field is added to the DocuSign template, a default Data Label is assigned to that field.


Data Labels can be updated in your DocuSign template, located in the Templates page. For more on editing DocuSign templates, see To edit a template.
See DocuSign Product Documentation for more information on how to use DocuSign.