Perform an Action
First, it's probably good to first explain why actions are even important. Actions capture the important things such as history, life cycle, workflow and functionality. Otherwise, you'd probably just use a spreadsheet and let's admit it; spreadsheets can make for a very long day.
So actions capture important details but doesn't mean that they're difficult to configure. In fact, we've made the whole thing easy at Asset Panda because hey, we know you have a life. As a result, we've included some configurable, straight out of the box actions. (Told you we'd made it easier!)
It's now time we end our coffee break, roll up our sleeves and get to work. (We just want to add that there's absolutely nothing wrong with taking a coffee break. We enjoy them too!)
One more thing (we know we just mentioned getting to work, so this is really and truly the "one more thing.") This article is about performing actions and is under the assumption that you've already configured them to your liking or of course have decided to use them straight out of the box. (If you wish to learn more about configuration, see Configure an Action.)
1. Select the group in which you wish to perform your action.
You can of course do this either via the quick access menu (if you've added it there) or from your Groups menu.
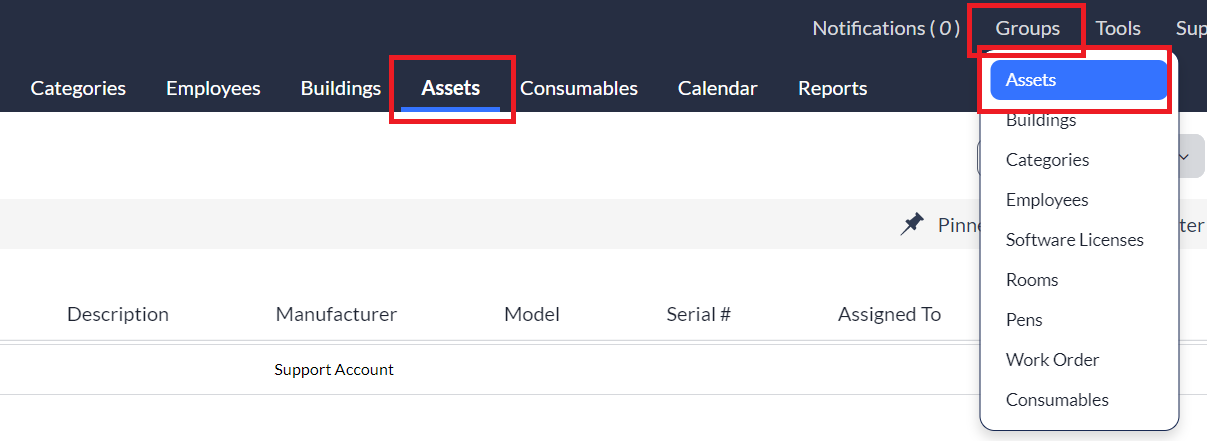
2. Select the action you want to perform.
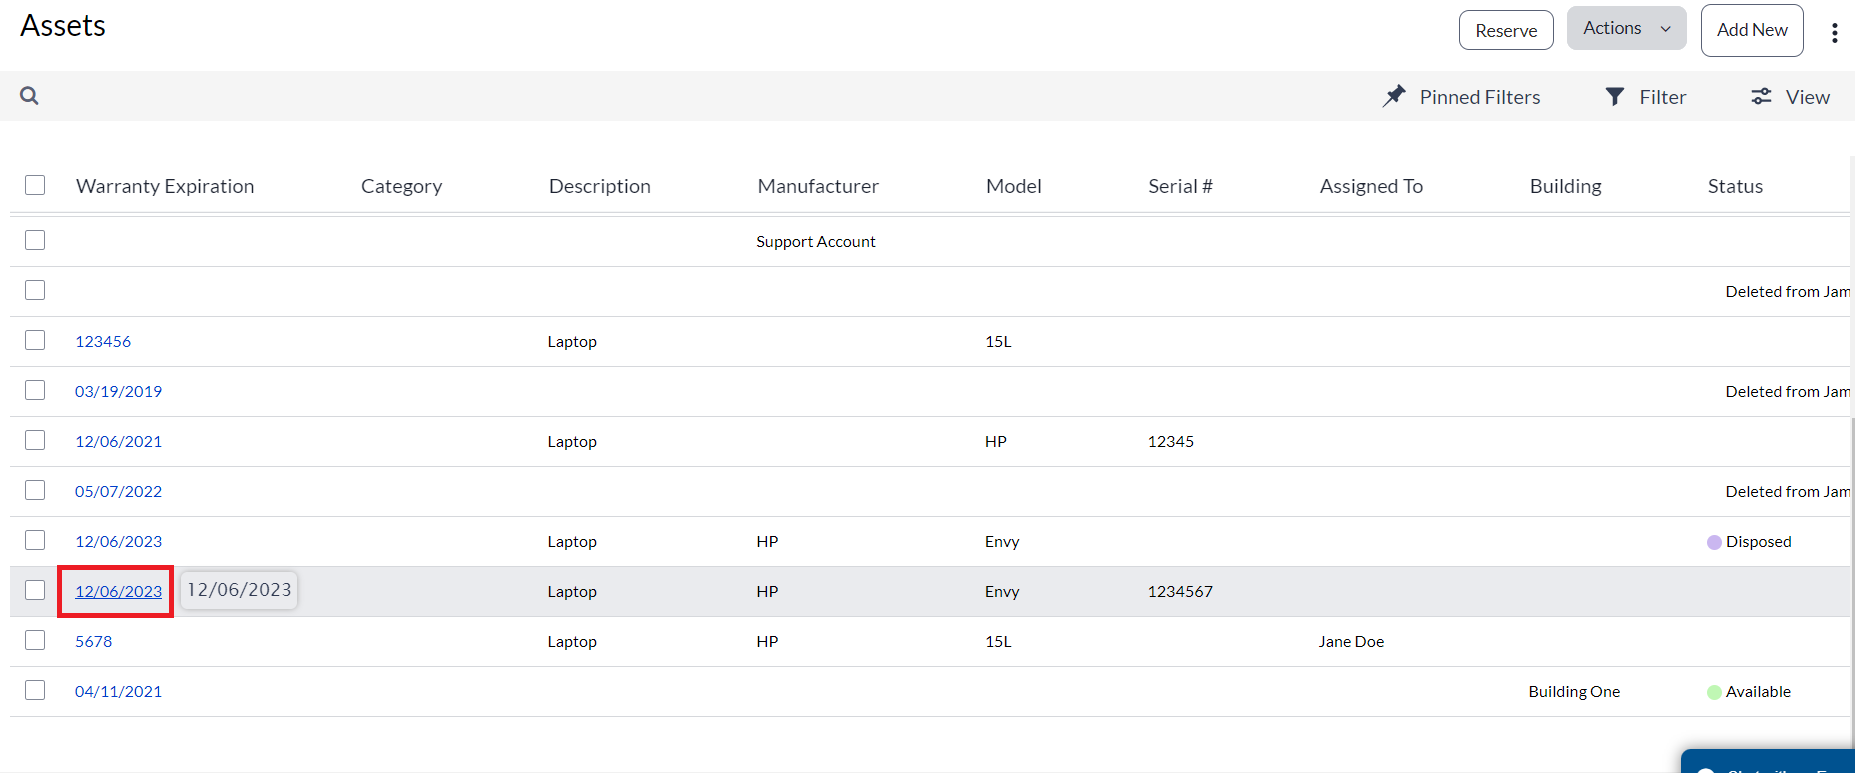
3. Click the Actions menu and you'll see a list of all your actions. Those we show here are our configurable, out of the box actions which we must admit, are pretty cool (and useful).
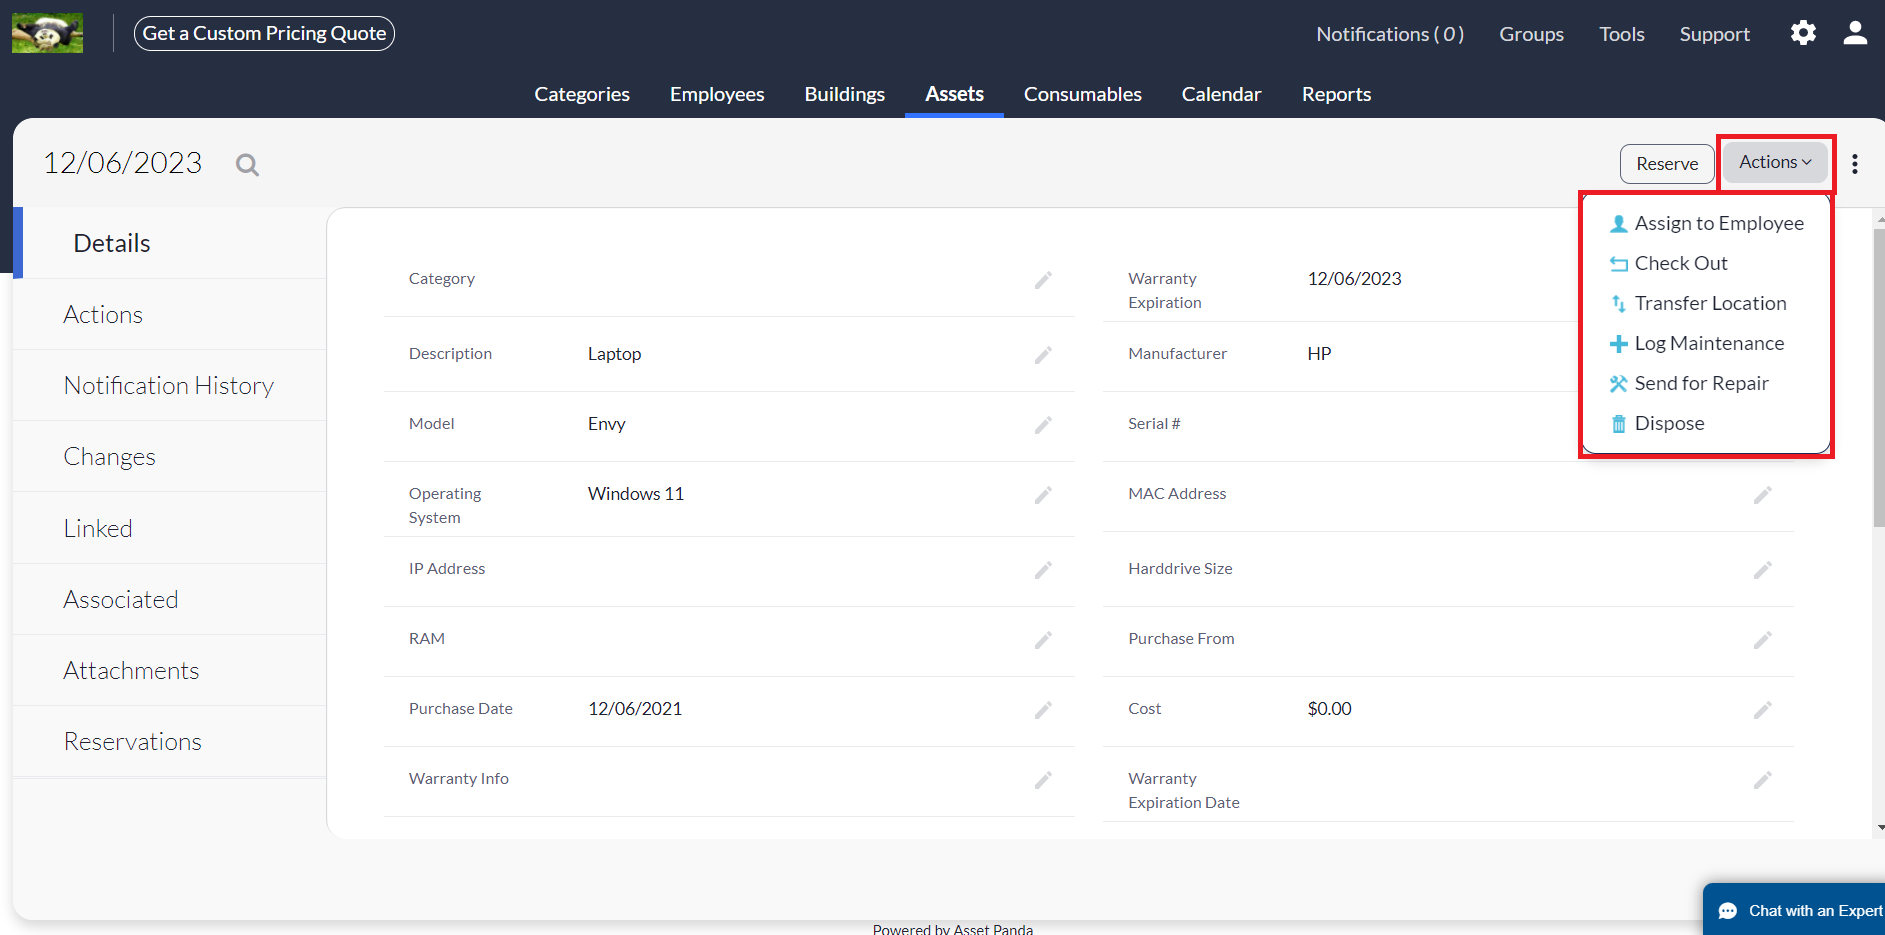
4. Select the action you want to perform and you're golden.
Another thing to mention is that you can click on any of the pencil ![]() icons to place this action into an editable format from within the action fields themselves.
icons to place this action into an editable format from within the action fields themselves.
Notice that this opens all of the fields for editing.
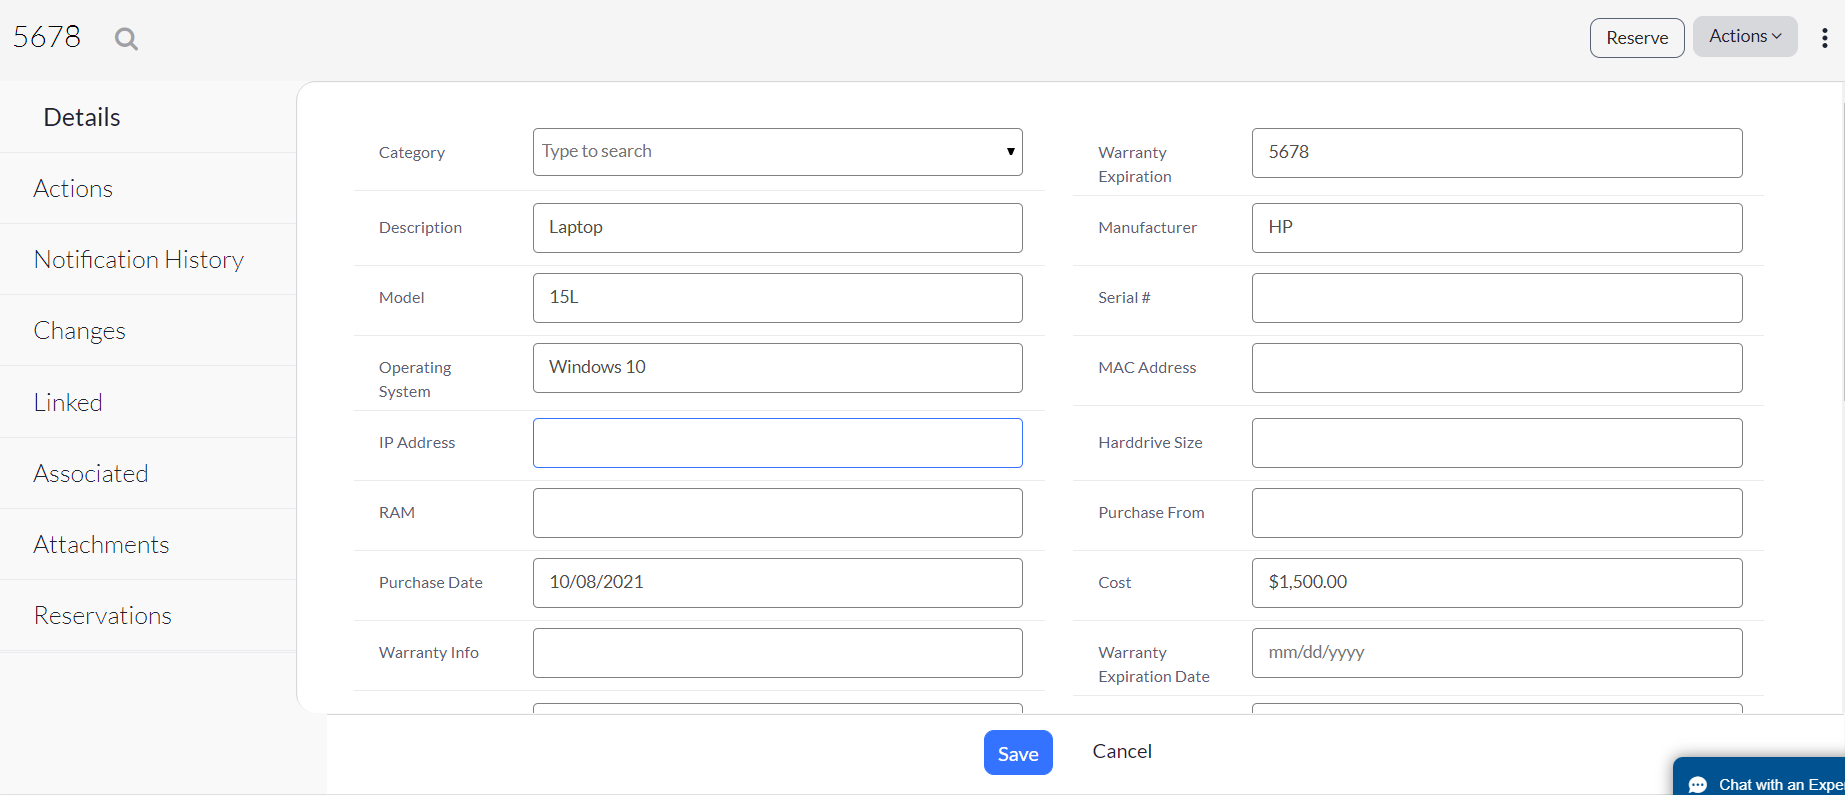
Something to note here. You could of course perform certain actions without using the actual Actions menu. Notice we said could. Just because it's possible doesn't mean it's always the preferred way and we'll explain.
Say you want to change the status of the item in this action. You'd like to change it from Available to Checked Out because you're about to check it out to an employee. You scroll down and ah-ha! You see that the Status field has a drop-down menu. You click it and find all of the wonderful status options that are available. Easy breezy. Right? Not so fast.
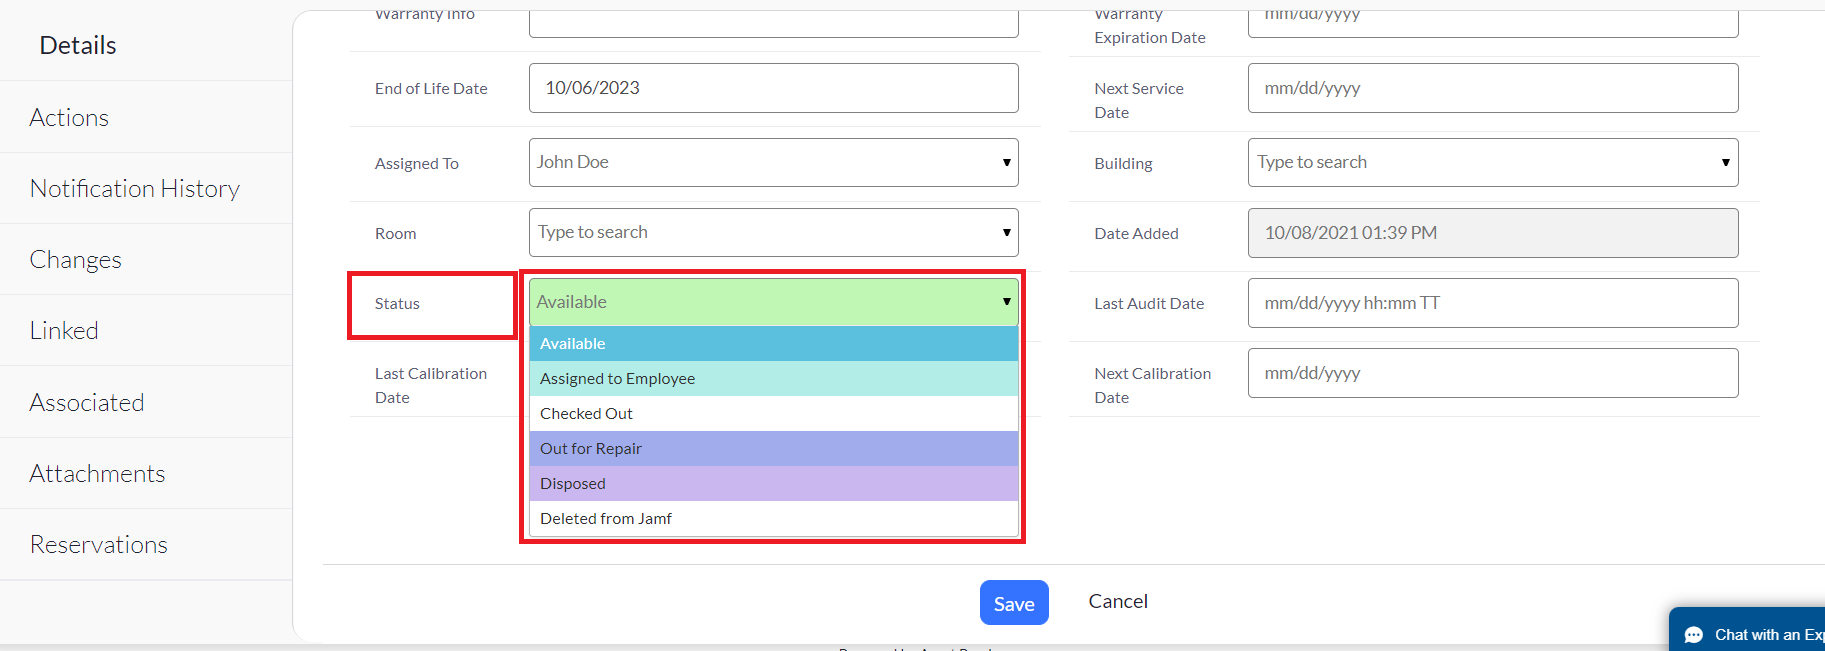
We recommend that you click on the Action menu instead, and then click Check Out.
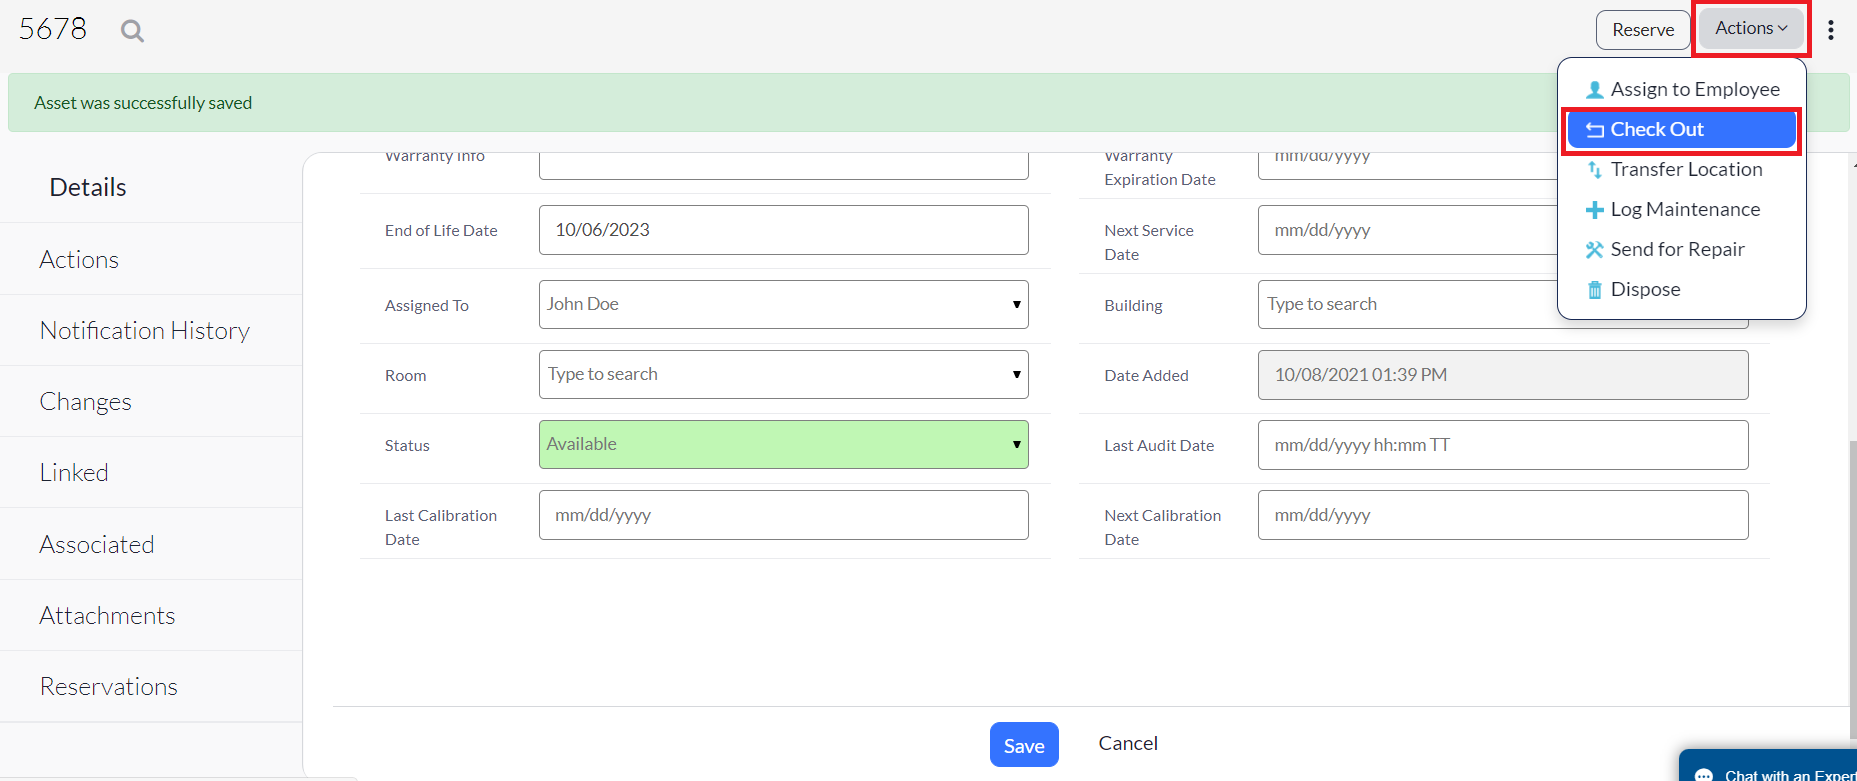
Performing your actions through the Actions menu keeps a record that you can later view in change logs. It shows information such as who logged the action, the date it occurred and who it was checked out to.

Notice how the action itself now reflect this change.
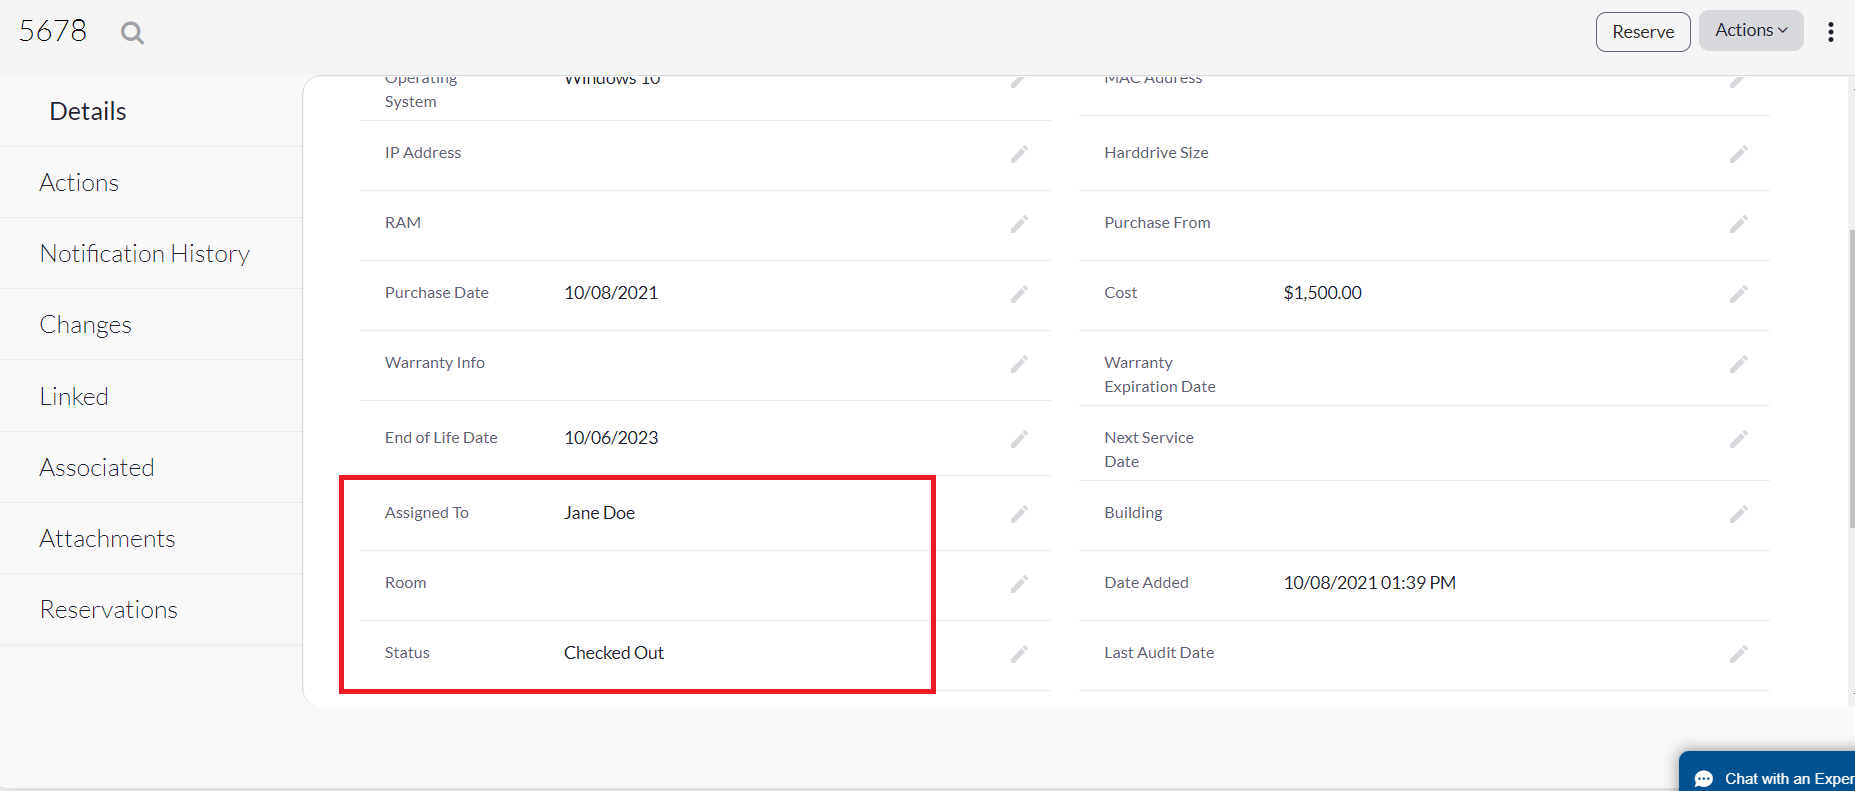
Making this change solely through the Status field won't capture this information and you may later wonder who performed the action and who has the item!
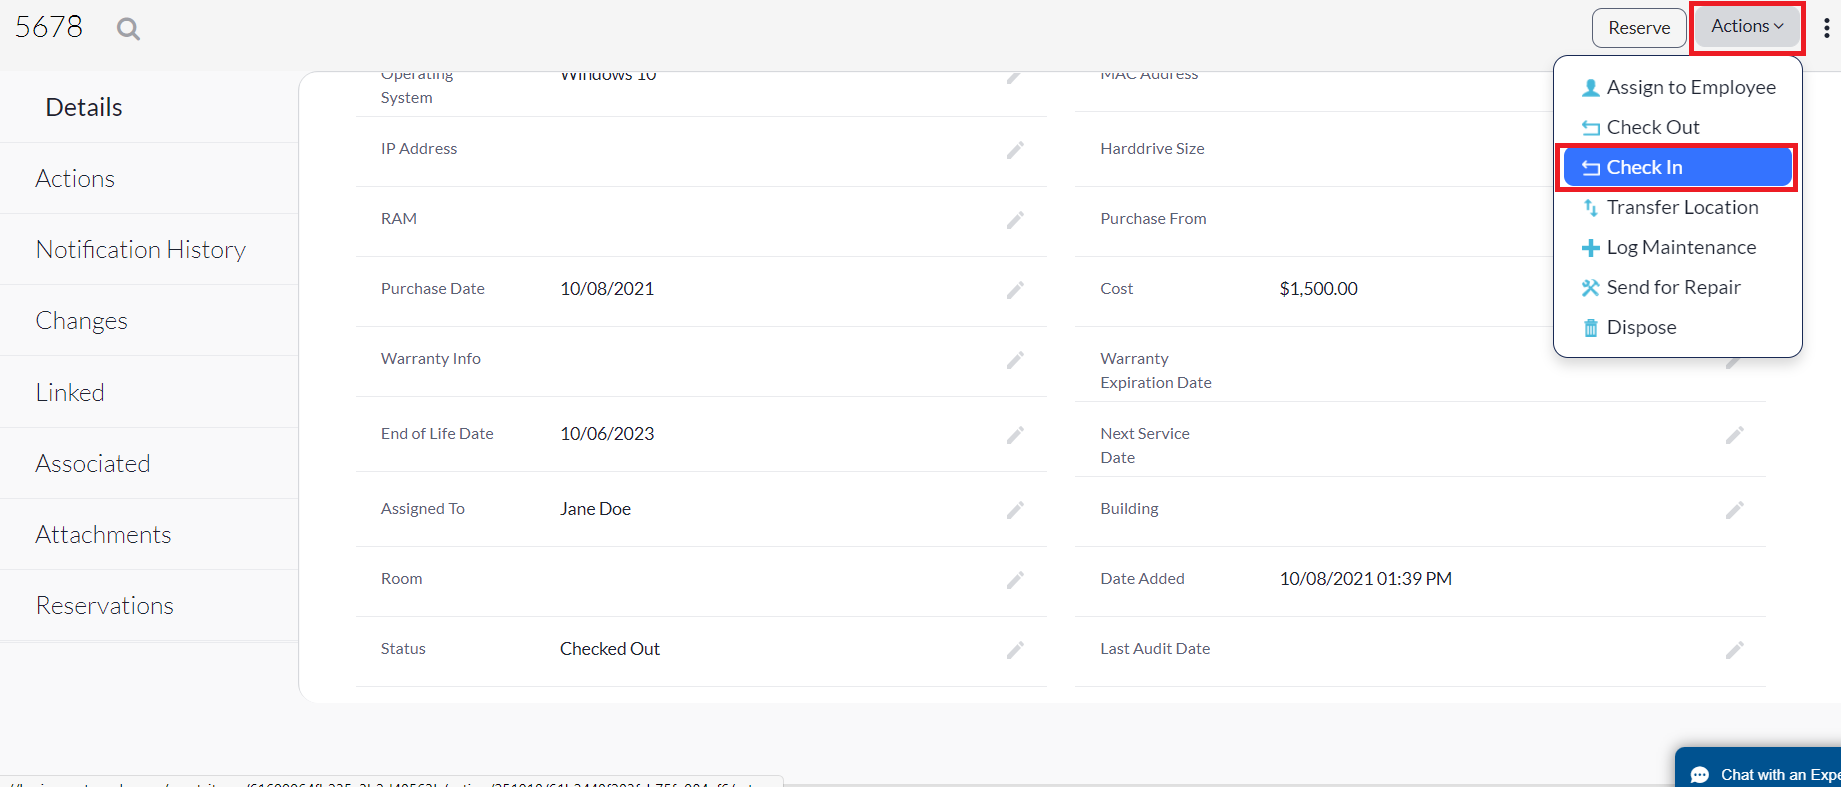
Another cool thing is that the system almost acts as if it has a crystal ball because it seemingly predicts the next step. It captured that the item was checked out so it now offers the next logical step which is none other than Check In!
See Configure an Action for help in actually configuring or customizing the actions more to your liking and needs (if you wish).
Related Topics