Configure an Action
So you want to learn how to configure actions. That's great news because that's what this article is all about; action configuration!
To begin, the configurations you set for your action(s) are primarily going to be based on your organization and its needs. We highly recommend that you configure your action(s) with this in mind. In other words, you can configure any number of actions.
You may even find that you need to reconfigure at some point. That's okay because your actions can be edited at anytime.
Let's dive in now, shall we?
1. Click to select your settings ![]() icon, and then select Group Settings.
icon, and then select Group Settings.
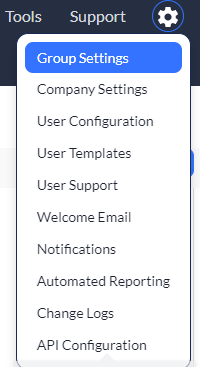
2. Select Actions from the group you wish to configure an action from. (We're using our Assets group for this example but you can use any!)
You will see your list of existing actions. You can edit any of them from this page or even create a new one if you wish.
3. Click Edit from the action you wish to configure. (Again, you don't have to use the one we're using in our example but hey, we're okay if you do.)
The Edit Action screen displays. This screen allows you to see all of the insides of an action. Keep in mind that actions are automatically defaulted to work just fine in a straight "out of the box" kind of way but, you can also customize them even further to best fit the needs of your organization. (We like options here at Asset Panda and thought you might as well.)
4. Scroll down to your Fields section. You'll notice some different types of fields that live here:
- Open Fields
- Closed Fields
- Change Fields
Before we go any further, let's talk a bit about each one of these field options.
Configure open fields
Open fields are what happens when someone clicks your action.
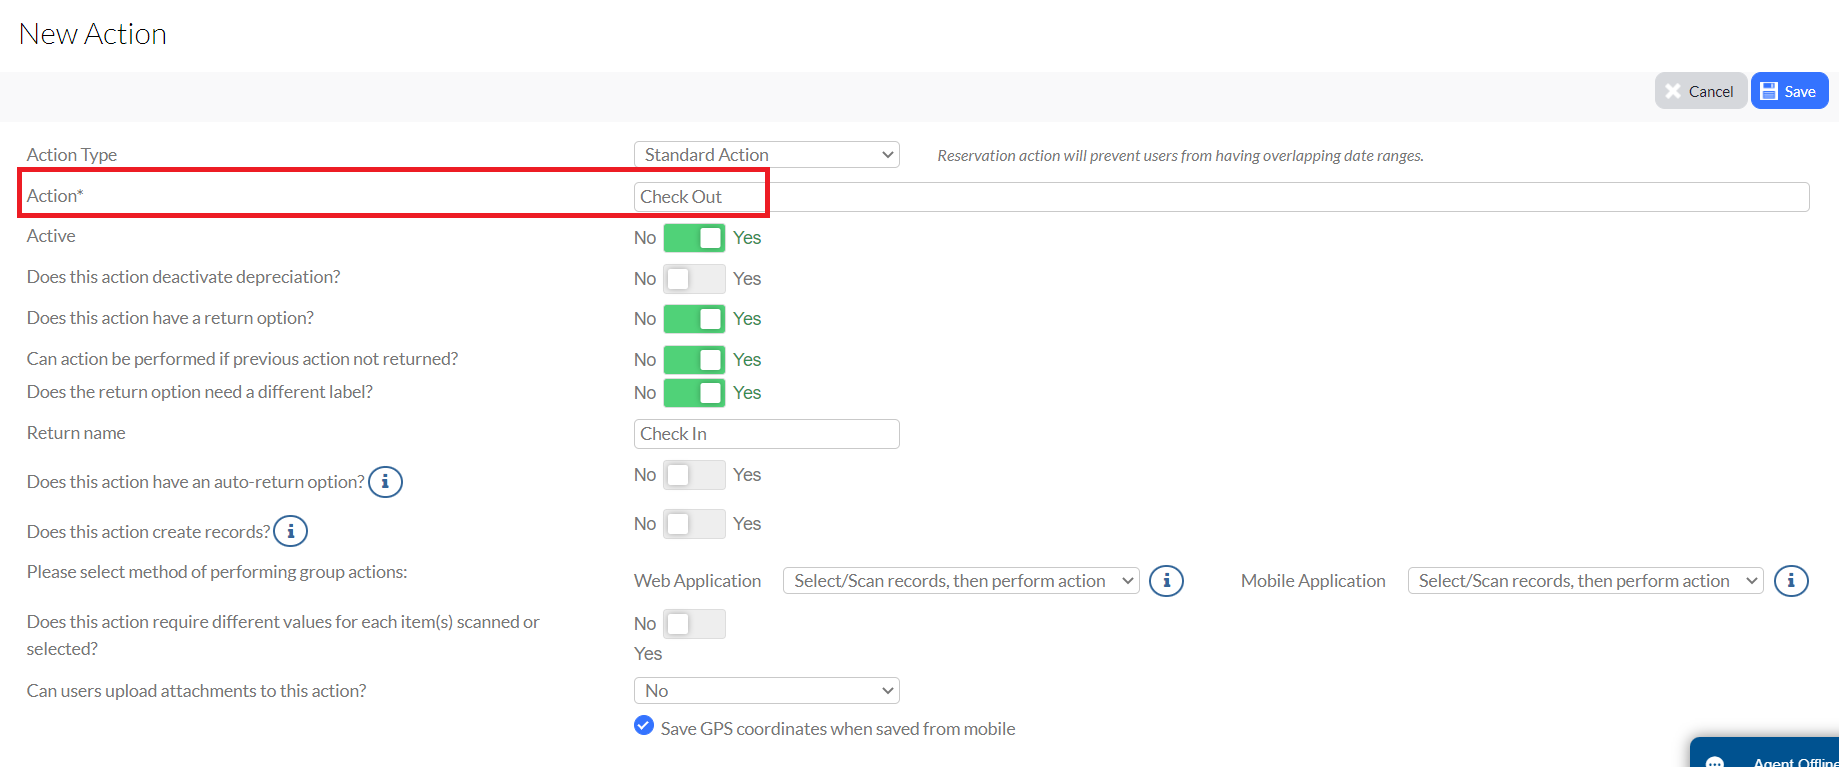
For instance, say the name of your action is Check Out (as shown above). The open fields are what happens when someone selects the Check Out action. Your open fields may differ from our example below but again, that's okay.

Things aren't written in stone once these fields have been created. You can edit them at anytime simply by clicking the Edit link.
Configure closed fields
Closed fields are what happens when you select the option shown in the Return name field, as shown below. In other words, what goes out, must come back. In other words, think of it as closing an action.
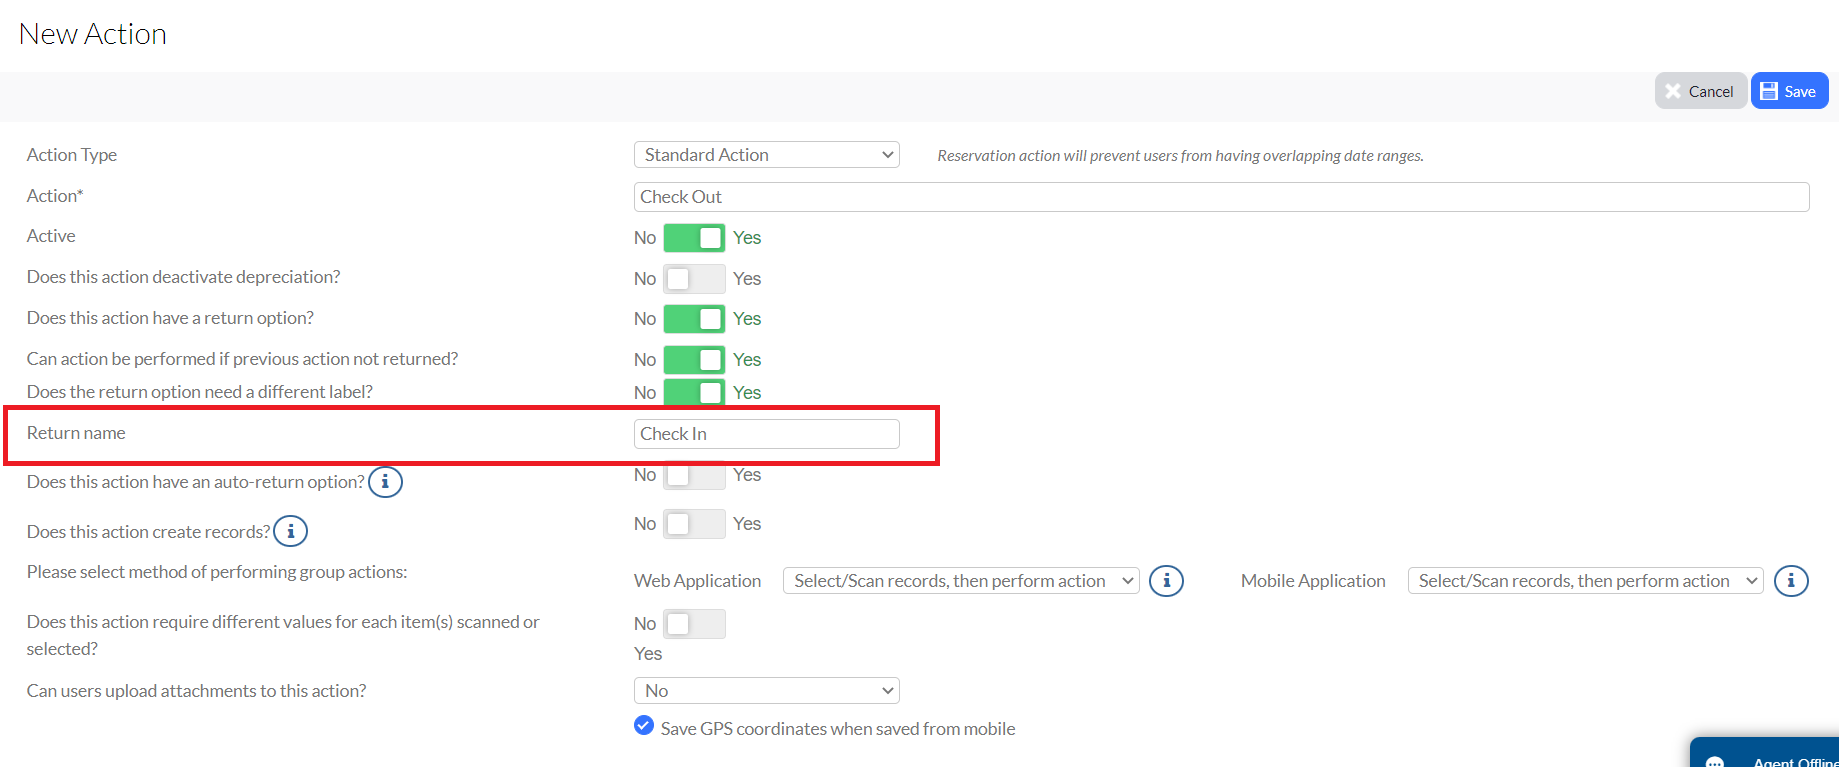
We've entered Check In as our Return name and have created the following closed fields to go with this specific return action.

Configure change fields
Now, let's talk about change fields. A change field is what you expect to see as a result of performing your action. There are quite a few options and variations you can select when it comes to change fields. Let's talk about some of these.
The two most popular change fields are:
- Status
- Assigned To
As a result, let's delve into these a bit more closely. We'll walk you through their configurations, helping you to understand a bit more about what it is that change fields really do. Of course, also keep in mind that despite the popularity of these two, they aren't the only choices. There are plenty of others to suit the needs of everyone.
Status
We now need a Status change field set to where the status is pulling from our Assets group. We also have it set to where the field changes to Checked Out when an item is checked out, and then back to Available when checked back in.

Let's take a closer look and first, click the Edit link to see how the Status change field is configured.
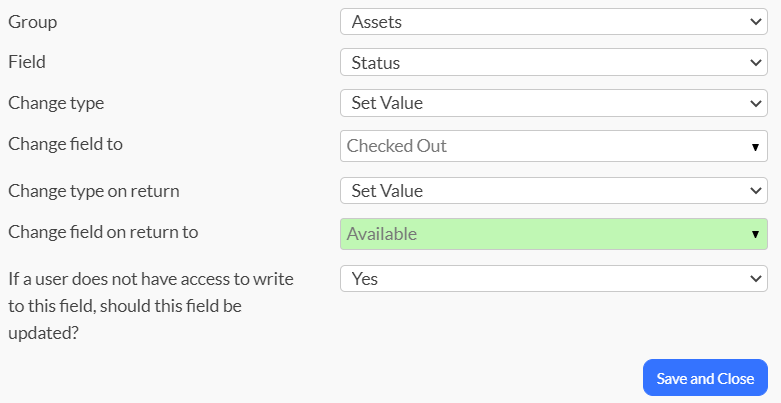
- Group: First, you select the group in which you want to see the change take place. We are currently in our Assets action, so this is what we chose.
- Field: This is where you select the field where you wish to see the change. There is where we've specifically designated our Status field.
- Change type: What type of change do you wish to see happen? We've selected Set Value, which is one of the most popular.
- Change field to: What do you want the field to change to? We've selected Checked Out for ours because we want it to show that it's been checked out when the item is checked out.
- Change type on return: What do we want the field to do when the item is returned?
- Change field on return to: What do we want the field to change to when the item is returned?
- If a user does not have access to write to this field, should this field be updated: You really want to select Yes for this because it ensures that the value will be updated, regardless of user permissions.
Configure assigned to fields
Now, let's take a closer look at the configurations for our next, most popular change field. Some of the settings will be the same or very similar to those in the Status change field but there will also be differences.
First, we click the Edit link next to the Assigned To field and when we do, we see the screen below:
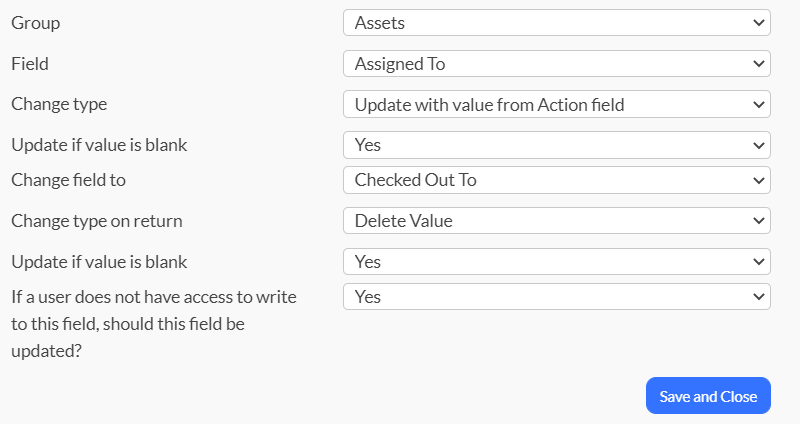
- Group: First, you select the group in which you want to see the change take place. We are currently in our Assets action, so this is what we chose.
- Field: This is where you select the field where you wish to see the change. This is where we've specifically designed our Assigned To field.
- Change type: What type of change do you wish to see happen? We've selected Update with value from Action field. This won't be a set value because we are likely not checking this out to the same person each and every time. It will likely be a name from a list of different people. We want this to update with the value from our action. We are asking to pull from the Checked Out To field (see the Change field to field next), which pulls from our employee Group List, as set in our Open Fields section.
- Change field to: What do you want the field to change to? We've selected Checked Out To for ours because we want it to show who exactly the item is checked out to.
- Change type on return: What do we want the field to do when the item is returned? We selected Delete Value because we've already gotten what we need to know. The names of who this item has been checked out to will be maintained in the item's history.
- Update if value is blank: Do you wish for the change field to be updated to a null value? Stated more simply, selecting Yes updates if the field is left blank while selecting No keeps the value as is.
- If a user does not have access to write to this field, should this field be updated: You really want to select Yes for this because it ensures that the value will be updated, regardless of user permissions.
And....that's all there is to configuring actions!