Shareable Calendar Configuration
Complete the following steps to successfully configure your Shareable Calendar views. Depending on your third party calendar provider, it may take up to 24 hours before you see your shared views. (See Shareable Calendar Navigation for more information on how to navigate the Shareable Calendar feature.)
1. Click the + icon.
2. Create and enter the name of your shared view within the required View name field.
3. Use the Group drop-down menu to assign the shared view with a specific group.
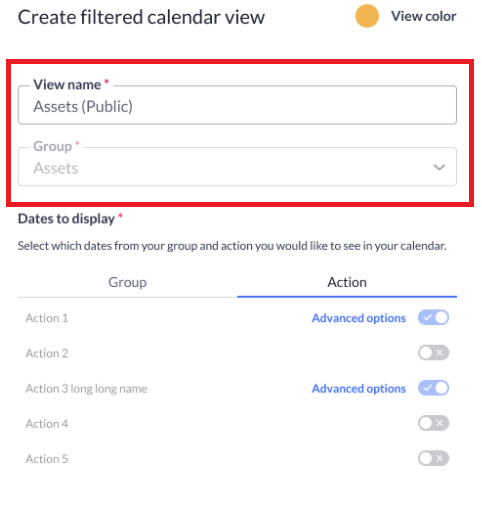
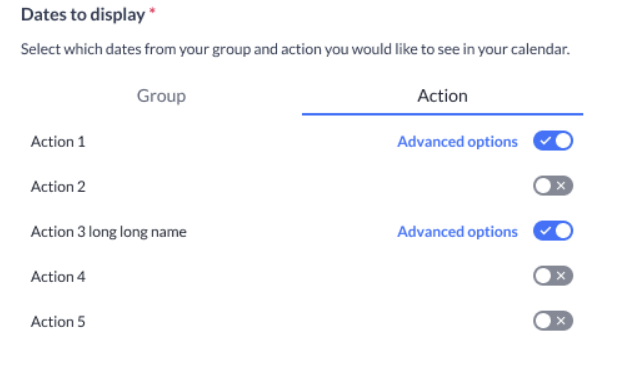
Next, are the Dates to display options. This option allows you to set (using the toggles) your Group date and/or Action fields. (See the Dates to Display section below for more information on how to configure these settings.)
4. Select the preferred groups and actions you wish to view on your calendar.
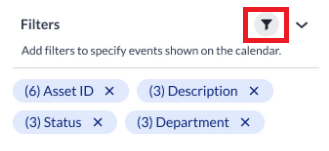
5. Click the filter icon within the Filters section to specify the events you would like to be shared on your calendar. (See the Filters section below for assistance with filter configuration.)
6. Click the + icon within the Display fields section to customize the fields that will display on your calendar.
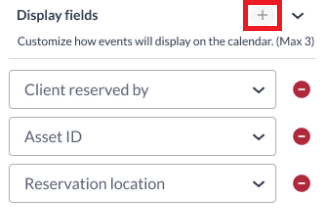
NOTE: You may choose to display a maximum of three display fields.
7. Click Create.
Your new shareable view is now visible within the Shareable views section of your Asset Panda calendar.
Dates to display
The Dates to display feature allows you to set the dates from your groups or actions that you wish to see on your calendar. See the following instructions to configure your how your dates appear on your calendar.
Action
The Action feature allows you to see action logs as events on your calendar. To configure this option:
1. Click Action.
2. Click the toggle to the ON position (click to the right) to set your preference(s).
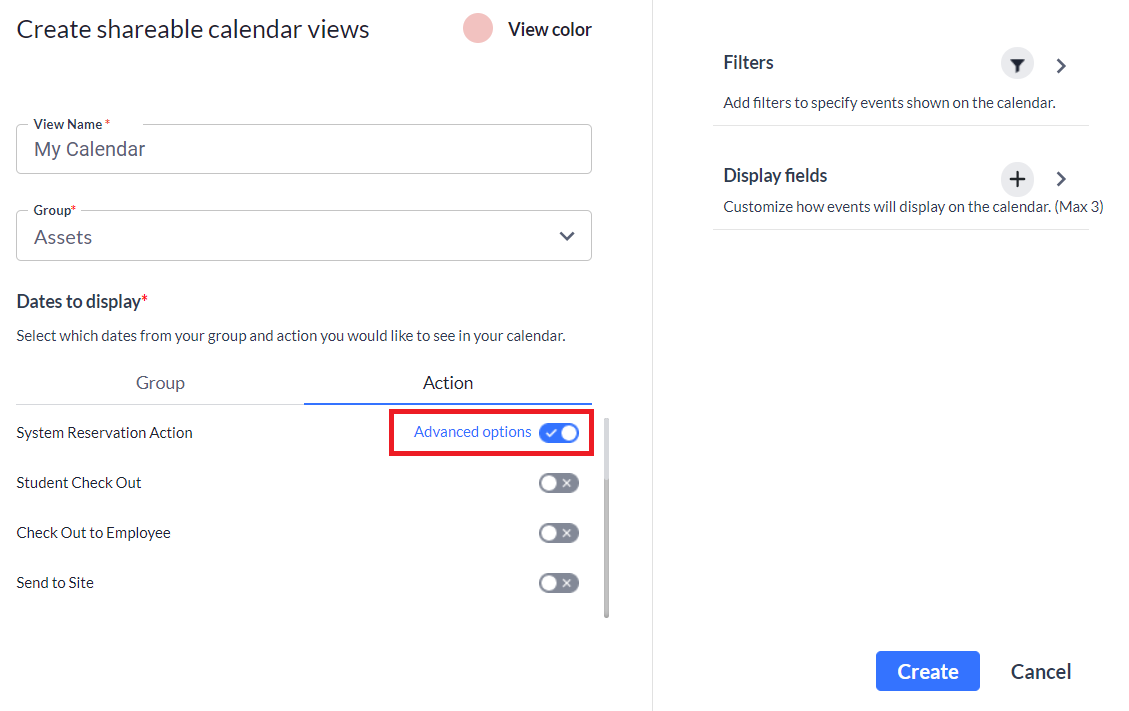
3. Click the Advanced options link that displays when a toggle is ON.
Stamp
You will find that the setting is automatically defaulted to the Stamp option.
With this option, any date field that is added within the action will display on that date value only. (You will not be able to set the Start or End date fields.) For instance, if your Check Out action contains a Logged Date of March 16th, a Return By Date of March 23rd, and a Maintenance Date of March 31st, you will only see the Check Out action on March 16, 23, and 31 rather than a running event of March 16th through the 31st.
Range
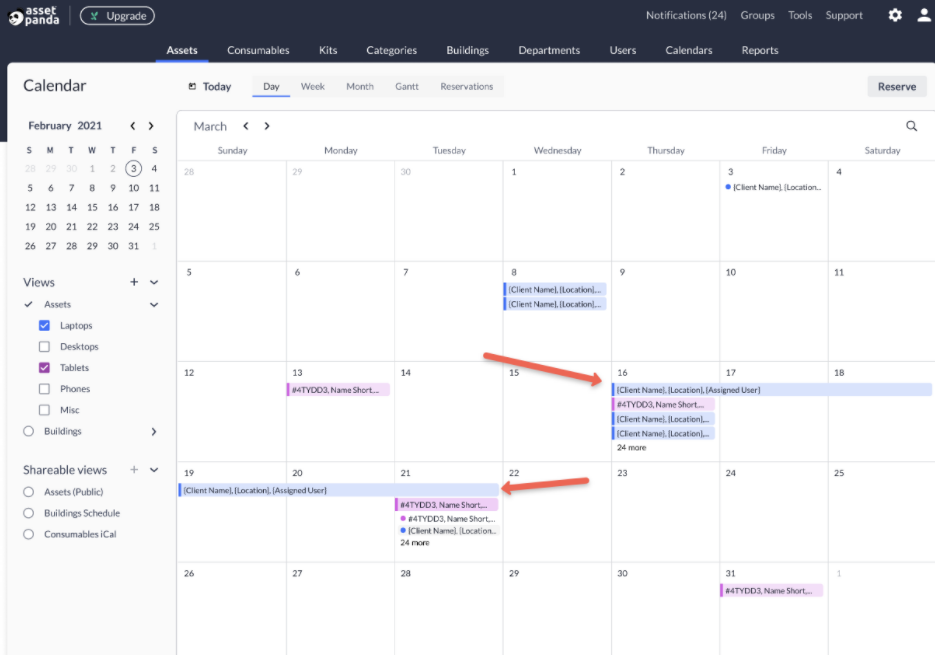
If you prefer to set running events, click Range. You will then be able to select both your Start date field and End date field to set your running events. The event date will start on the set start date and will display as running until the set end date, as shown below.
Group
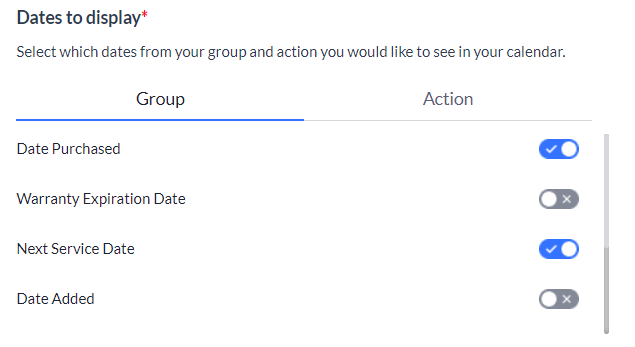
The Group feature within the Dates to display section allows you to set date field types that have been added into a specific group.
Click the toggle to the ON position (click to the right) to set your group preference(s).
Shareable calendar filters
The Filters option will help you narrow your events down to specific records.
1. Click the Filters icon.
2. Select the Fields and Values for those dates you wish to see in your calendar.
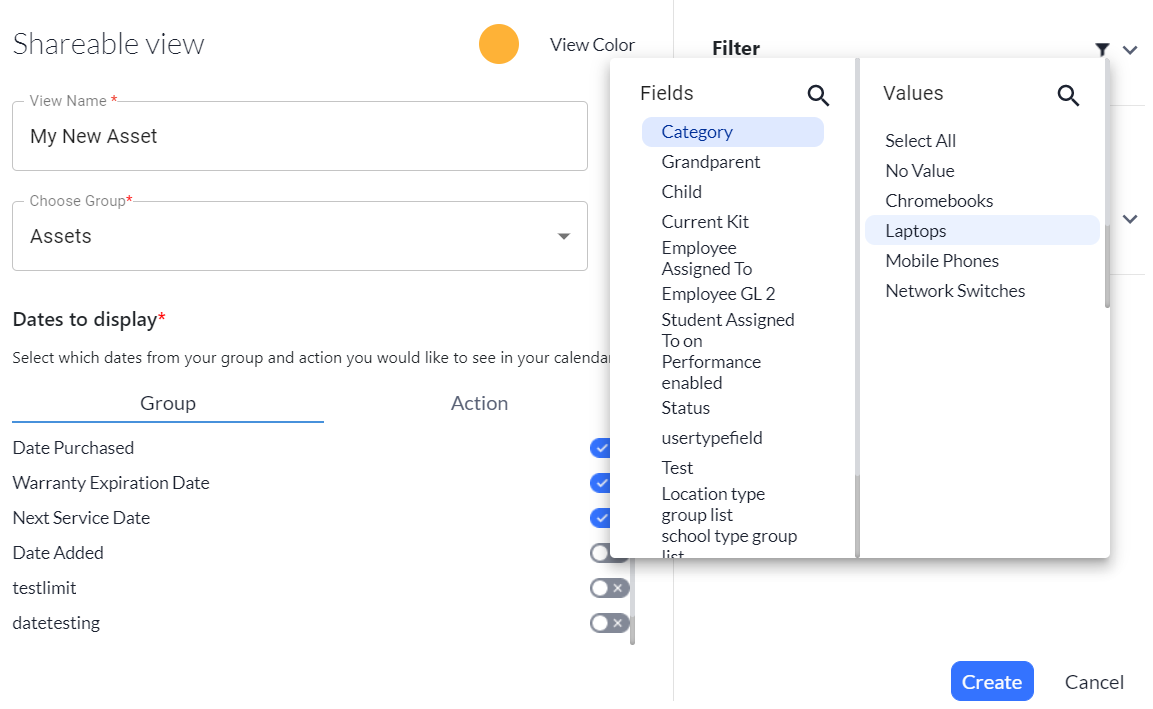
You will see your selections display within an Applied Filters section (that displays after your Value(s) have been selected).
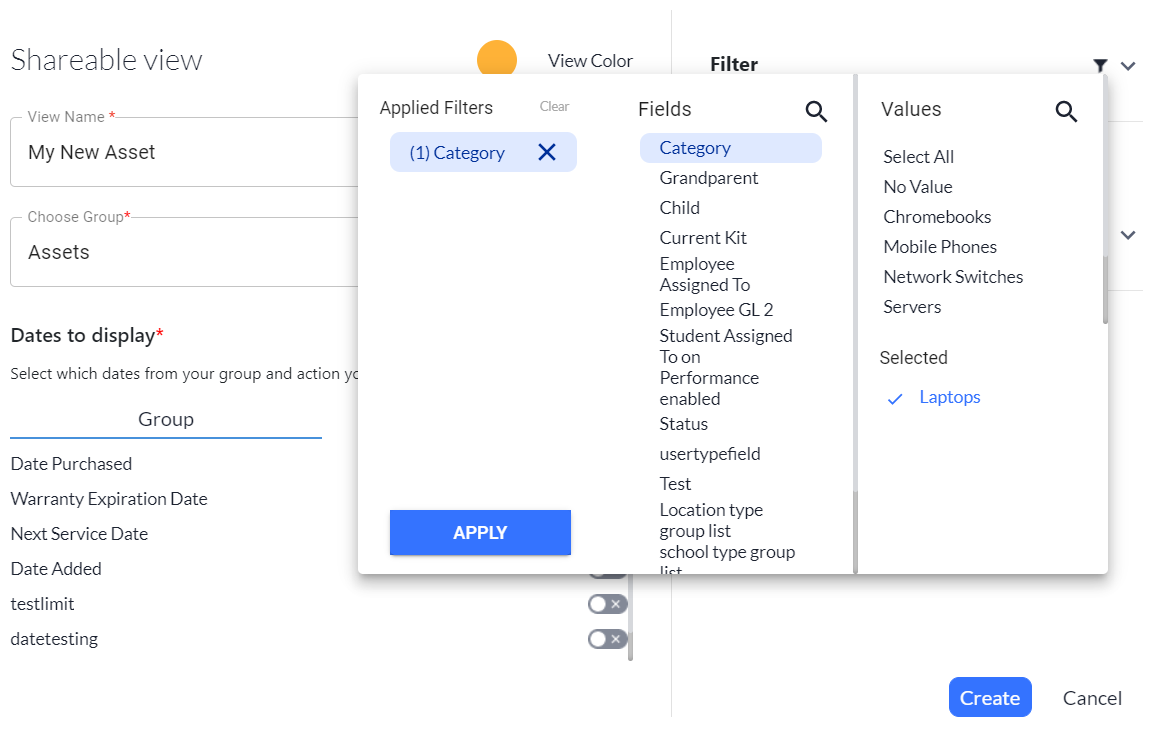
3. Click Apply to save your selected date filters.
Depending on your third party calendar provider, it may take up to 24 hours before you see your shared views.
Related Topics
