Microsoft System Center Configuration Manager
Use the following steps to successfully integrate your Microsoft SCCM (System Center Configuration Manager) and Asset Panda accounts. (Note that SCCM is included within the Microsoft Endpoint Manager brand.)
Requirements
The hardware and software requirements to successfully run SCCM are as follows:
- Operating System (OS): Windows Server 2012 R2 or higher
- 1 GHz (or faster) processor
- 512 MB of RAM
- 200 MB of available hard disk space
- .Net version 4.5.2 or higher (this is installed by the tool of it does not already exist)
Our SCCM integration allows you to deploy a program on your windows server (that contains SCCM), allowing you to sync information to Asset Panda about both the hardware and software contained on your devices.
Microsoft SCCM Installation and Configuration
You'll first need to install and configure Microsoft SCCM. To do this:
1. Select your settings ![]() icon, and then select API Configuration.
icon, and then select API Configuration.
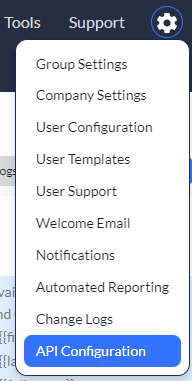
2. Open a .txt file (such as Notepad), and then copy and paste both the Client ID and Client Secret into the .txt file. (You will need them in later steps.)
3. Select your settings ![]() icon, and then select Integrations.
icon, and then select Integrations.
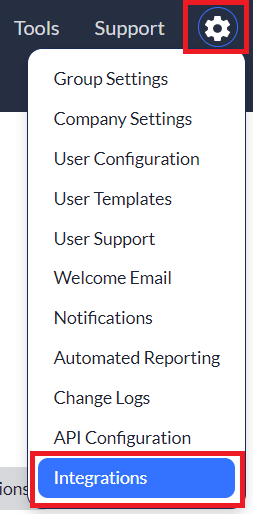
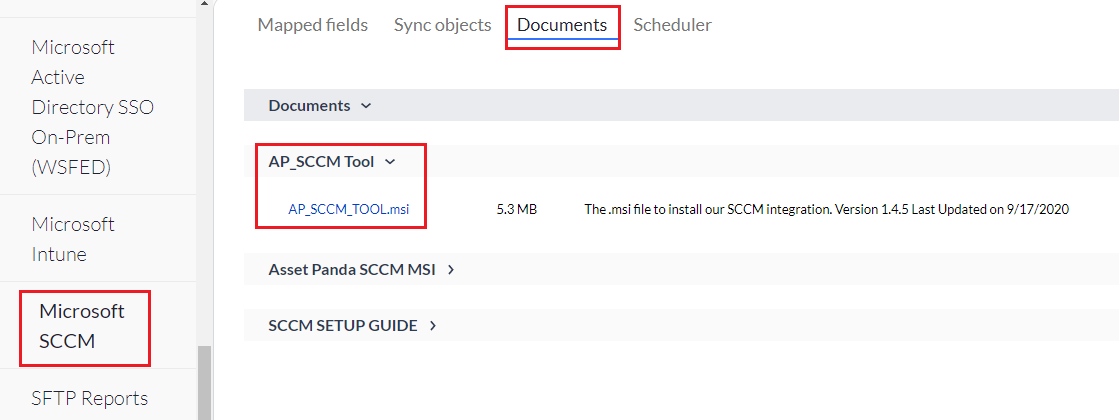
4. Select Microsoft SCCM from your integrations menu.
5. Select the Documents tab, and then select AP_SCCM Tool (clicking AP_SCCM_TOOL.msi) to download the device data agent to your device.
NOTE: You can also share this file out via email to those in your company that may not have access to Asset Panda.
6. Once download is complete, select Next at each prompt to run the installer.
![]()
The AP_SCCM panda icon displays on your desktop once the tool has been installed.
7. Click icon to launch the program.
NOTE: You must be a company administrator for the integration to be properly set up.
8. Enter the following information (also shown in the screen shot below):
- Base URL: https://login.assetpanda.com
- Email: Your Asset Panda email address
- Password: Your Asset Panda account password
- Client ID: Open your .txt file, copy and then paste the Client ID (see step # 2, above ), and then paste that ID into this field.
- Client Secret: Open your .txt file, copy and then paste the Client ID (see step # 2, above ), and then paste that ID into this field.
9. Select Login.
![]()
10. Enter the username and password into the correct fields, and then click Save.
11. Slide the Enable Automatic Sync toggle to ON.
12. Click Test Connection to run a test on your connection. (Re-check both your username and password if the test is unsuccessful.)
13. Click Send.
![]()
Asset Panda Configuration
You'll now need to configure your Asset Panda account. Complete this section only after you have completed the Microsoft SCCM Installation and Configuration.
Select your settings ![]() icon, and then select Integrations.
icon, and then select Integrations.

Mapped Fields
Use the following instructions to configure your mapped fields within Asset Panda.
NOTE: To prevent the duplication of records, the following fields must be defined as unique and not include a blank value:
- Devices (computers, mobile, and other devices) - link with the serial_number field
See Unique Rule for more information about unique fields.
1. Select Microsoft SCCM from your integrations menu, and then select the Mapped fields tab.
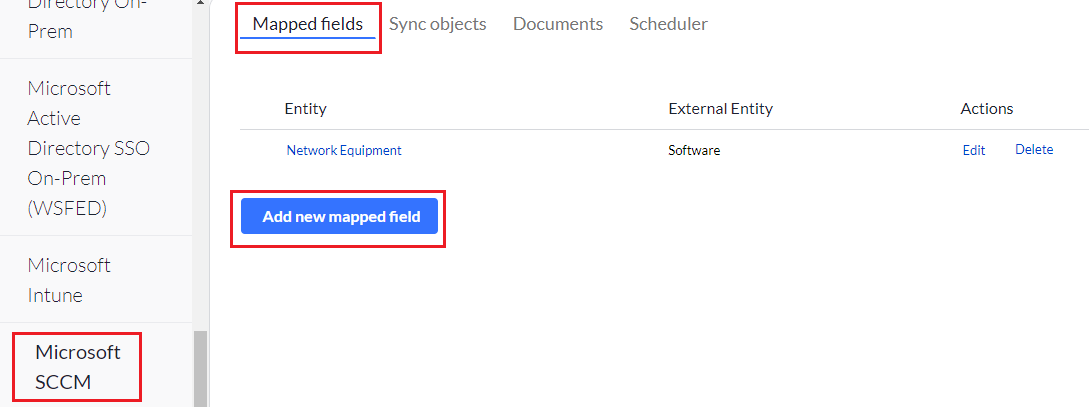
2. Select Add new mapped field.
Use the following drop-down menus to:
3. Select the Entity (from within Asset Panda) and External Entity (from within SCCM).
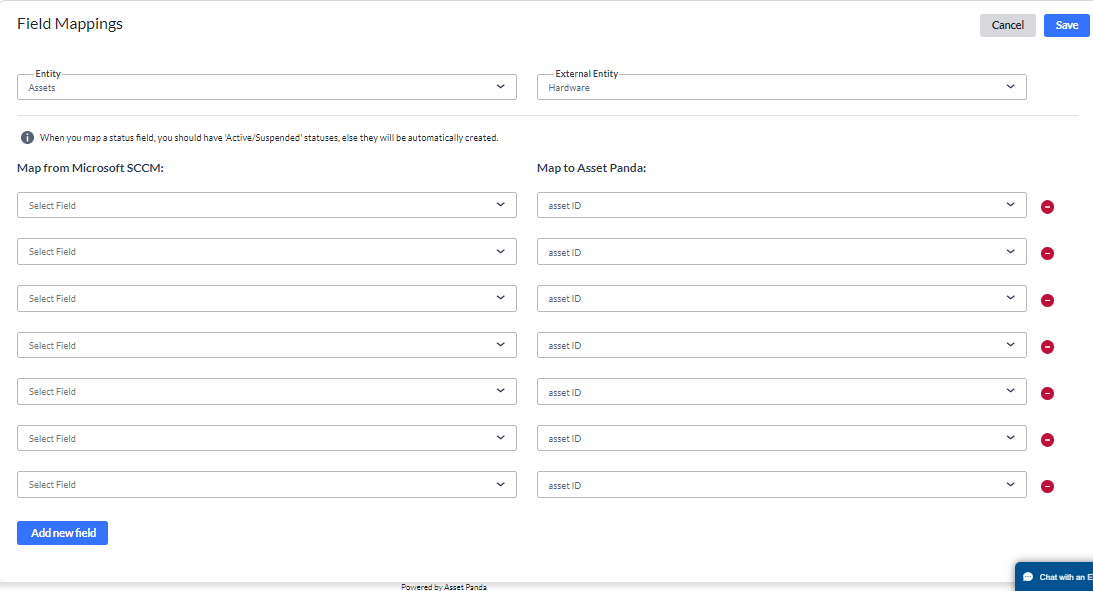
4. Select the fields you wish to Map from Microsoft SCCM and Map to Asset Panda.
5. Click Add new field if you need additional fields.
6. Click Save.
Sync Objects
Sync objects allows you the ability to sync objects, view sync logs, and to complete other SCCM sync-related tasks. To select one (or more) of these options:
1. Click the Sync objects tab, and then select your desired year and month to expand your logs for the specified timeframe.
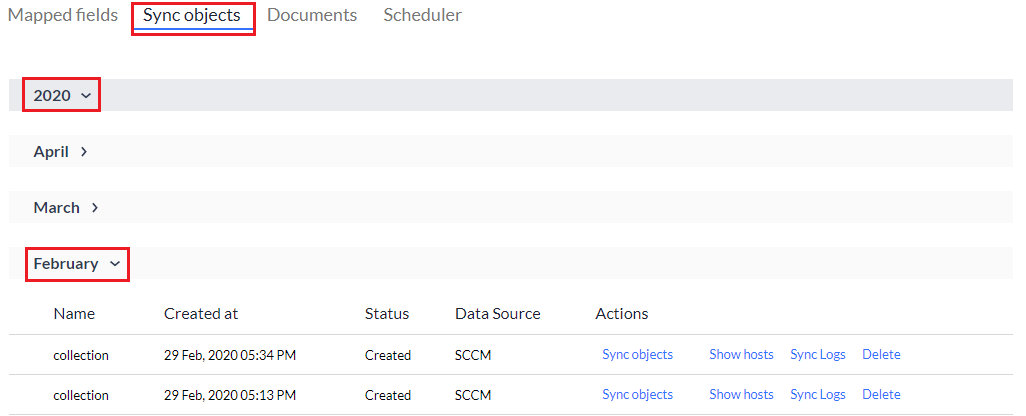
2. Select from one of the following:
- Sync objects: Runs a sync between Asset Panda and Microsoft SCCM. (Displays as Re-Sync objects if the objects has been previously synced.)
- Show hosts: Displays Microsoft SCCM hosts such as the IP Address, the SCCM Resource ID, and other host information.
- Sync Logs: Displays details of your syncs divided by year and month.
- Delete: Deletes a sync object.
Schedulers
Use the Schedulers feature to set up automatic sync schedules. (You can choose when and how often your syncs occur.)
NOTE: A maximum of two schedules may be added at any given time. At least one must be deleted if you find the need to setup new schedules.
To begin:
1. Click the Scheduler tab.
2. Click Add new schedule (or Edit next to an existing schedule to edit) to add new schedules. Note there is a maximum of two scheduled tasks.

The Add Microsoft SCCM Schedule page displays.
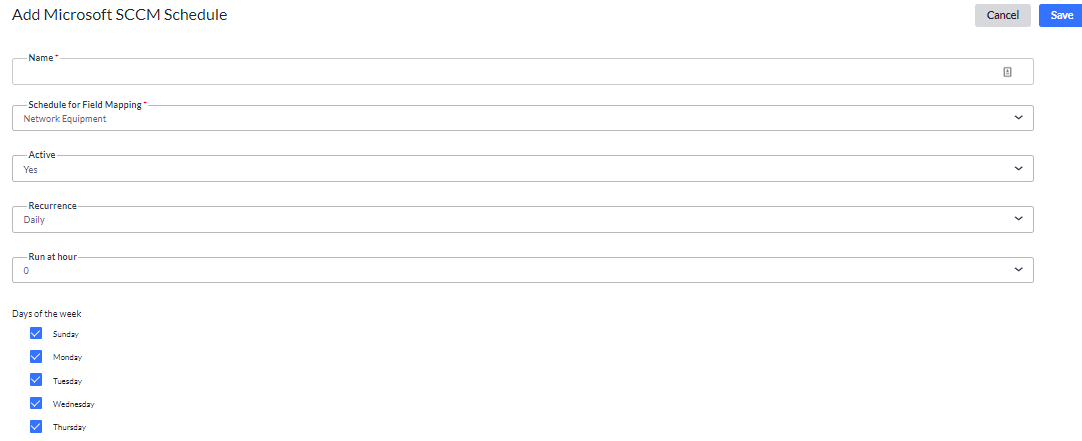
3. Enter your preferred scheduler name into the Name field.
This is a required field.
4. Use the Schedule for Field Mapping drop-down menu to select the group you wish to sync to.
The groups included within this drop-down menu are pulled from fields you mapped within the Mapped Fields section. This is a required field.
NOTE: You must create a schedule for each group.
5. Use the Sync type drop-down menu to select your preferred sync type.
6. Use the Active drop-down menu to select Yes, and to activate your scheduler.
7. Use the Recurrence to select:
- Daily – Select Daily, the hour, and day of the week.
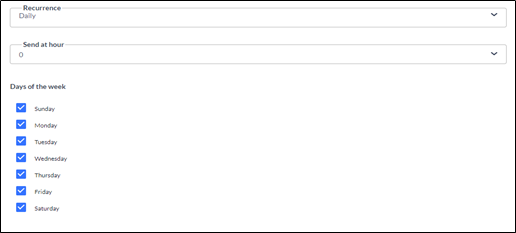
- Weekly – Select Weekly, the hour, the frequency, and day of the week.

- Monthly – Select Monthly, the hour, and the frequency (includes the frequency of the month such as every month, every other month, etc., and the day of the month).

- Yearly – Select Yearly, the hour, and the frequency (includes the specific month and day of the month you wish to schedule).

8. Click Save.
Your new schedules display.

NOTE: Remember that there is currently a maximum of two scheduled tasks. You will be unable to select the Add New Schedule button once the maximum amount has been reached. You will need to delete one in order to add another.
Troubleshooting Tips
- If the program fails at first sync, you may need to restart your computer before it will proceed.
- Many issues can arise if permissions are not correct, please double check that the Asset Panda account you used in the integration has full permission levels by going to configuration > User configuration then clicking edit user permissions and selecting all checkboxes including the company admin – yes option.
- Running the program as administrator can also help alleviate some permissions issues if they should arise.
- If you are looking to limit the machines the tool can see and sync, we recommend creating an SCCM admin account that only has access to the computers you want to sync; and use that account to log in on step 7.
- The sync schedule in the tool will operate on its own if a user is logged in to the server. If you’re looking to have the tool run when a user is not logged in to the server, you can download the AsstPandaSCCMIntegratorInstallServices.msi file and it will run based on the schedule in the tool. This program will work with SCCM Tool version 1.4.1 and above.
- If you continue to have troubles, please zip up the folder below and send it to support@assetpanda.com. Note that this location may be hidden, so you will need to select view > Hidden Items.
- C:\ProgramData\AssetPanda_SCCM