Jamf Pro
Our Jamf Pro integration feature allows you to connect your Asset Panda account to your Jamf Cloud account, pulling over records that you select.
This feature also allows you to define specific fields so that you can sync information from Asset Panda back to Jamf Pro. See Jamf Permissions to properly set your pre-existing and custom privileges.
Click any of the following links to be taken directly to specific topics. (If this is your first time in setting up your Asset Panda and Jamf Pro integration, we recommend following the steps sequentially.)
Jamf Pro is a third-party application and Asset Panda does not control updates made by Jamf. Please see the Jamf Resources: Product Documentation page for more information on how to use Jamf, and Jamf Pro | Mobile Security | Casper Suite | Jamf for more information on Jamf Pro.
NOTE: This integration requires a Jamf Cloud account.
To begin your integration:
1. Log into your Asset Panda account.
2. Click the settings  icon, and then select Integrations.
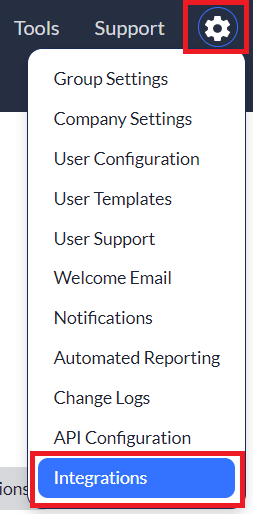
Settings
Complete the following steps to successfully link your Asset Panda and Jamf Pro accounts.
1. Select Jamf Pro from your available list of integrations, located on the left side of your screen, and then click Settings tab.
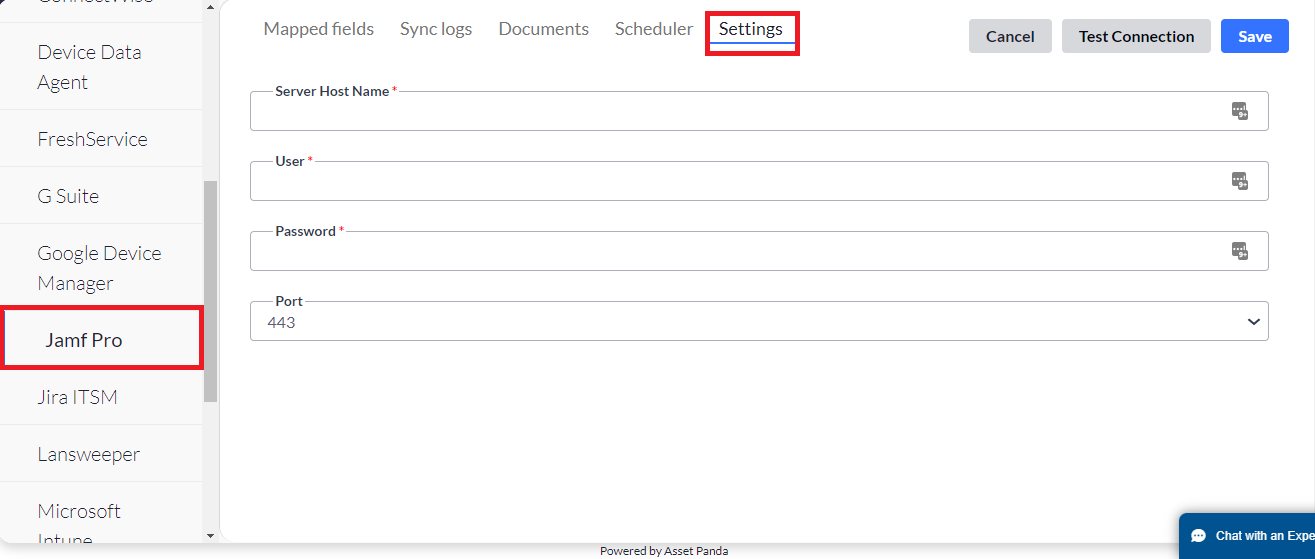
2. Enter your custom Jamf URL within the Server host name field, your Jamf username within the User field, the username for your Jamf account, and the associated password within the Password field.
An error usually indicates that you have entered incorrect information into the connection fields. Re-check to confirm that you have entered the correct data.
3. Click Save to save all of your information, and then click Test Connection. (Our personal information is intentionally blocked in the screenshot below). Note that you must select Save before selecting Test Connection or your integration will not work properly.
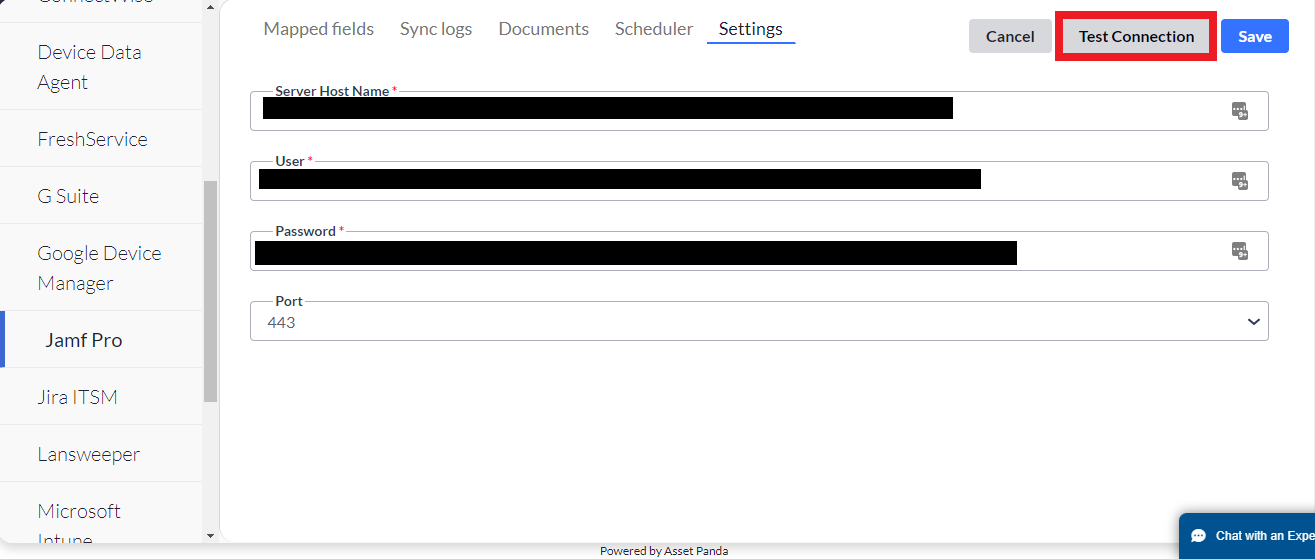
You will receive a success message if the connection test was successful.
Scheduler
Use the Scheduler feature to set up automatic sync schedules. (You can choose when and how often your syncs occur.)
To begin:
1. Click the Scheduler tab.
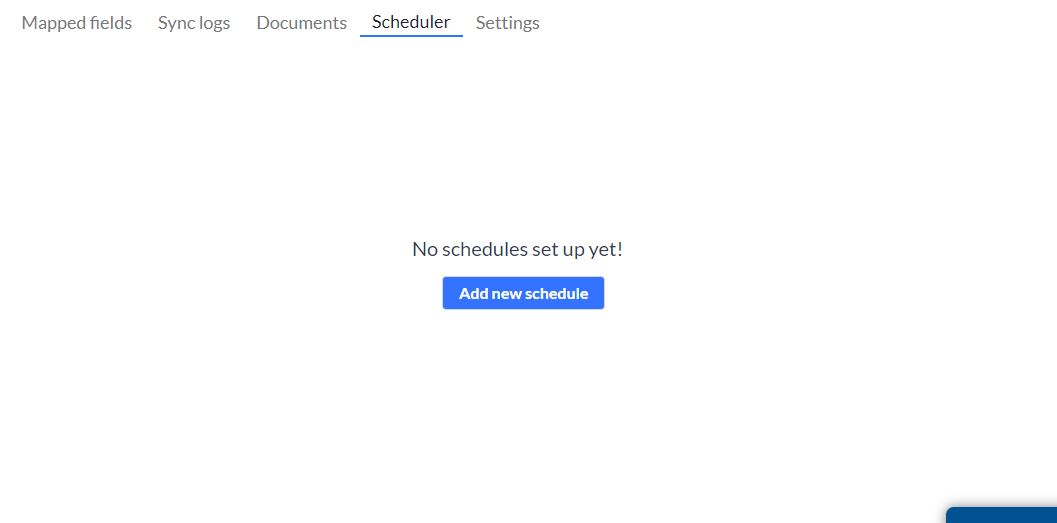
2. Click Add new schedule to add new schedules.
The Add Jamf Pro Schedule page displays.
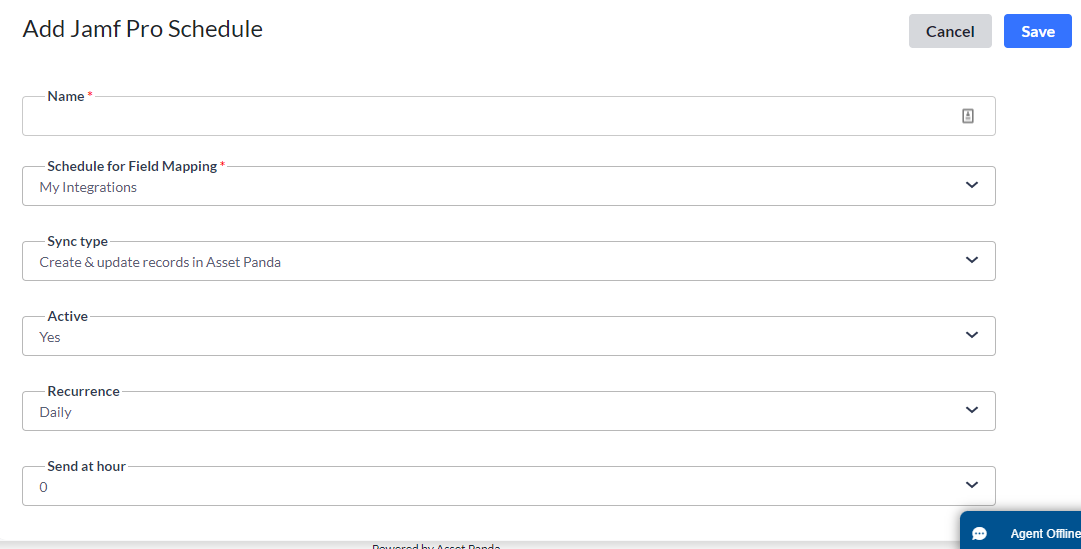
3. Enter your preferred scheduler name into the Name field.
This is a required field.
4. Use the Schedule for Field Mapping drop-down menu to select the group you wish to sync to.
The groups included within this drop-down menu are pulled from fields you mapped within the Mapped Fields section. This is a required field.
NOTE: You must create a schedule for each group.
5. Use the Sync type drop-down menu to select your preferred sync type.
6. Use the Active drop-down menu to select Yes, and to activate your scheduler.
7. Use the Recurrence to select:
- Daily – Select Daily, the hour, and day of the week.
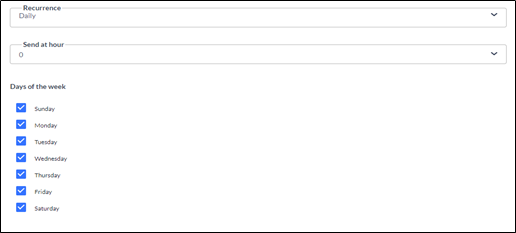
- Weekly – Select Weekly, the hour, the frequency, and day of the week.

- Monthly – Select Monthly, the hour, and the frequency (includes the frequency of the month such as every month, every other month, etc., and the day of the month).

- Yearly – Select Yearly, the hour, and the frequency (includes the specific month and day of the month you wish to schedule).

8. Click Save.
Your new schedules display.
![]()
Sync Logs
Your Sync Logs store all your syncing information and are divided by year and month.
1. Click the Sync Logs tab, and then select your desired year and month to expand your logs for the specified timeframe.
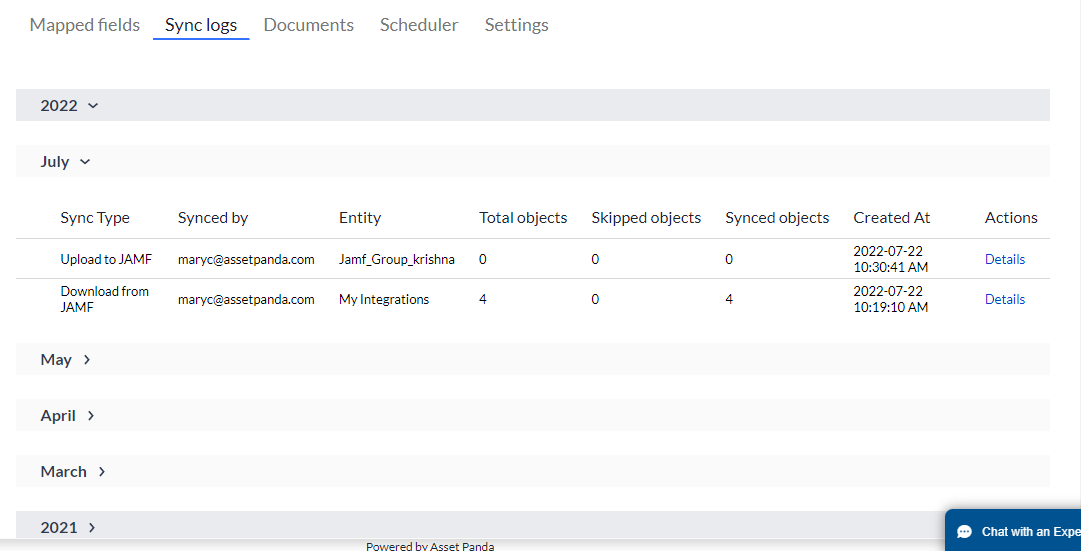
2. Click the Details link to view a more detailed log of sync information.
Mapped Fields
Use the following instructions to configure your mapped fields within Asset Panda.
NOTE: To prevent the duplication of records, the following fields must be defined as unique and not include a blank value:
- Computers and mobile devices - link with the serial_number and udid.
- Users - link with the Email field.
See Unique Rule for more information about unique fields.
1. Click the Mapped Fields tab, and then select Add new mapped field.
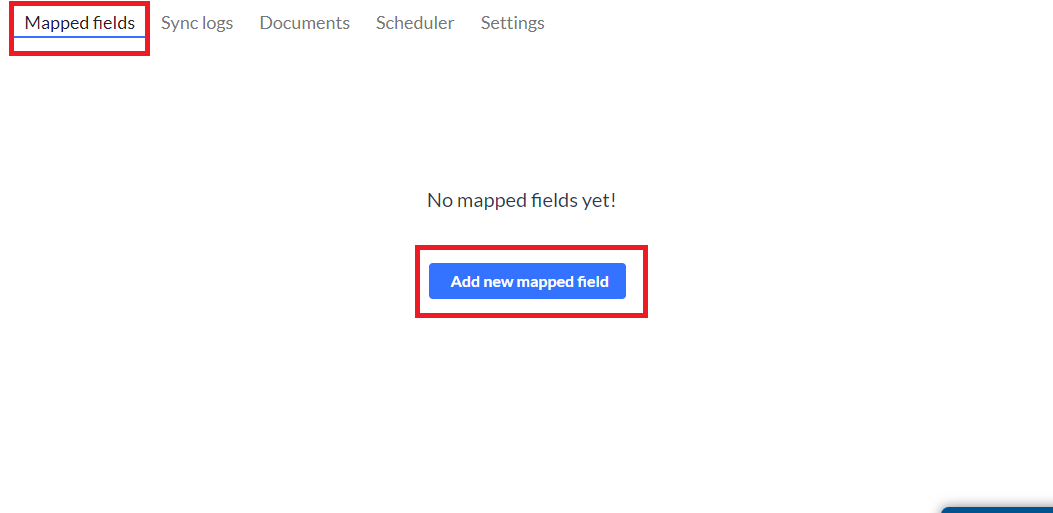
The Field Mappings page displays and allows you to begin the process of linking your Jamf Pro groups to Asset Panda.
This screen also allows you to choose the Jamf Pro and Asset Panda groups you wish to link, as well as any individual fields you wish to pull over.
Use the following drop-down menus to:
2. Use the Entity drop-down menu to select the group from within Asset Panda that you wish to store the information within. This selection will usually be your Assets group however, you may use any of your groups or create a new one (if needed).
3. Use the External Entity drop-down menu to select the Jamf Pro group you wish to connect to.
4. Select your preferred Status to either, Yes, updated status when an item is deleted from Jamf or No, do not update status.
Note that only specific fields can be upgraded from Asset Panda back to Jamf Pro (Asset Tag, Name, Username, MAC Address, Alt MAC Address, Real Name, Phone, Position, Room, Is Purchased, Is Leased, Purchase Price, PO Number, PO Date, Warranty Expires, Lease Expires, Vendor, Bar Code 1, Bar Code 2).
5. Click Save once you have completed mapping your fields.
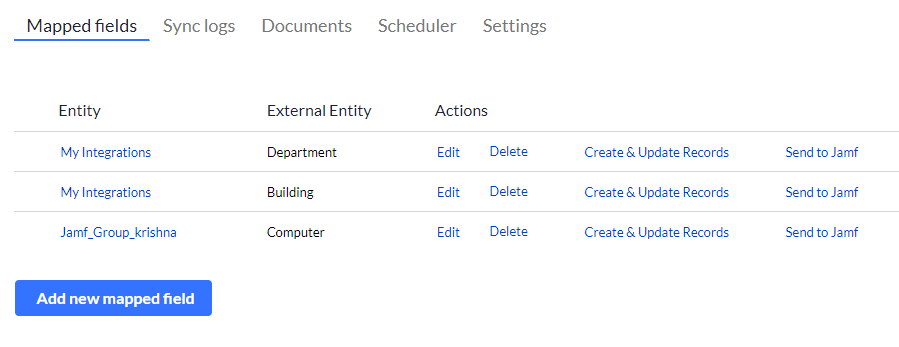
6. Click the Create & Update Records link to run a one-way sync from Jamf Pro to Asset Panda. (This option pulls from Jamf Pro.)
7. Click the Send to Jamf link to update within Jamf Pro when a record is changed within Asset Panda. As an example, let’s say you've mapped your Model field and then decide to change the value within Asset Panda. When clicking this link, Asset Panda sends that information over to Jamf Pro, also updating the Model field within Jamf Pro.
8. Click Add new mapped field to add additional mapped fields.
Jamf Permissions
Use the following tables to set your Jamf privileges.
Jamf Pre-existing Privilege Sets Table
| Pre-existing Privilege Set | Privilege |
| Administrator | User will be able to read and write the records along with other privileges. |
| Auditor | User will be able to read and write the records (minimum requirement). |
| Enrollment Only | User won't be able to read or write the records (not required). |
| Custom | User can set custom privileges. |
Jamf Custom Privileges Table
| Custom Privilege | Read | Write |
| Users | Required | Not required (unless user wants to update the record) |
| Computers | Required | Not required (unless user wants to update the record) |
| Mobile Devices | Required | Not required (unless user wants to update the record) |
| Buildings | Required | Not required (unless user wants to update the record) |
| Departments | Required | Not required (unless user wants to update the record) |