Import Data
Complete the following steps to successfully import data, helping you to more efficiently process and track your assets.
You can also choose to disable (or enable) the main login for your users when you import data. (See Disable the Main Login.)
(See Field Type Descriptions for more information on the various types of lists.)
To import your data:
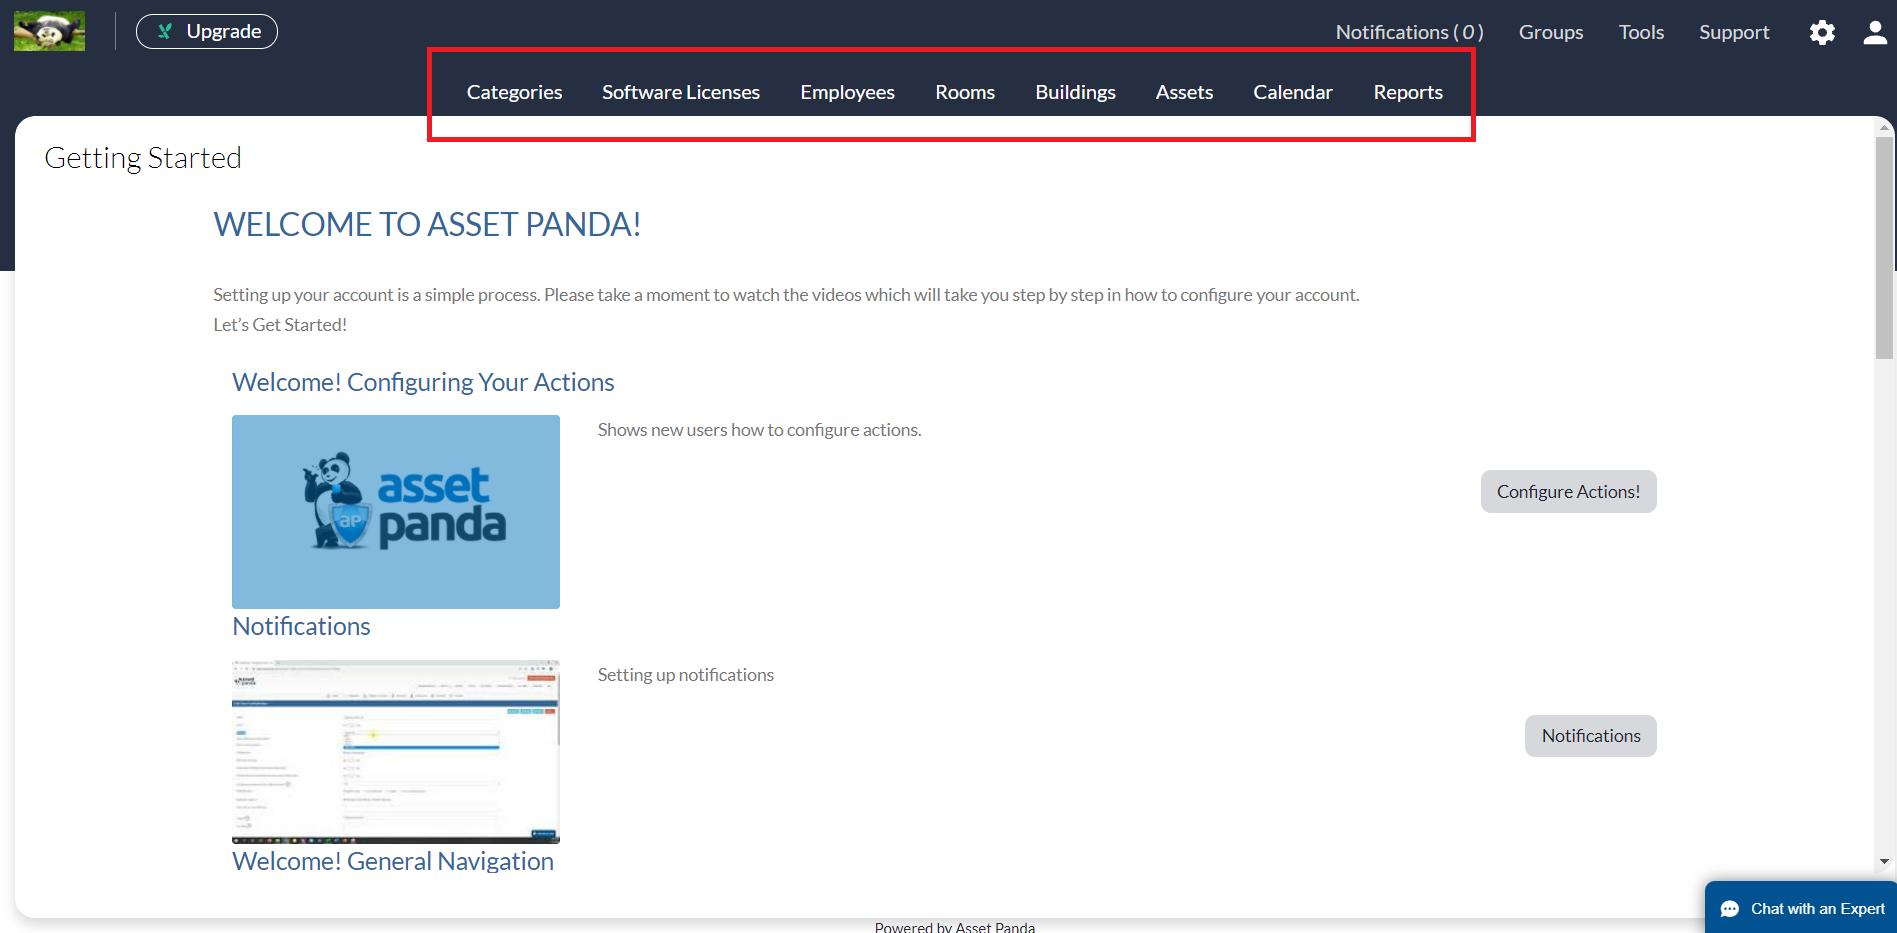
1. Select the desired group from the top of the page.
NOTE: Your group options may differ depending on your settings and configurations. It is also important to note that not all groups offer the import option.
2. If you wish to add your items individually and manually, click the Add New button.
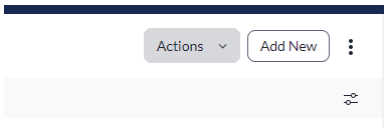
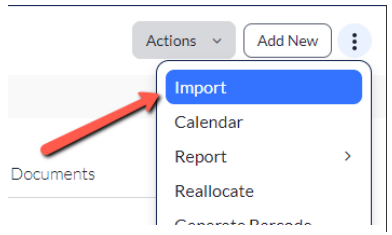
3. If you wish to import your items, click the ellipses button and then select Import.
NOTE: Not all groups offer the import option.
The Imports page displays (the Assets imports page is used in this example), providing a list of your import history (this page will be blank if you do not yet have an import history).

4. If you do not yet have any data collected, select Download Sample CSV.
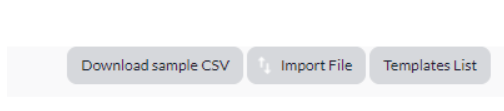
The sample CSV provides a template with column headers that are identical to the fields on your record so that all necessary information is provided. This helps to ensure that your information is properly mapped.
5. If you have already collected and cleaned your data, select Import File.
6. Select the file you wish to upload, and then select Submit.
The Import page displays, allowing you to map your imported items.
Map columns for an import
1.If using the drop-down menu, select an existing template.
NOTE: The drop-down menu contains only those templates that you have previously created.
2. If not selecting a template from the drop-down menu, enter the title for your file in the OR create a new one field.
![]()
3. Navigate to the Column Mapping section.
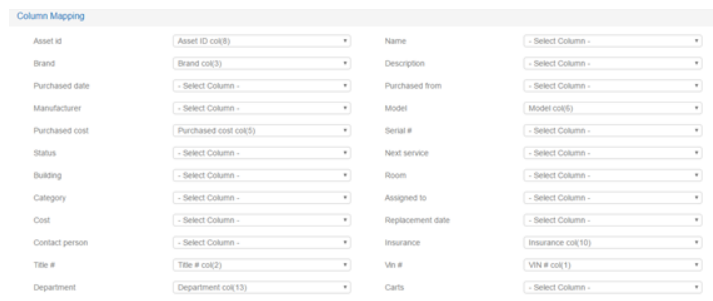
4. Make sure that all columns are correctly mapped, and then click Submit to initiate the import process.
5. If not errors are found, click Review Pending Objects to confirm that you are ready to add your objects to the group.
6. If some of your records were skipped, click on the Report link to view the location of these skipped records.
7. If errors are found, update the data and re-import.
Import group lists
How do group list imports work?
A Group List is a type of field that can be found within a record. This field takes the data that is imported into a different Group and displays it as a drop-down/searchable field.
If you want to reference the Asset location, you can create a Group List within your Assets Group that pulls from all the data imported into the Buildings Group.

Group Lists are important because you need to have data to pull from for your imports.
Multiple group list imports
This field type functions in the same way as Group Lists. The only difference is that this field type allows the program to pull over multiple items from the designated Group.
The common use for this field type is for assigning an Asset to multiple Employees or Locations at once.

If you attempt to import Assets before importing Buildings, the system will reject the import because there is no information in the Buildings group to pull from.
Map list/multiple lists
The cells in your spreadsheet that you map to a list must be a perfect match. For instance:
- If the cell is campus a and the option is Campus A, the system will reject this entire row for import.
- If the cell is London Bridge and the option is Bridge, the system will reject the entire row for import.
- If cell is Panda Avenue and the record is Panda Avenue, the system will accept the row for import.
Important Importing Information
We recommend that you import all groups that are featured as Group Lists (Categories, Buildings, Rooms and Employees) first, prior to all of your asset data. This prevents the system from rejecting your spreadsheet since those records don't exist.
It's also important to double-check the records in your spreadsheet and compare them to the records that already exist in your Group Lists. This helps to make sure there are no variant spellings of any kind.
You should also provide Asset ID numbers (if you do not have the Numeric Auto Increment option turned on).
Asset Panda needs some sort of Unique Identifier for each record so the system can differentiate each record.
When Asset Panda imports your files, we map the column headings from your spreadsheet to the fields on your records. This prevents confusion when you get to the mapping portion of your import
You must import in CSV (the preferred method) or Excel format.
Import with depreciation
When depreciation is turned ON, the following four depreciation fields must contain values or be removed from the spreadsheet entirely or they will not import properly:
- Date Placed in Service: must be populated with a date for the import.
- Original Cost: must be at least $0.00 for the import.
- Lifespan: total months, quarters, years of life must be greater than zero (0) for the import.
- Salvage Value: must be at least $0.00 for the import.
If depreciation fields are not needed for the import, we recommend removing those fields out of the spreadsheet by deleting the columns that represent those depreciation fields.
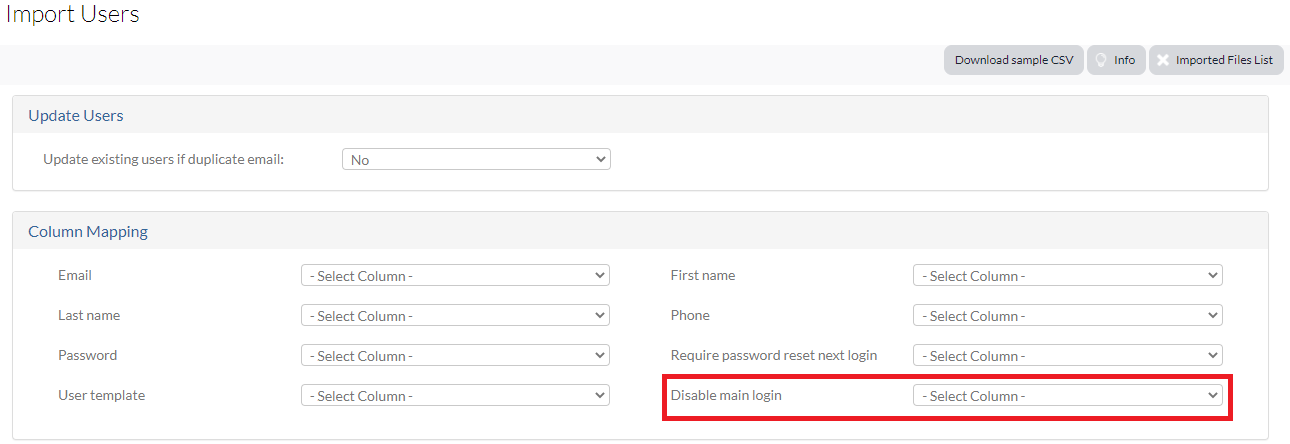
Import for disabling the main login
You can disable (or enable) the main login when performing a data import. You must first make sure your user list file (Import File) contains the following settings:
1. Create a Disable Main Login column within your user list file.
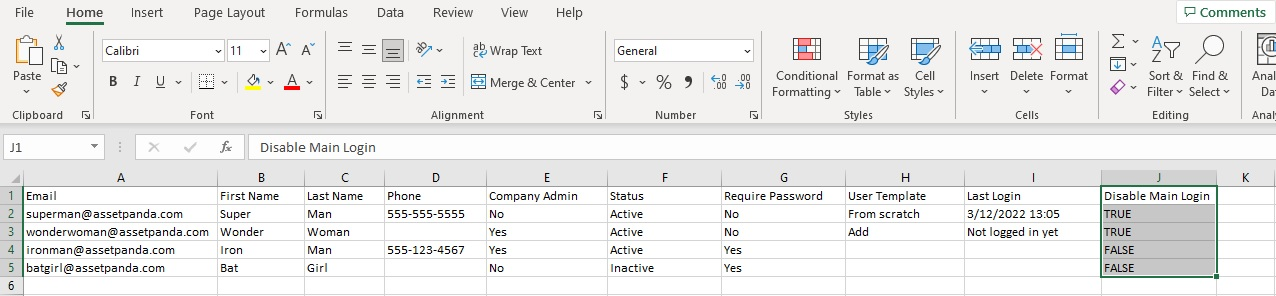
2. Enter True (for yes) or False (for no) for each user, depending on the settings you wish to provide.
3. Select the Disable Main Login column from the Disable main login drop-down menu when mapping your columns. (See the Map columns for an import instructions on Column Mapping.)