Cisco Meraki
Version 10.10.23
The Cisco Meraki and Asset Panda integration allows you to both import and update devices shared between the accounts.
NOTE: Cisco Meraki is a third-party application and Asset Panda does not control updates made by Cisco. As a result, your Cisco Meraki screens and options may vary from those you see in our examples below. See Cisco’s technical documentation for more information.
This guide will take you through the setup to successfully integrate your accounts:
Cisco Meraki API Credentials
1. Log into your Cisco Meraki account.
2. From your dashboard, select Organizations, and then click Settings (from the Configure column).
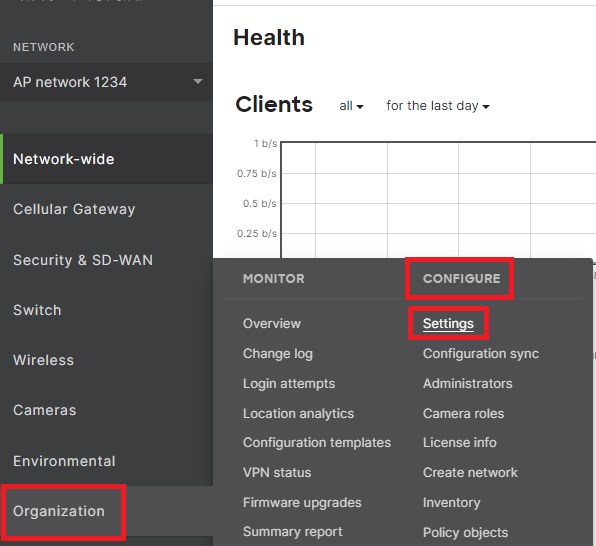
3. Scroll down to the Dashboard API access section, and then select Enable access to the Cisco Meraki Dashboard API.
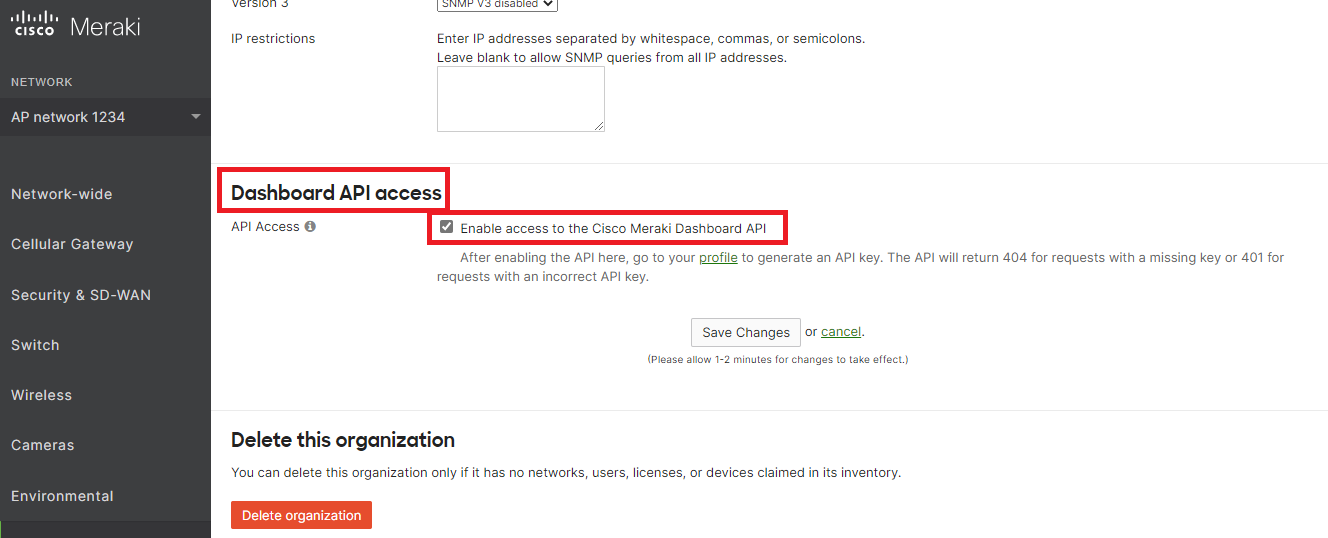
4. Click Save Changes.
NOTE: It may take one to two minutes for your changes to take effect.
5. Click the Profile link, and then scroll down to the API access section. (You can also edit your profile from your main dashboard. Just select your profile, and then click My profile.)
6. Click the Generate new API key button.
7. Click the copy icon located next to your API key, and then paste the key into a .txt file (such as Notepad) for later use. (You’ll need it again when you log into your Asset Panda account.)
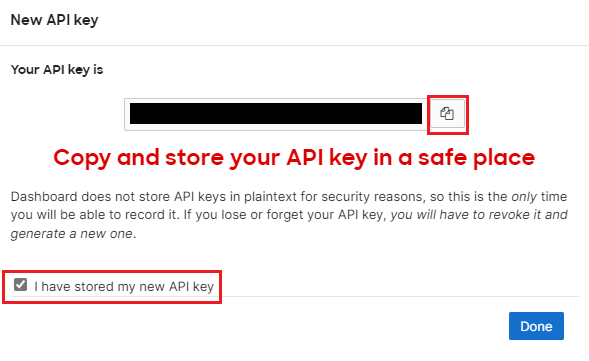
8. Select the I have stored my new API key once you have pasted it into a .txt file. (You must check this box before you are able to select the Done button.)
Note that this is the only time you’ll be able to grab your key, as Cisco Meraki does not store the plain text key. You’ll need to revoke this specific key, and then create a new one if you do not capture it as this time.
9. Proceed to the Asset Panda and Cisco Meraki Integration section below.
Asset Panda and Cisco Meraki Integration
Use the instructions in this section to successfully integrate your Asset Panda and Cisco Meraki accounts.
To set up your integration:
1. Log into your Asset Panda account.
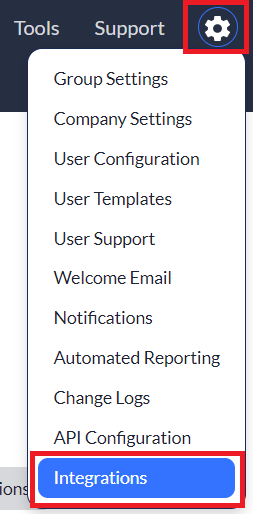
2. Click your settings  icon, and then select Integrations.
3. Select Cisco Meraki from your Integrations menu, located on the left side of your screen.
Settings
Use the following instructions to configure your integration settings within Asset Panda.
1. Select the Settings tab.
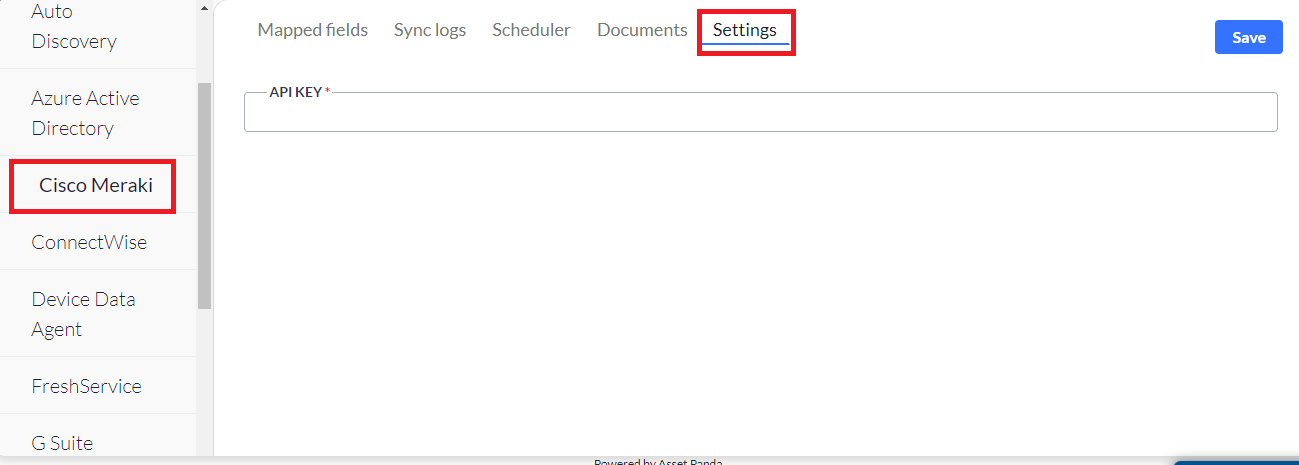
2. Enter the API Key obtained from the Cisco Meraki API Credentials section.
3. Click Save.
Mapped Fields
Use the following instructions to configure your mapped fields within Asset Panda.
NOTE: To prevent the duplication of records, the following fields must be defined as unique and not include a blank value:
- Device - link with the serial_number field
- Network device - link with the MAC_address field
See Unique Rule for more information about unique fields.
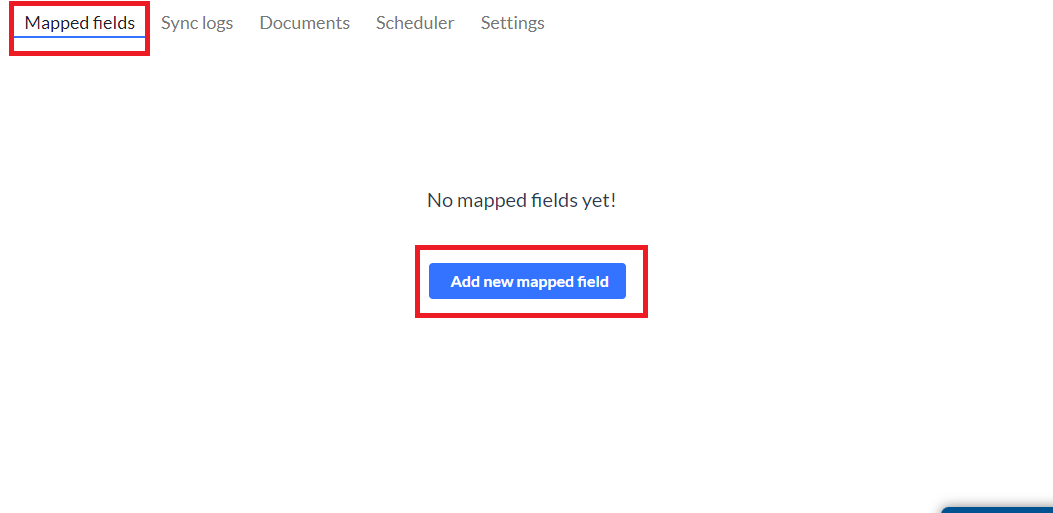
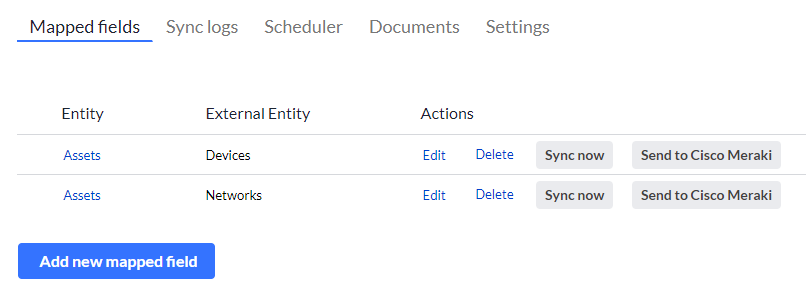
1. Click the Mapped Fields tab, and then select Add new mapped field.
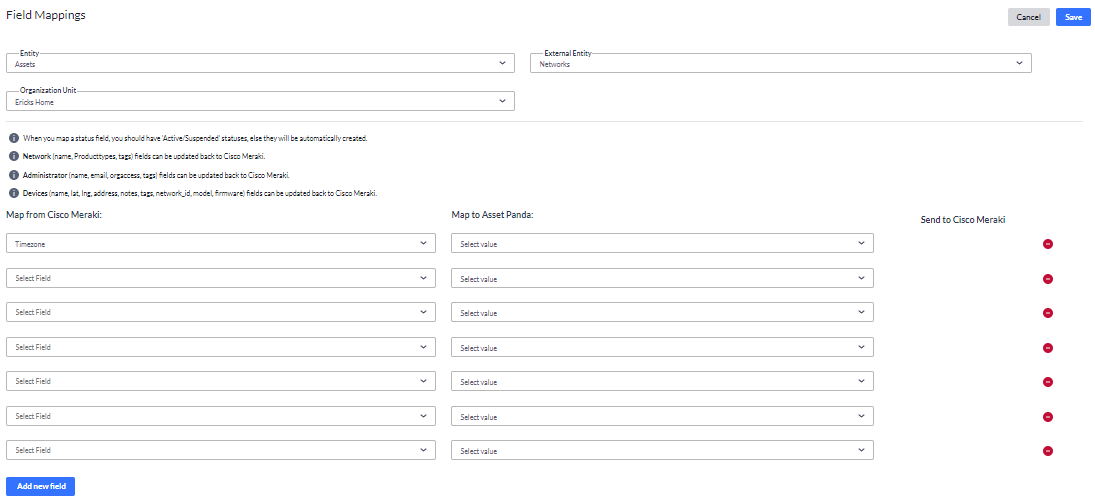
Use the following drop-down menus to:
2. Select the Entity (from within Asset Panda) and External Entity (from within Cisco Meraki).
3. Select your Organization Unit.
4. Select the fields you wish to Map from Cisco Meraki and Map to Asset Panda.
NOTE: The Cisco Meraki Timezone mapped field functions differently than the Timezone mapped field in Asset Panda. The Cisco Meraki Timezone field displays the Timezone the device is in, whereas the Timezone field in Asset Panda is a calculation-type field.
5. Select the Send to Cisco Meraki checkboxes for those fields you wish to update back to Cisco Meraki.
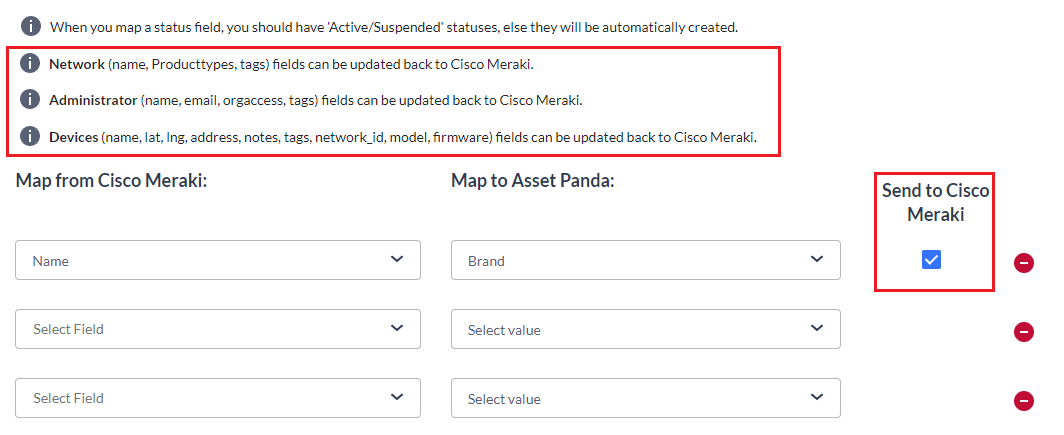
6. Click Save.
7. From the Mapped Fields page, click Sync now. This pulls your Cisco Meraki information into Asset Panda, whereas Send to Cisco Meraki pushes your Asset Panda information into Cisco Meraki. Network devices are synced between systems.
8. Your items begin to synchronize and you will receive an email once it is complete.
NOTE: All sync information can be viewed by clicking the Sync Logs tab. See the Sync Logs section below for more information.
You can view your linked devices from within your Asset Panda groups.
Sync Logs
Your Sync Logs store all your syncing information and are divided by year and month.
1. Click the Sync Logs tab, and then select your desired year and month to expand your logs for the specified timeframe.
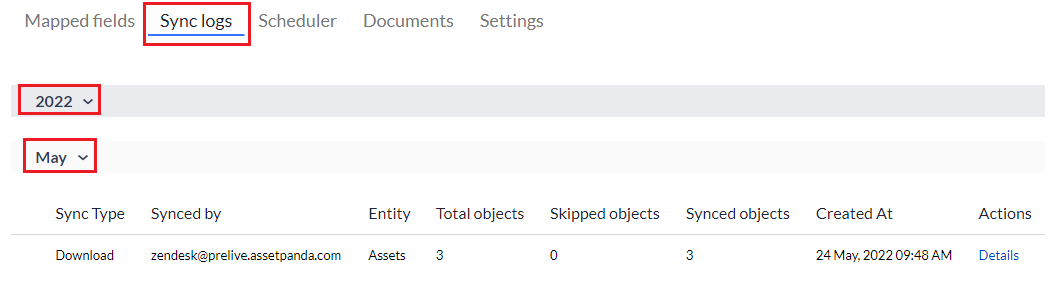
2. Click the Details link to view a more detailed log of sync information.
Schedulers
Use the Schedulers feature to set up automatic sync schedules. (You can choose when and how often your syncs occur.)
NOTE: A maximum of two schedules may be added at any given time. At least one must be deleted if you find the need to setup new schedules.
To begin:
1. From the Cisco Meraki page, click the Scheduler tab.
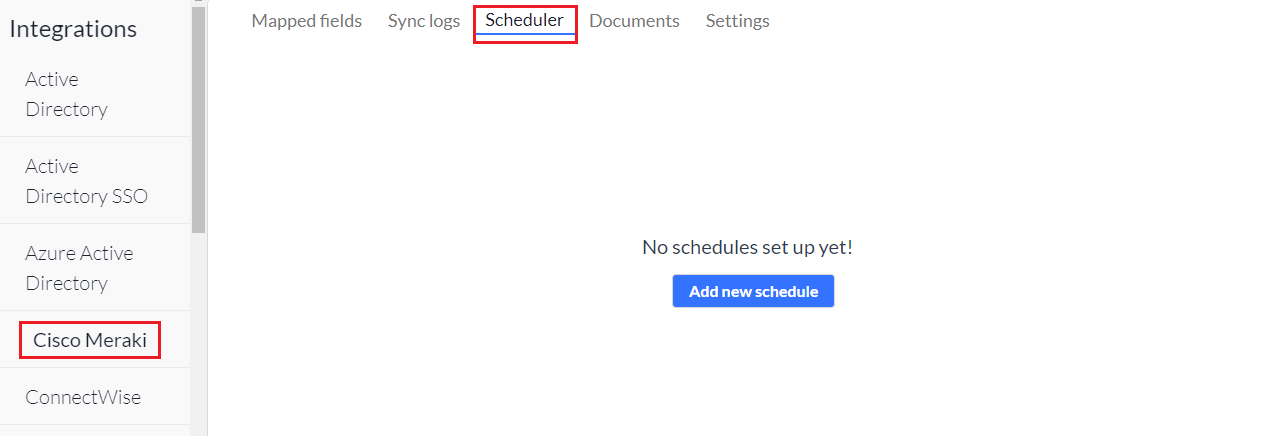
2. Click Add new schedule if you do not currently have any existing schedules.
The Add Cisco Meraki Schedule page displays.

3. Enter your preferred scheduler name into the Name field.
This is a required field.
4. Use the Schedule for Field Mapping drop-down menu to select the group you wish to sync to.
The groups included within this drop-down menu are pulled from fields you mapped within the Mapped Fields section. This is a required field.
NOTE: You must create a schedule for each group.
5. Use the Sync type drop-down menu to select your preferred sync type.
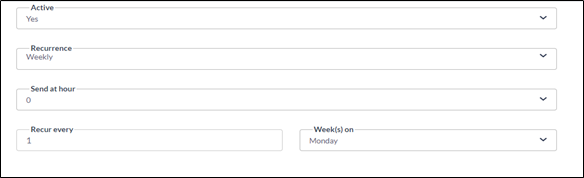
6. Use the Active drop-down menu to select Yes, and to activate your scheduler.
7. Use the Recurrence to select:
- Daily – Select Daily, the hour, and day of the week.

- Weekly – Select Weekly, the hour, the frequency, and day of the week.
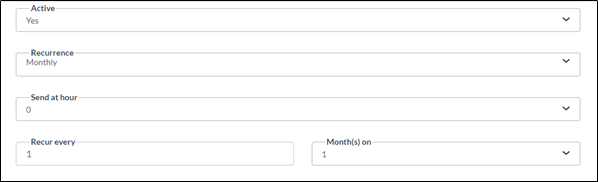
- Monthly – Select Monthly, the hour, and the frequency (includes the frequency of the month such as every month, every other month, etc., and the day of the month).
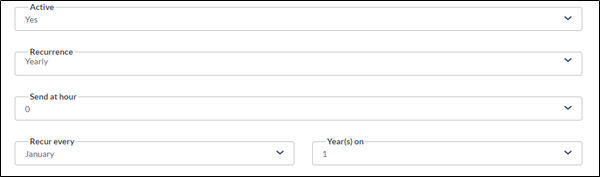
- Yearly – Select Yearly, the hour, and the frequency (includes the specific month and day of the month you wish to schedule).
8. Click Save.
Your new schedules display.
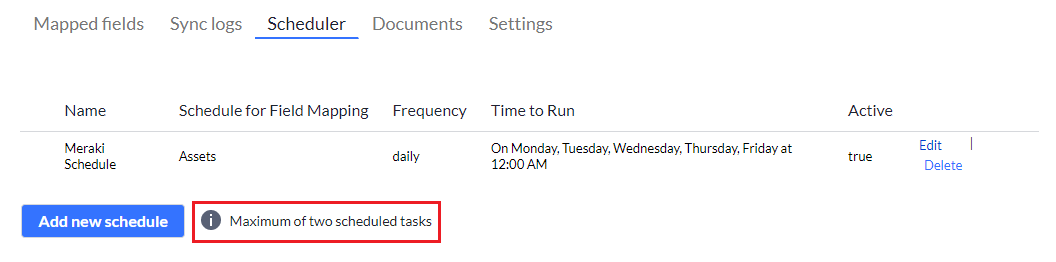
NOTE: There is currently a maximum of two scheduled tasks.