Check Out Reports
A check out report is an action report. You can click Action Reports to learn more about what they are and how they work but overall, they're pretty useful because they give you the ability to pull current data and workflow from records within a group, as well as pull action history from that group’s workflow.
Let's now create a check out report. You may even want to create more than one!
1. Navigate to your Reports group, and then click the + to expand your Action Reports.
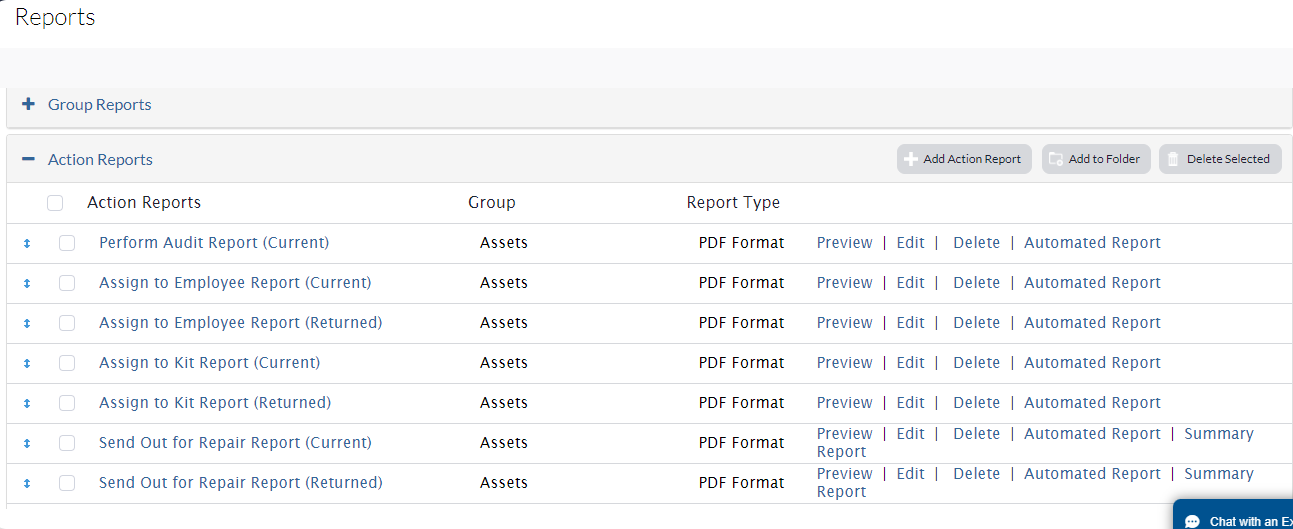
2. Click the Add Action Report button.
Just like magic, lots of fields appear on your screen to help you build your new action. You'll start by naming your report, and will then decide on the output of your report. PDF, CSV...the choices!
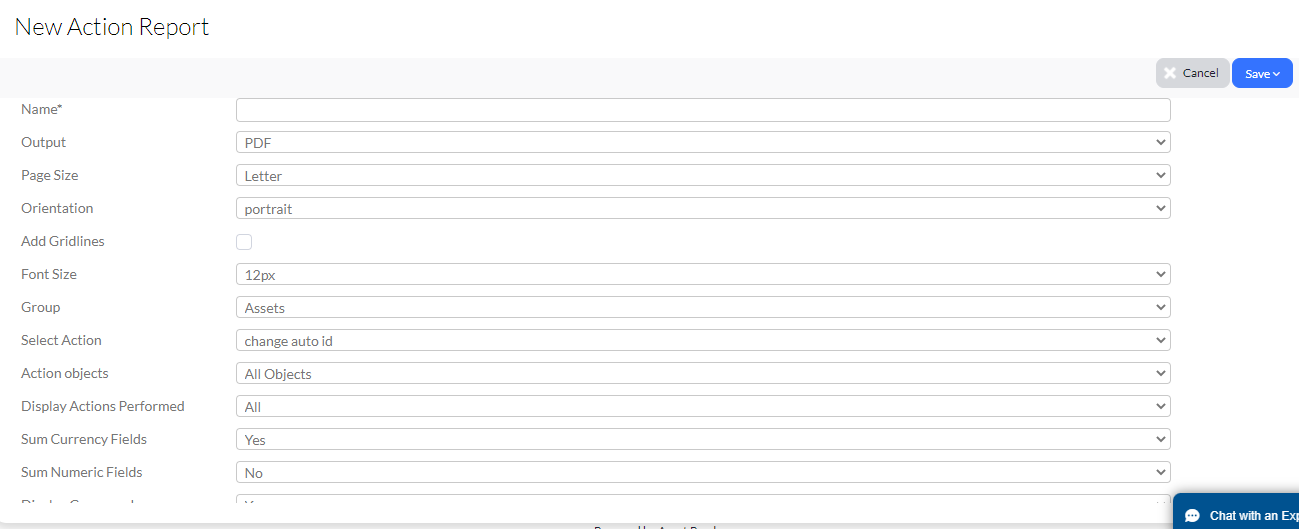
You might now be wondering, "Asset Panda, what sets action reports apart from group reports?" Glad you asked! The answer lies within the ability to choose an action that is included in the report.
This is where the check out action enters the picture. For instance:
3. Click the Group drop-down menu to select the group you wish to run your report on.
4. Use the Select Action drop-down to select the action which in this case, will be the Check Out action. (You knew we were going to say that, didn't you?)
Something to remember here is this. The group you choose must contain a check out action. Otherwise, you won't be able to select a check out action. You'll need to create one (see Action Types) if you need one, but don't yet have one.
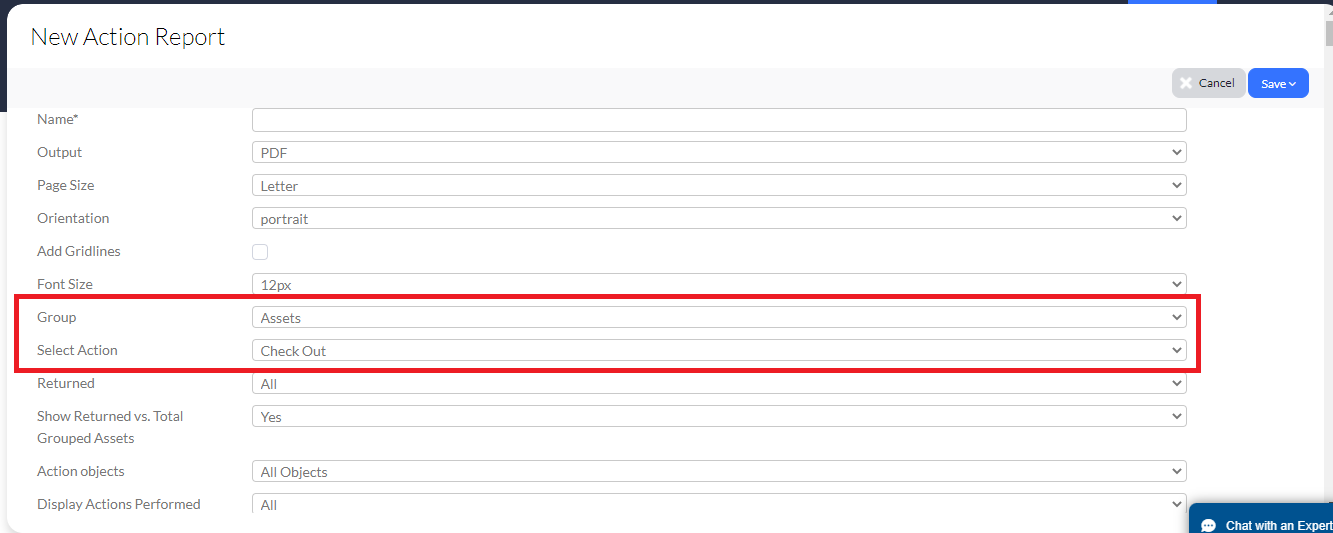
As you've likely noticed (if you took a look at the screenshot above), we selected our Assets group from the Group drop-down menu. Our Assets group contained a Check Out action, so we were able to select it from our Select Action drop-down menu.
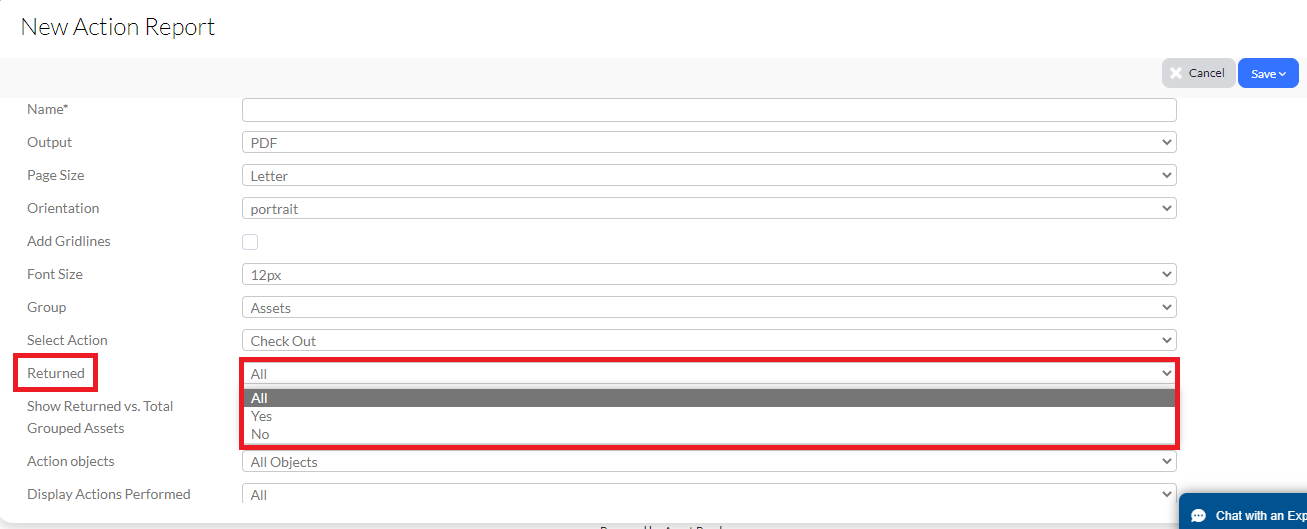
Another thing you'll be able to do....you will have options (via the Returned field) to filter your results in several ways IF your action has a return option.
5. Use the Returned drop-down menu to select one of the following options:
- All: Lets you display all the assets the action has been performed on.
- Yes: Lets you see only the assets that have been returned.
- No: Lets you see only the assets that are still checked out.
6. Select Yes or No from the Show Returned vs. Total Grouped Assets field to display returned assets versus all the assets in the group.
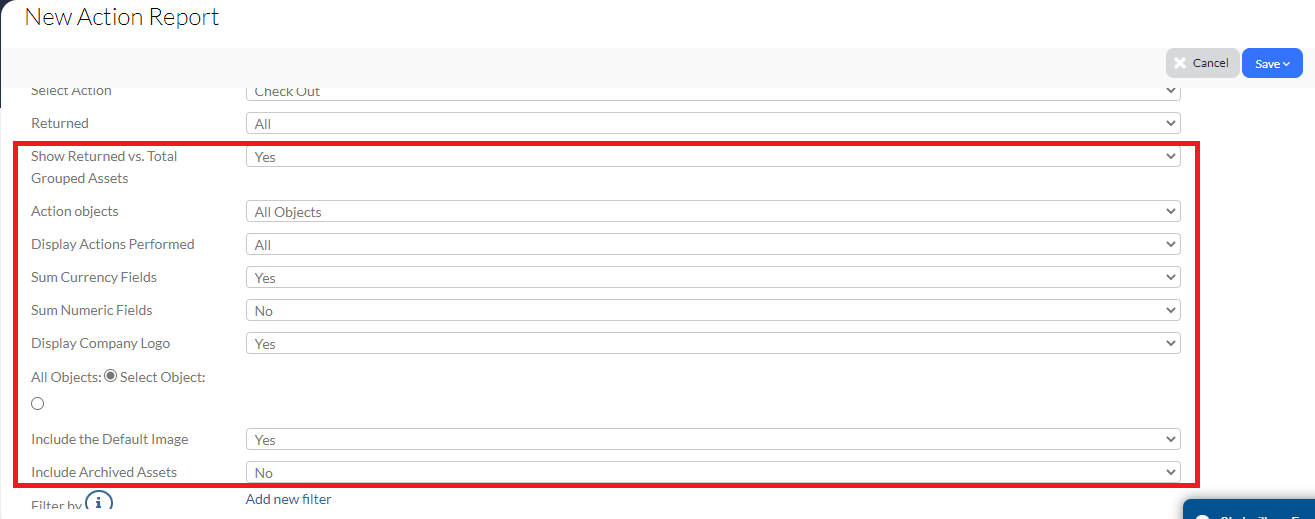
7. Use the Action objects drop-down menu to allow (or not) filtering of your results to show All Objects or Only objects that have this action performed on.
8. Use the Display Actions Performed drop-down menu to select:
- All: Lets you see all of your action history, no matter when it was performed.
- First: Lets you see logs of the first time the action was performed on a record.
- Last: Lets you see logs of the last time the action was performed on a record.
-
9. Select your sum fields, and company logo (if you wish to add one).
10. Select to include All Objects or Select Objects.
Note that selecting All Objects automatically just assumes that you mean what you say and want to include all objects without question. Choosing the Select Objects option offers you additional choices, letting you make a few customize selections as to which objects you include.
11. Select your default image (only if you want one), and whether you'd like to include any of your archived assets.
12. Add any filters you wish to add, along with any more customized order(s) you'd like your fields to be organized.
Before you know it, you arrive at your filter options.
10. Click the blue arrows within the Available Fields to move them over to Selected Fields.

Choosing from the Available Fields list allows you to choose which fields show up in your Check Out report.
11. Finally, click Save to save your new Check Out report. (If only everything was this easy!)
Related Topics