Archive Records
Asset Panda provides you with the ability to archive your records. This is an excellent ability because it allows you to store the record history of a specific asset, while removing the asset from your overall billable count.
Archiving also:
- prevents discontinued assets from being updated or moved by users.
- prevents loss of history and data that is caused when a record is deleted from the system.
This article covers lots of archiving info and how-to. You can read in order or skip ahead. We fully support doing whatever it is that floats your boat!
Phew. I think we've covered the initial basics. Let's now jump into the how-to of it all!
Set user permissions
It's time to learn all about archiving!
The first thing you'll need to do is update user permissions. (This is likely usually performed by your company administrator, so you may not have permissions unless of course, you are the company admin.)
Specific Users
1. Click your settings ![]() icon, and then select User Configuration.
icon, and then select User Configuration.
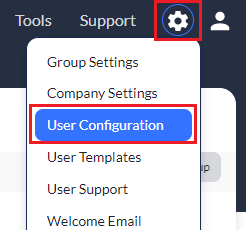
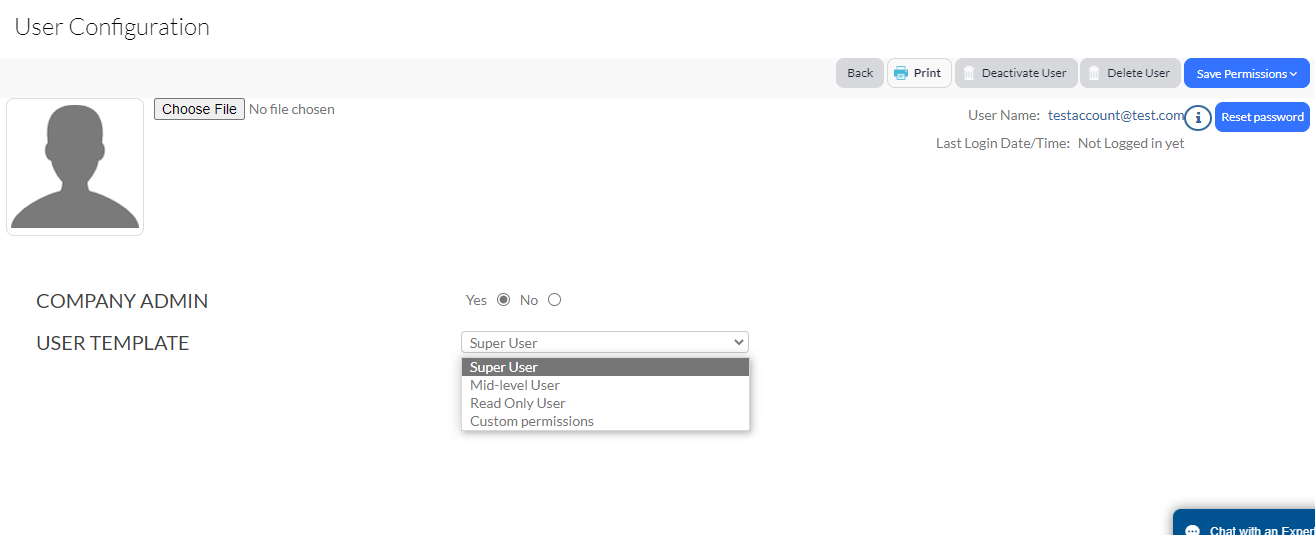
2. Select the user that you want to enable archiving for, and then select Edit user permission.

3. Select the permission(s) you want to set for the specific user(s).
Multiple Users
You can also grant permission to multiple users, all at once:
1. Click your settings ![]() icon, and then select User Templates.
icon, and then select User Templates.

2. Click Edit for the type of user you want to grant permissions to. (Don't panic if your screen looks a bit different than our example above. Your users may differ. It's all good.)
3. Scroll down to Permissions for Group Objects, and then click the + to expand the group in which you wish to enable the archive feature.
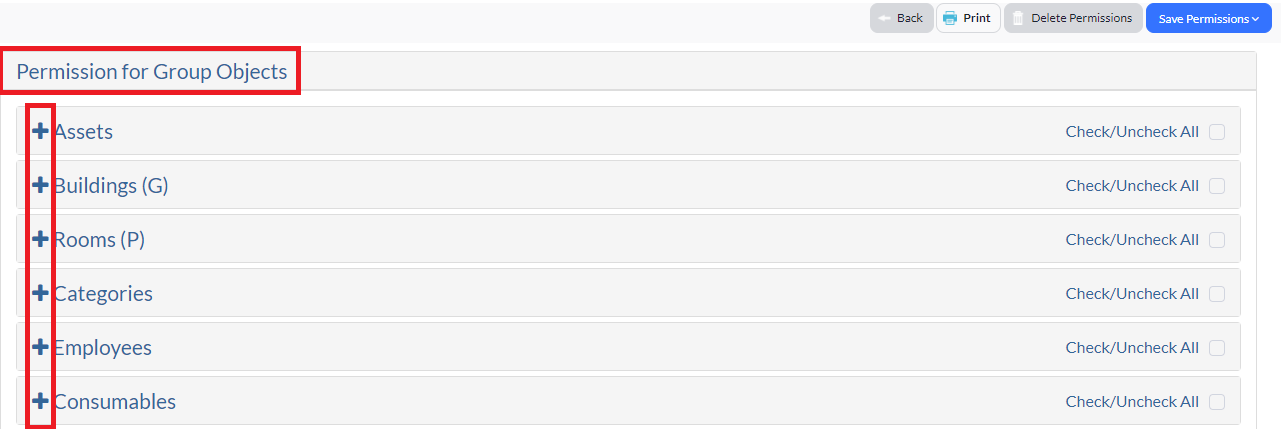
4. Click to select the Archive option.

5. Click Save Permissions and you're good to go!
Archive records
Up to this point, we've talked about archiving, a lot. Let's now talk about how to archive (finally).
1. Navigate to your group. (We're using our Assets group in our example.)
2. Select the records you want to archive.
3. Click the ellipses  icon, and then select Archive/Activate.
4. Select Archive.

A message magically appears, asking you to enter the Depreciation/Inflation Stop Date.

4. Enter the date, and then click Archive.
Pretty cool, huh?
View archived records
So, it's great to be able to archive your records but what happens when you want to view those archived records and how do you do it?
1. Navigate to the group in which you want to view archived records.
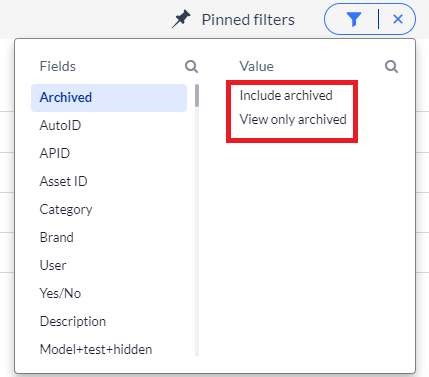
2. Select your filter ![]() icon, and then select Archived.
icon, and then select Archived.
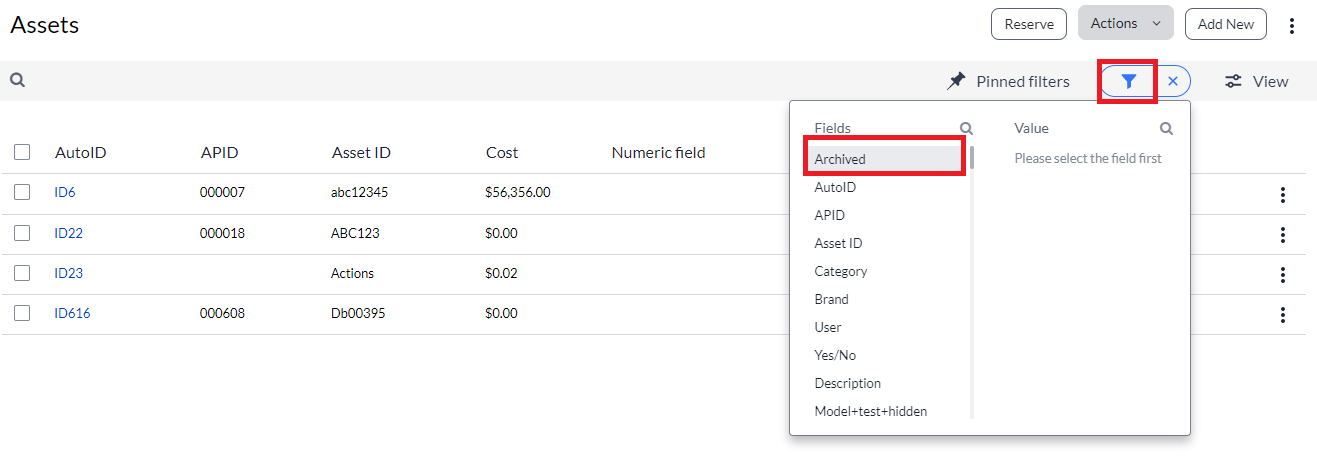
3. You have all the power here because you can select whether to Include archived, or View only archived.
Remove records from archived status
Archiving a record doesn't mean that it must stay that way forever. You can remove it from archived status at any time. This is all accomplished through our Activate feature.
1. View your archived records (check out View Archived Records if you need a refresher).
2. Select the archived records you want to activate (remove from archived status).
3. Click the ellipses  icon, and then select Archive/Activate.
4. Select Activate.

Just like that, they are now removed from archived status and re-activated (hence, the Activate feature)!
But wait! There is another way you can remove an individual item from archived status. (We've got lots of tricks up our sleeves.)
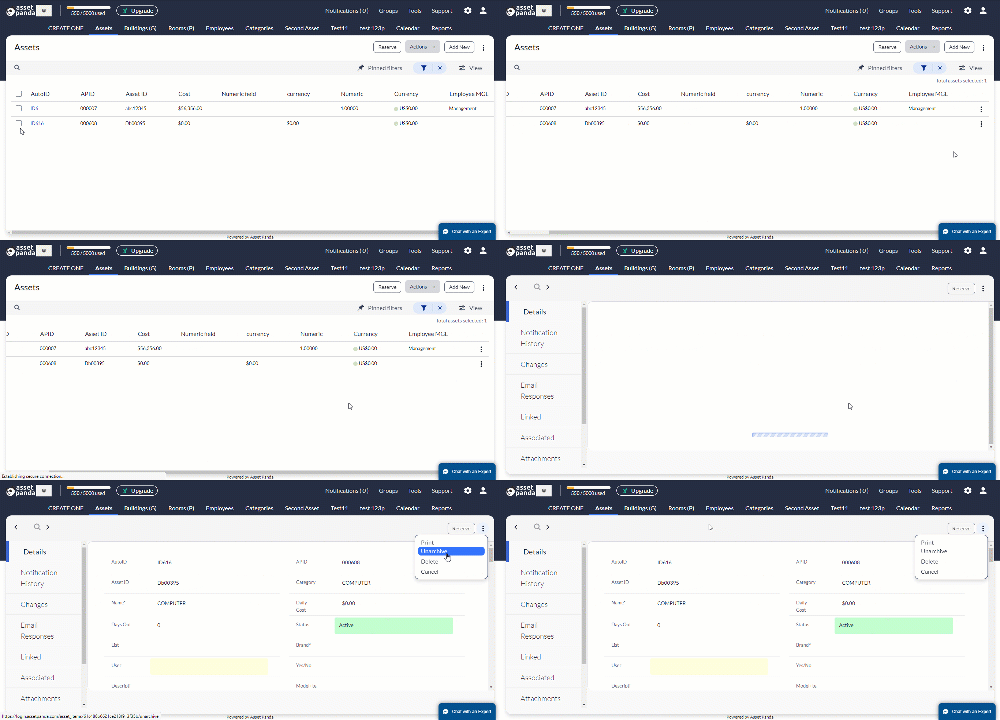
1. View your archived records, and then select the record you want to re-activate.
2. Click the ellipses  icon of that record (located on the end of the record), and then select View.

3. Click the ellipses  icon, and then select Unarchive.
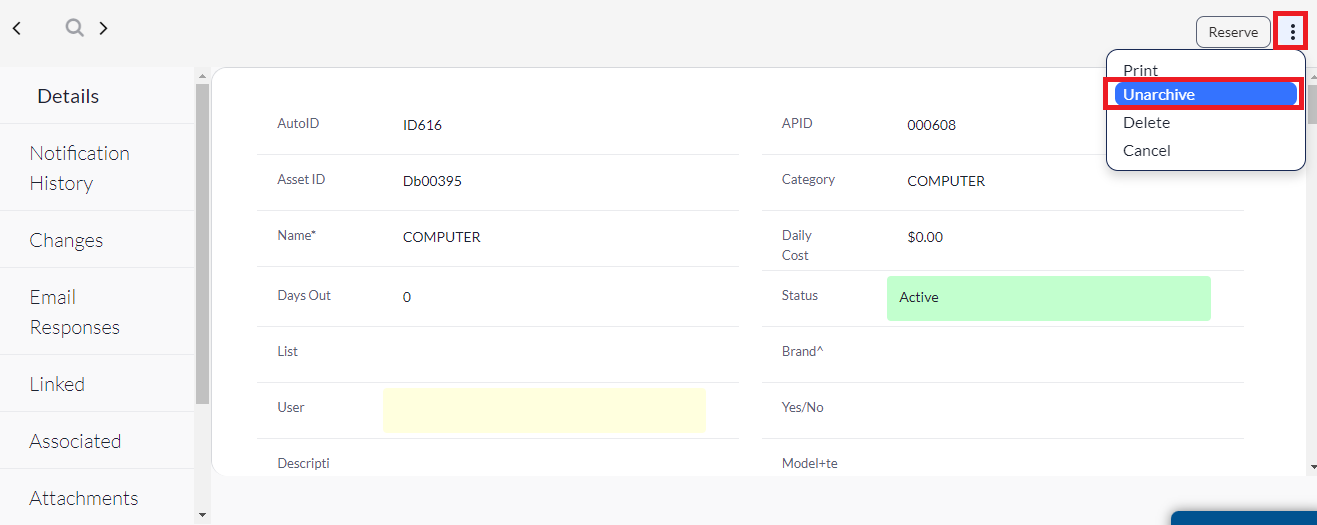
You can likely guess what happens next but we'll tell you anyhow. The record is removed from its archived status.
One last, parting note. If you remove a record from archived status, and then archive it again, the system will allow you to stop depreciation on a new date and will overwrite the existing stop date.
Let the party begin!
Related Topics