ServiceNow Integrations Setup
Version 10.6.23
This guide assists in the integration of a two-way sync between your ServiceNow and Asset Panda accounts. This Integration Supports ServiceNow ITSM and FSM.
NOTE: Field Service Management (FSM) is enabled in the ServiceNow platform. ITSM comes standard with integration in Asset Panda.
NOTE: ServiceNow is a third-party application and Asset Panda does not control updates made by ServiceNow. As a result, your screens and options may vary from those you see in our examples below. See ServiceNow Product Documentation for the most up-to-date technical information.
NOTE: When information is updated on either platform, Asset Panda or ServiceNow, two-way sync is required for the updates to be synced on both platforms.
NOTE: Incidents (tickets) created from within ServiceNow are not pulled into Asset Panda however, incidents created from with Asset Panda are pulled into Service Now.
We recommend following these processes sequentially if this is your first time integrating ServiceNow and Asset Panda.
This integration includes:
- ServiceNow Implementation
- Asset Panda Implementation
- Create a ServiceNow Incident
- Perform Actions from Within Asset Panda
- Review Actions and ServiceNow Incidents
NOTE: You will be copying and pasting values between ServiceNow and Asset Panda during this integration. It is recommended that you paste all values into a text (.txt) file (such as Notepad) so you do not lose them if your system times out. We’d also recommend that you open both of your accounts in separate tabs. This will make it easier to navigate back and forth between your accounts for the setup.
ServiceNow Implementation
To complete your integration on the ServiceNow side:
- Open your ServiceNow instance.
- Once you are signed in, type "Application Registry" into the search bar, and then select Application Registry. The Application Registry page displays.
- Select New, located on the upper, right side of your screen.
- Select Create an OAuth API endpoint for external clients from within the OAuth application section.
- Enter the details into the fields as shown below (the Name field is required), and then select Submit.
- Select the name of the application registry you created in the previous step.
- Open a .txt file (Notepad or similar).
- Copy both the Client ID and Client Secret. Paste these into your .txt file for later use within Asset Panda.
Asset Panda Implementation
To complete your integration on the Asset Panda side:
- Log into your Asset Panda account.
- Select the settings
 icon, and then select Integrations.
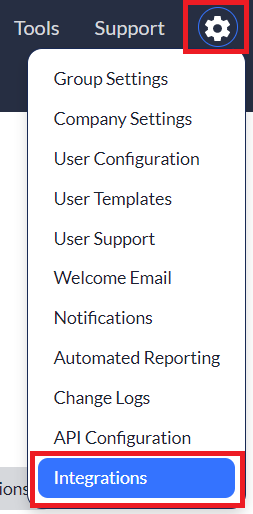
- Select ServiceNow from your available list of integrations, located on the left side of your screen, and then select the Settings tab.
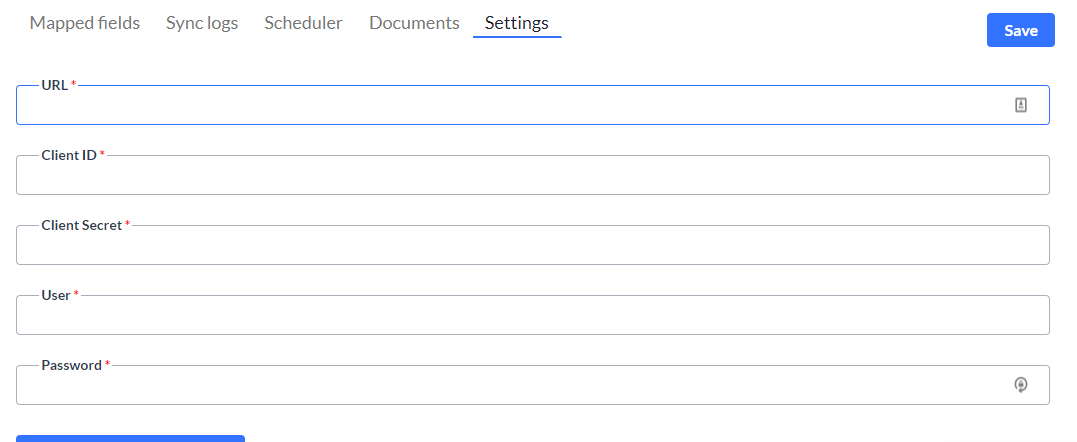
- Enter your ServiceNow instance URL into the URL field.
NOTE: Do not enter anything beyond .com within the URL. For instance, let’s say your ServiceNow application URL is
https://dev12345.service-now.com/. You would only enterhttps://dev12345.service-now.comand not the slash (/) at the end, making certain to also include thehttps://portion at the beginning (or it will not work correctly). - Open your .txt file that contains your Client ID, and Client Secret (from the ServiceNow Implementation section).
- Copy both the Client ID and Client Secret from your .txt file, and then paste them both into the appropriate fields within Asset Panda.
- Enter your ServiceNow Username into the Asset Panda User field, and your Password into the Asset Panda Password field.
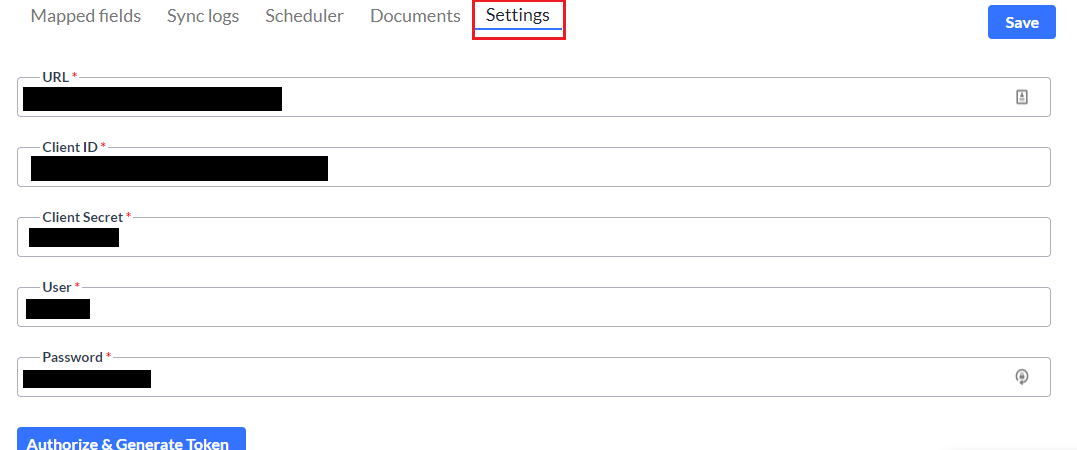
- Select Save.
Your Asset Panda and ServiceNow accounts are now linked.
Mapped Fields
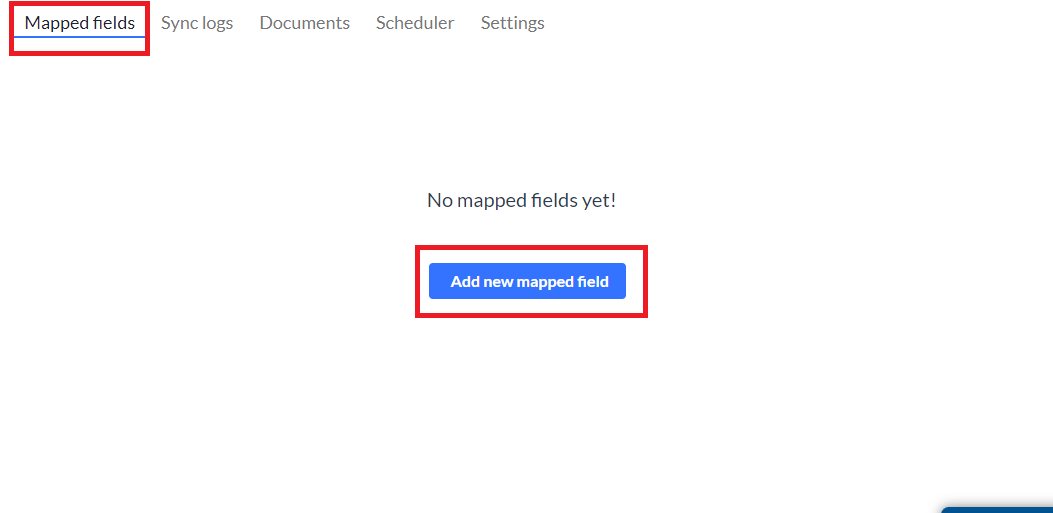
To configure your mapped fields within Asset Panda, select the Mapped Fields tab, and then select Add new mapped field. The field data that is synced is determined by your opting for FSM or the default, ITSM.
Use the drop-down menus to:
- Select the Entity (from within Asset Panda) and External Entity (from within ServiceNow).
- Select the fields you wish to map from ServiceNow and map to Asset Panda. Field options that update back and forth between Asset Panda and ServiceNow:
- Questionaires
- Work Types
- Work Orders
- Work Order Models
- Work Order Tasks
- Work Order Flows
- Work Task Flows
- Select the Send to ServiceNow checkboxes for those fields you wish to update back to ServiceNow.
- From the Mapped Fields page, select Sync now. (This pulls your ServiceNow information into Asset Panda, whereas Send to ServiceNow pushes your Asset Panda information into ServiceNow.)
- Your items begin to synchronize and you will receive an email once your sync is complete.
NOTE: All sync information can be viewed by selecting the Sync Logs tab. See the Sync Logs section below for more information.
Sync Logs
Your Sync Logs store all your syncing information and are divided by year and month.
- Select the Sync Logs tab, and then select your desired year and month to expand your logs for the specified time frame.
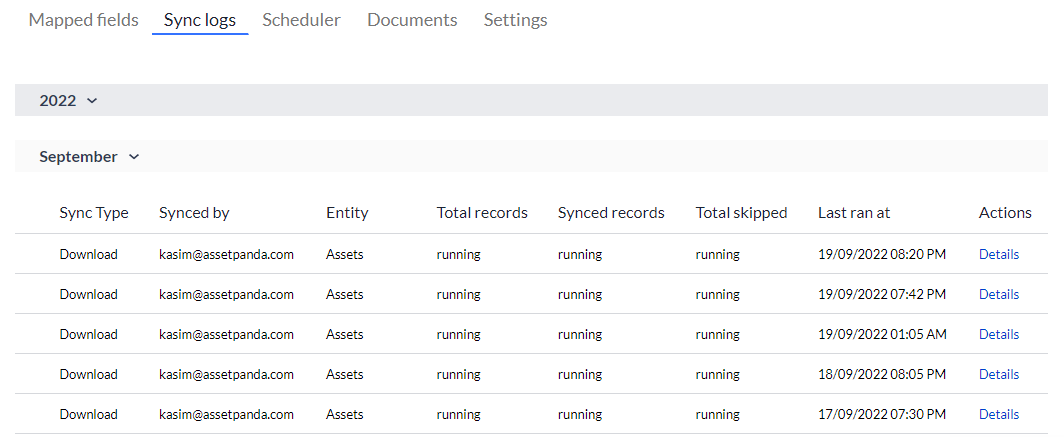
- Select the Details link to view a more detailed log of sync information.
Schedulers
Use the Schedulers feature to set up automatic sync schedules. (You can choose when and how often your syncs occur.)
NOTE: A maximum of two schedules may be added at any given time. At least one must be deleted if you find the need to setup new schedules.
To begin:
- From the SerivceNow main page, select the Scheduler tab.

- Select Add new schedule if you do not currently have any existing schedules. The Add ServiceNow Schedule page displays.
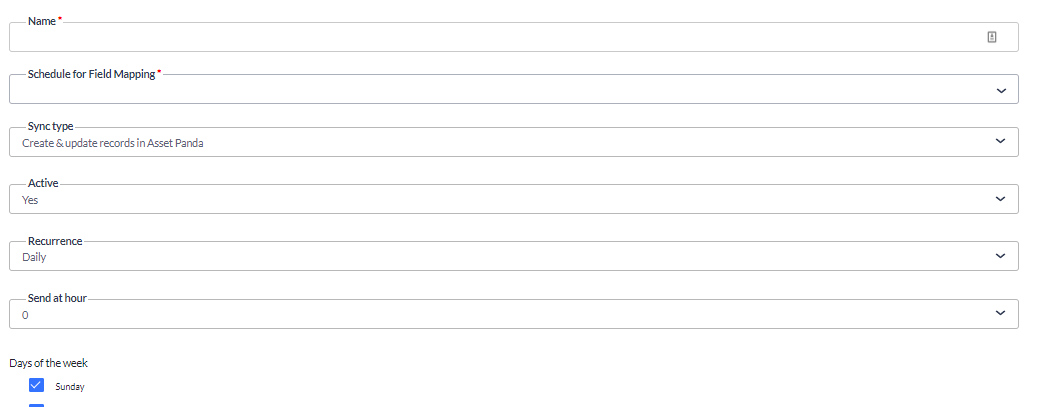
- Enter your preferred scheduler name into the Name field. This is a required field.
- Use the Schedule for Field Mapping drop-down menu to select the group you wish to sync to. The groups included within this drop-down menu are pulled from fields you mapped within the Mapped Fields section. This is a required field.
NOTE: You must create a schedule for each group.
- Use the Sync type drop-down menu to select your preferred sync type.
- Use the Active drop-down menu to select Yes, and to activate your scheduler.
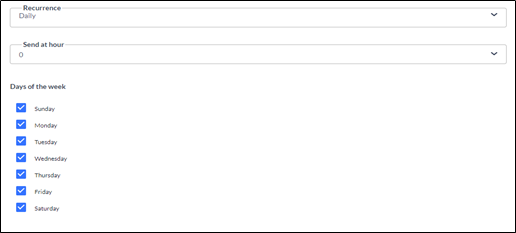
- Use the Recurrence to select:
- Daily – Select Daily, the hour, and day of the week.
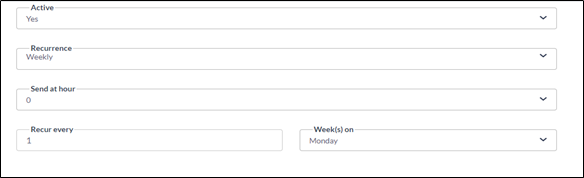
- Weekly – Select Weekly, the hour, the frequency, and day of the week.
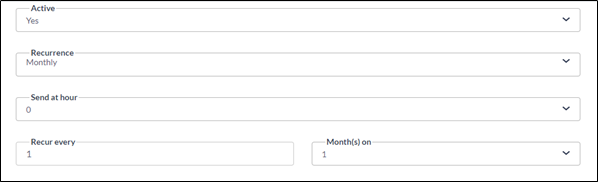
- Monthly – Select Monthly, the hour, and the frequency (includes the frequency of the month such as every month, every other month, etc., and the day of the month).
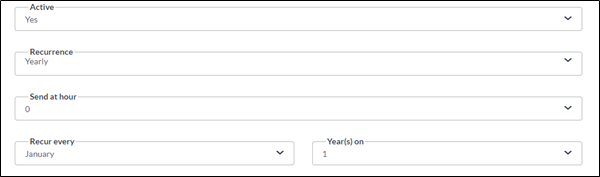
- Yearly – Select Yearly, the hour, and the frequency (includes the specific month and day of the month you wish to schedule).
- Daily – Select Daily, the hour, and day of the week.
- Select Save.
Create a ServiceNow Incident
You can create a ServiceNow incident (ticket) from Asset Panda any time you create or update an action (once ServiceNow is integrated with your account). To create your ServiceNow incident from Asset Panda:
- Create or update an action as you normally would. (See Create or Modify an Action for more information)
- Slide the Create ServiceNow ticket toggle to Yes.
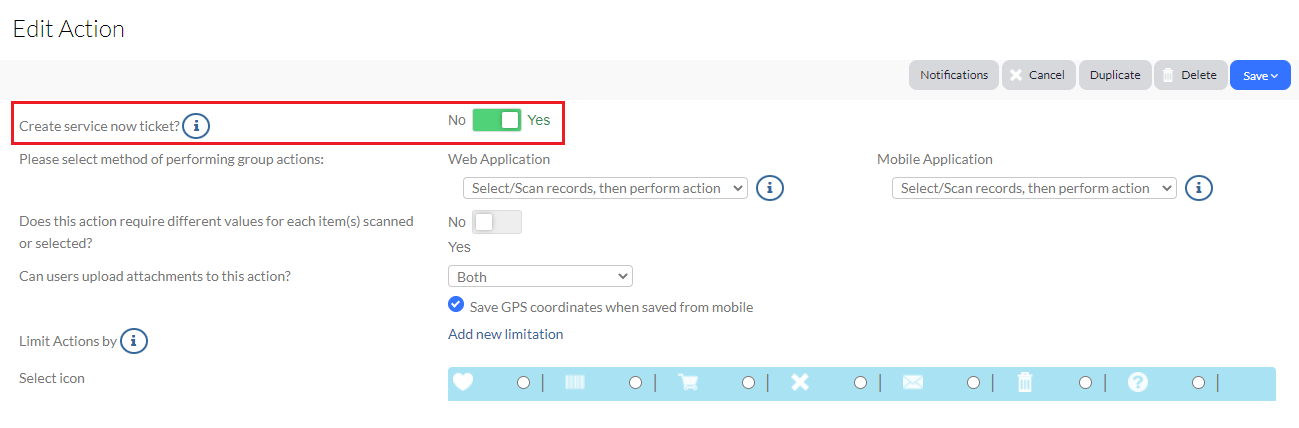
- Select Save.
This action will now be available within your list of actions and will create a ServiceNow ticket when selected. (See either Perform an Individual Action or Perform a Group Action depending on your needs.)
Perform Actions from Within Asset Panda
This section will help you to perform both individual and group ServiceNow actions from within your Asset Panda account.
NOTE: Only standard actions can be used with your ServiceNow integration. All actions must also be one-way. Return and other like actions cannot be used with this integration.
Perform an Individual Action
To perform an individual action from within Asset Panda:
(See ServiceNow Product Documentation for a more in-depth explanation of the following categories.)
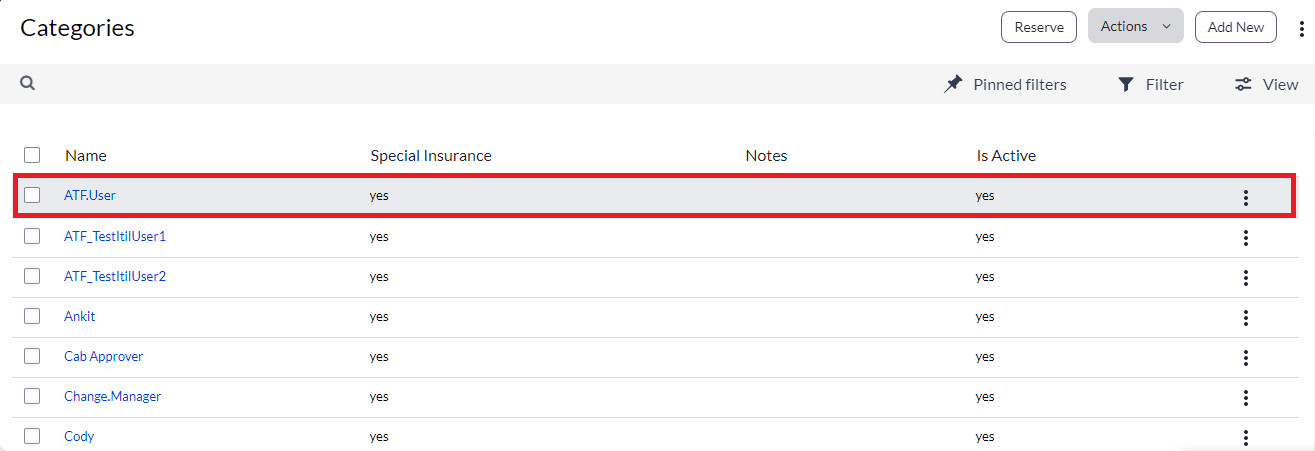
- Navigate to the group you wish to perform the action from within, and then select to select your asset.
NOTE: Select individual assets by selecting on the asset (anywhere within the gray area as shown below), rather than by selecting the checkbox.

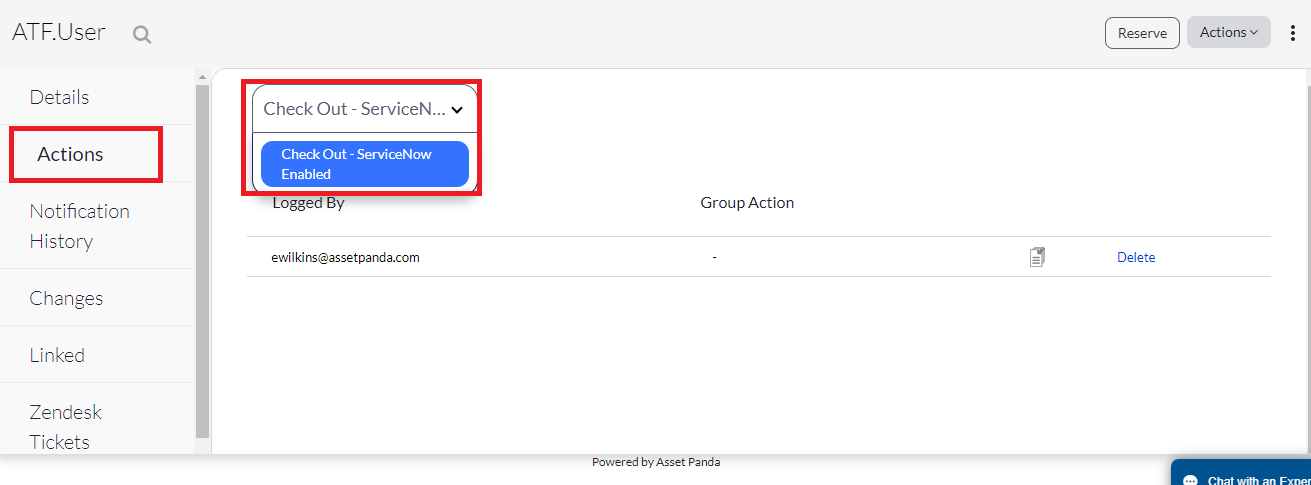
- Select the Actions drop-down menu, and then select the action you wish to perform. (The action must be enabled for ServiceNow. (See step 1 and 2 of the Create a ServiceNow Incident section if you need assistance with creating a ServiceNow-enabled action)

Once you select a ServiceNow-enabled action, it is notated as such (see the Example of ServiceNow-enabled action screenshot below). These actions also contain additional fields for your ServiceNow sync. (See the Create a ServiceNow Incident section for more information on how to create a ServiceNow-enabled action)
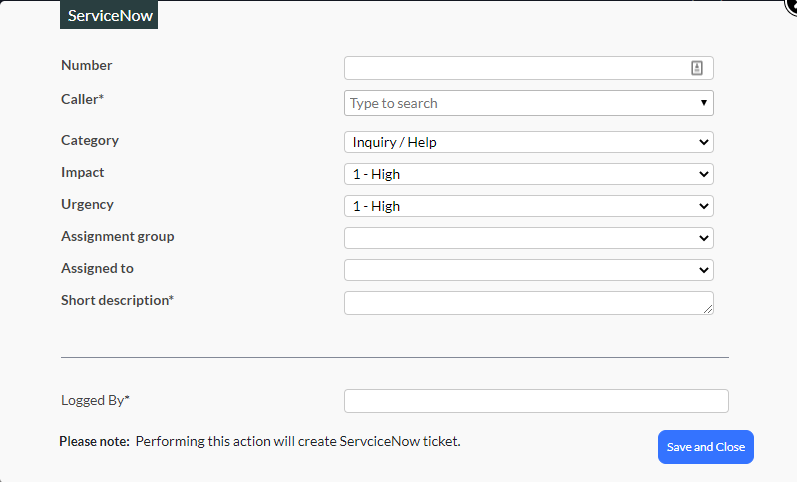
Example of ServiceNow-enabled action
NOTE: Some of the fields in your action (such as the Logged By field in our example above) may differ than ours, depending on the fields you customize.
- Verify that your action indicates that it is a ServiceNow-enabled action, as shown in our Example of ServiceNow-enabled action above (see Create a ServiceNow Incident if your action is not ServiceNow-enabled), and then enter the required information into the appropriate fields (all fields denoted with an asterisk (*) are required):
- Number: The number you wish to assign to your ServiceNow incident.
- Caller: This is usually the person affected by the issue or the person creating the ticket.
- Category: The category of your incident.
- Impact: Denotes the impact level of the incident.
- Urgency: Denotes the urgency level of the incident.
- Assignment group: The group the incident is being assigned to (such as IT, etc.)
- Assigned to: The person responsible for the resolving the incident.
- Short description: A short description of the incident.
- Any customized fields: You will notice that we have a customized field titled, Logged By within our screenshot. This field is pulling from our action fields. Yours will likely vary depending on your fields.
Perform a Group Action
You can also perform group actions from within Asset Panda. Note that a group action creates one ServiceNow incident for all the assets that you select. For example, let’s say you select three assets, and then choose an action. All three of those assets will be included on one ServiceNow incident.
To perform a group action from within Asset Panda:
- Navigate to the group you wish to perform the action from within, and then select your assets.
NOTE: Select multiple assets by selecting the checkboxes located next to each asset, as shown below.
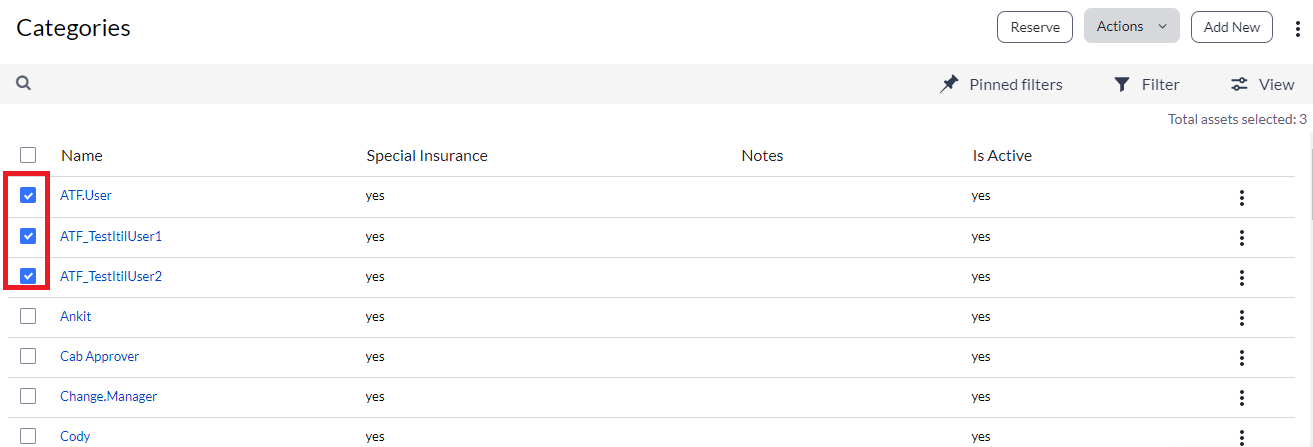
- Select Actions, select Group Action, and then select the action you wish to perform. (The action must be enabled for ServiceNow. See steps 1 and 2 of the Create a ServiceNow Incident section if you need assistance.)

ServiceNow-enabled actions are notated as such (see Example of ServiceNow-enabled action below) and contain additional fields for your ServiceNow sync. (See the Create a ServiceNow Incident section for more information.)
Example of ServiceNow-enabled action
NOTE: Some of the fields in your action (such as the Logged By field in our example above) may differ than ours, depending on the fields you customize.
Verify that your action indicates that it is a ServiceNow-enabled action, as shown in our Example of ServiceNow-enabled action above (see Create a ServiceNow Incident if your action is not ServiceNow-enabled), and then enter the required information into the appropriate fields (all fields denoted with an asterisk (*) are required):
(See ServiceNow Product Documentation for a more in-depth explanation of the following categories.)
- Number: The number you wish to assign to your ServiceNow incident.
- Caller: This is usually the person affected by the issue or the person creating the ticket.
- Category: The category of your incident.
- Impact: Denotes the impact level of the incident.
- Urgency: Denotes the urgency level of the incident.
- Assignment group: The group the incident is being assigned to (such as IT, etc.)
- Assigned to: The person responsible for the resolving the incident.
- Short description: A short description of the incident.
- Any customized fields: You will notice that we have a customized field titled, Logged By within our screenshot. This field is pulling from our action fields. Yours will likely vary depending on your fields.
Review Actions and ServiceNow Incidents
You’ll also want to review the ServiceNow incidents (tickets) and actions that you create for specific assets, while within Asset Panda.
NOTE: This is performed using the action from Perform a Group Action section above.
1. Select the asset in which you have performed a ServiceNow action.
2. Select Actions from the navigation menu on the left side of your screen, and then use the drop-down menu to select the type of action you wish to view.
You’ll see a list of actions and applicable details for that specific asset.
View Incidents
You can view a list of ServiceNow incidents created for each of your assets. You can view these in both Asset Panda and ServiceNow (once they’ve been synced).
View Tickets within Asset Panda
From the navigation menu on the left side of your screen, navigate to and select ServiceNow Tickets.
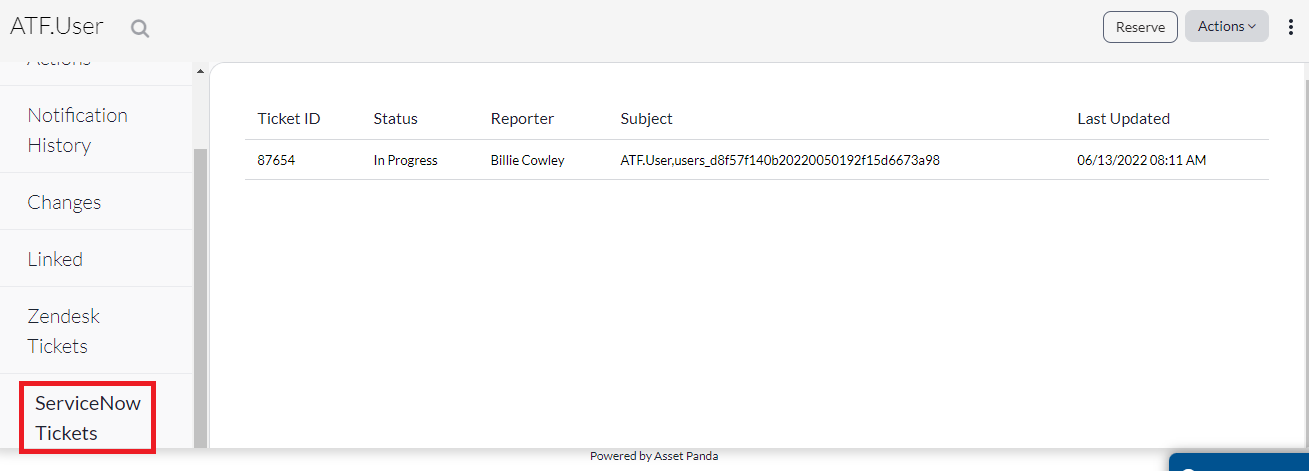
This list displays all ServiceNow tickets (incidents) that have been created for this asset.
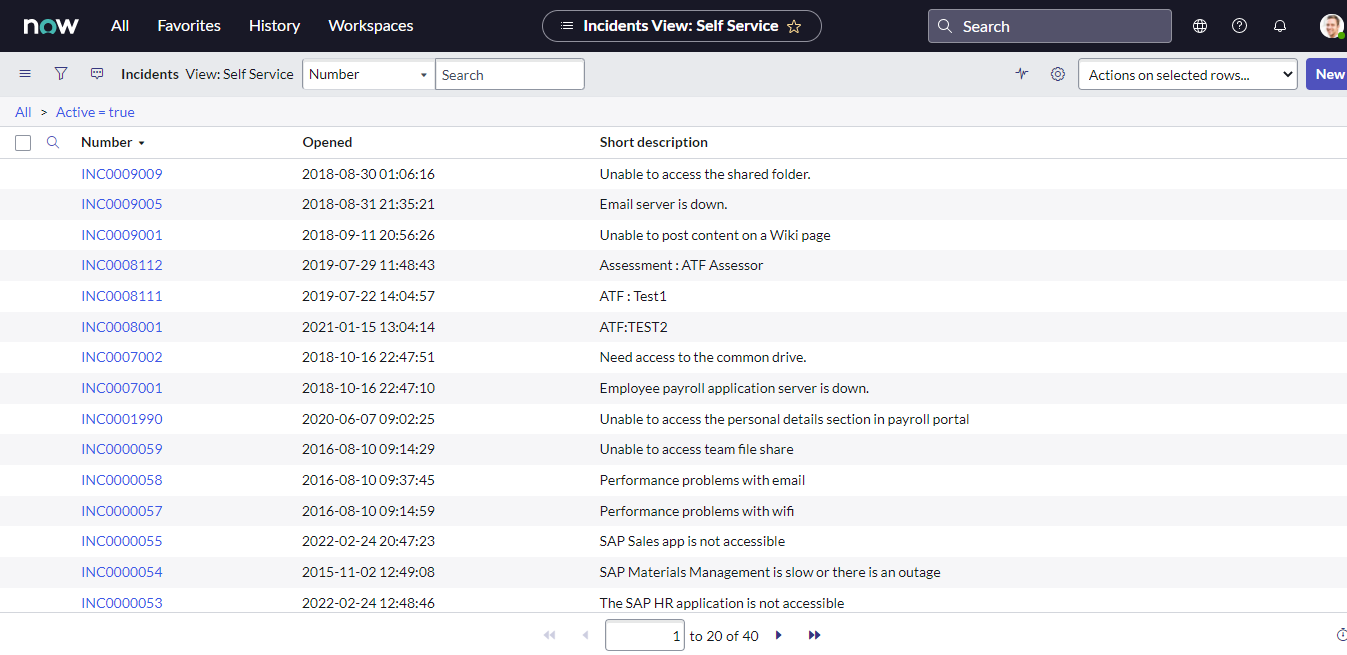
To view from within ServiceNow
- Select your All menu, and then select type Incidents into the search bar.
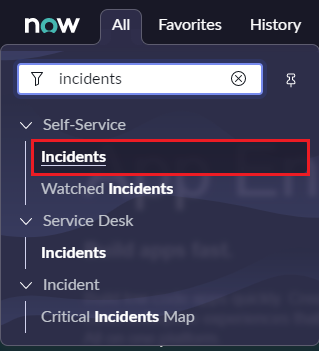
- Select Incidents to all incidents. (This page allows you to search your incidents by setting various filter criteria. If you need more assistance, select ServiceNow Product Documentation to find out more about using this feature, and other features within the ServiceNow application.)