Another way to add records is through the Incoming Email feature.
The Incoming Email feature is a way to add records to Asset Panda. For instance, activating this feature creates an email address. Sending an email to this email address creates a record in Asset Panda. Very cool, right?
We will be using a Work Order group as an example in this article.
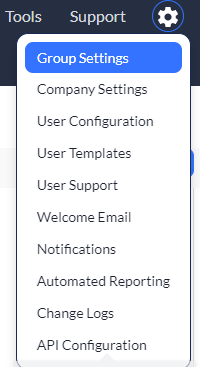
1. Click to select your settings ![]() icon, and then select Group Settings.
icon, and then select Group Settings.
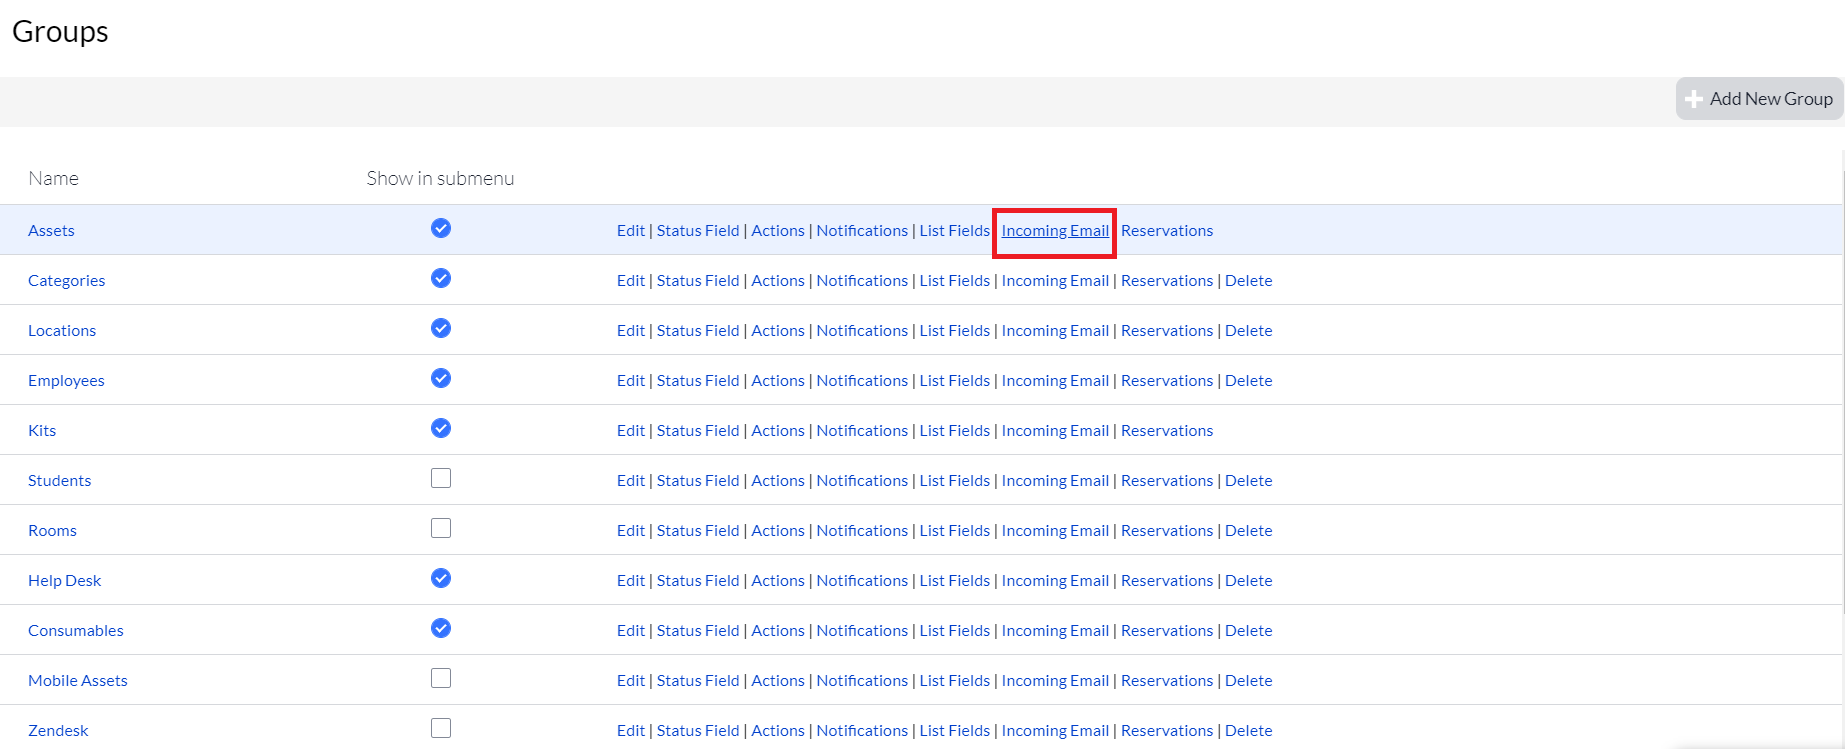
You'll notice that all of your groups magically appear on your screen.
2. Select Incoming Email from the group in which you wish to activate your incoming email.
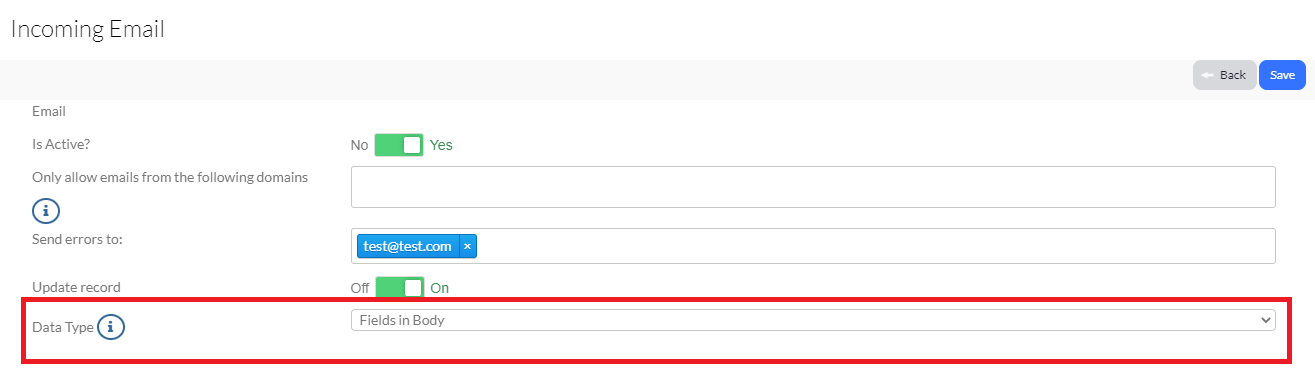
3. Toggle to Yes for the Is Active setting.
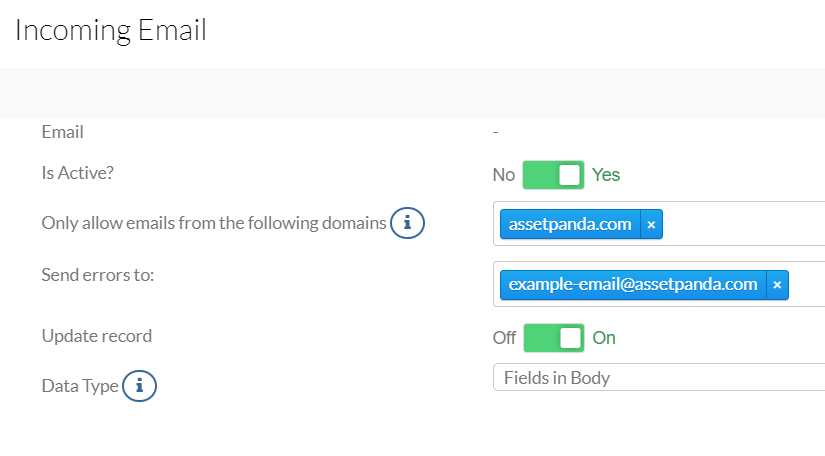
4. Enter the domains that you wish to allow emails from.
5. Enter any email address(es) you wish for errors to be sent to (not required).
6. Toggle the Update record switch to On if you wish for the record to be updated.
7. Use the Data Type drop-down menu to select Fields in Body or Mapping Email. (We'll explain these below to help you decide which to choose!)
Fields in Body
The Fields in Body option allows field names to be typed into an email, and values to be mapped to the fields in the group.
Say we want to map an asset to the Linked Asset field within the Work Order group. The example would appear as:
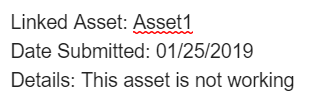
Just like when importing or manually adding records, all required fields will need to be entered. If we are mapping to a Group List or List field, the value would need to be inside the Group List or List before adding (in this case) a Work Order.
Mapping Email
The Mapping Email option allows you to choose which parts of the email to map to which fields within the work order.
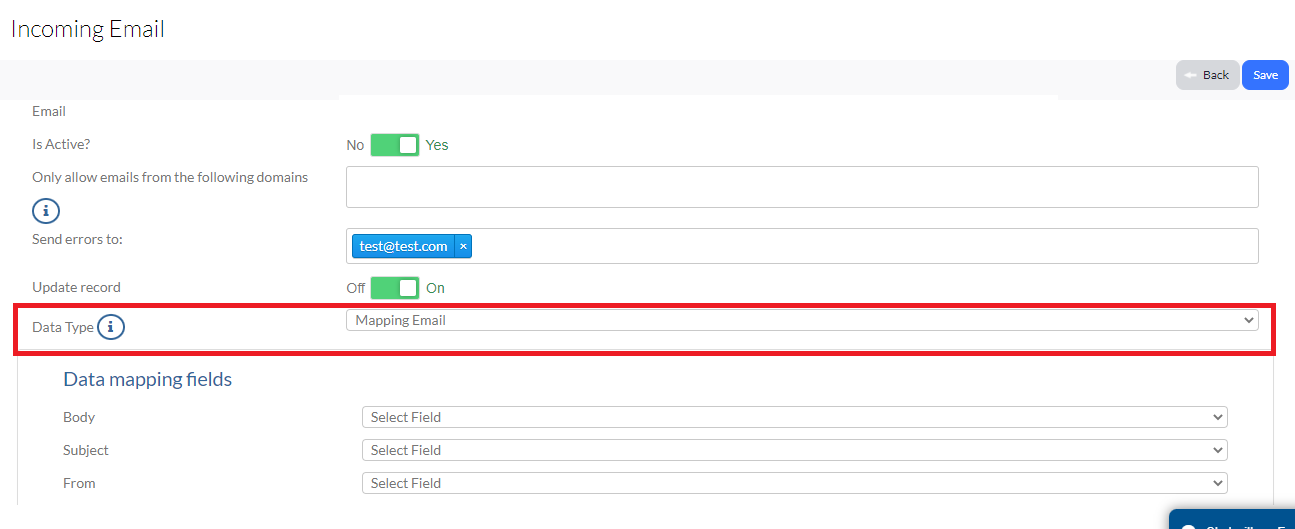
Use the Data mapping fields to choose which parts of the email to map to which fields within the Work Order.
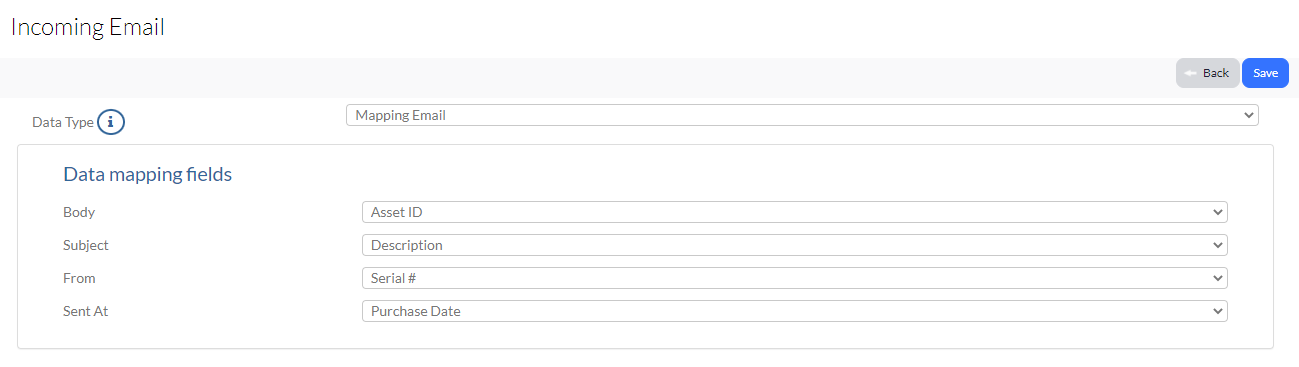
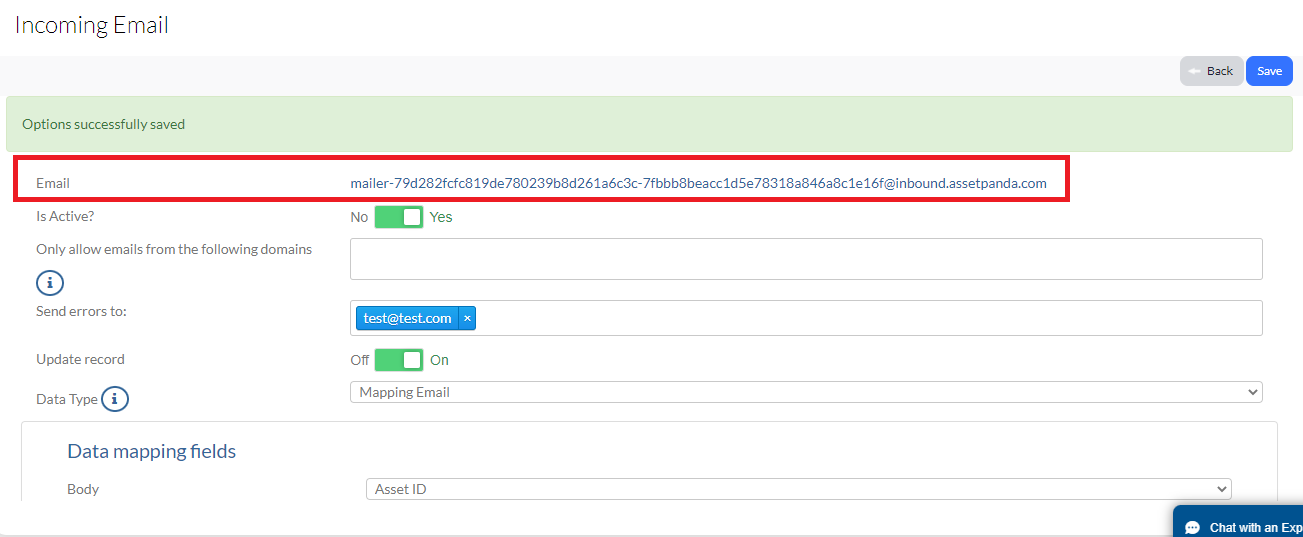
Click Save and you'll notice that an incoming email address displays. Sending an email to this address now creates a record.