Device Data Agent Setup - Deprecated
The Asset Panda Device Data Agent (DDA) allows you to sync over information about your computers that use Microsoft Windows. Both hardware and software contained on these devices can be imported to your Asset Panda account.
NOTE: The agent can create and update computer information only if the agent created the asset. If the computer was created before DDA was setup, it will not be able to update the already existing machine.
The following hardware and software are required to run the DDA:
- Operating System: Windows XP or higher
- 1 GHz or faster processor
- 512 MB of RAM
- 200 MB of available hard disk space
Device Data Agent Configuration
Use the following steps to successfully configure your Asset Panda DDA.
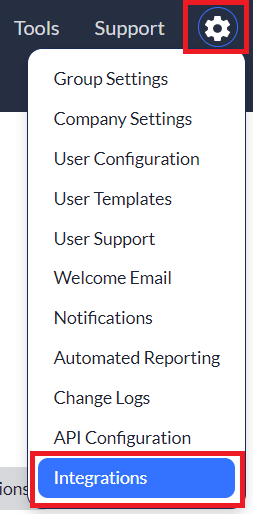
1. Click your settings ![]() icon, and then select Integrations.
icon, and then select Integrations.
2. Select Device Data Agent from the integrations menu on the left side of your screen, and then select the Documents tab.
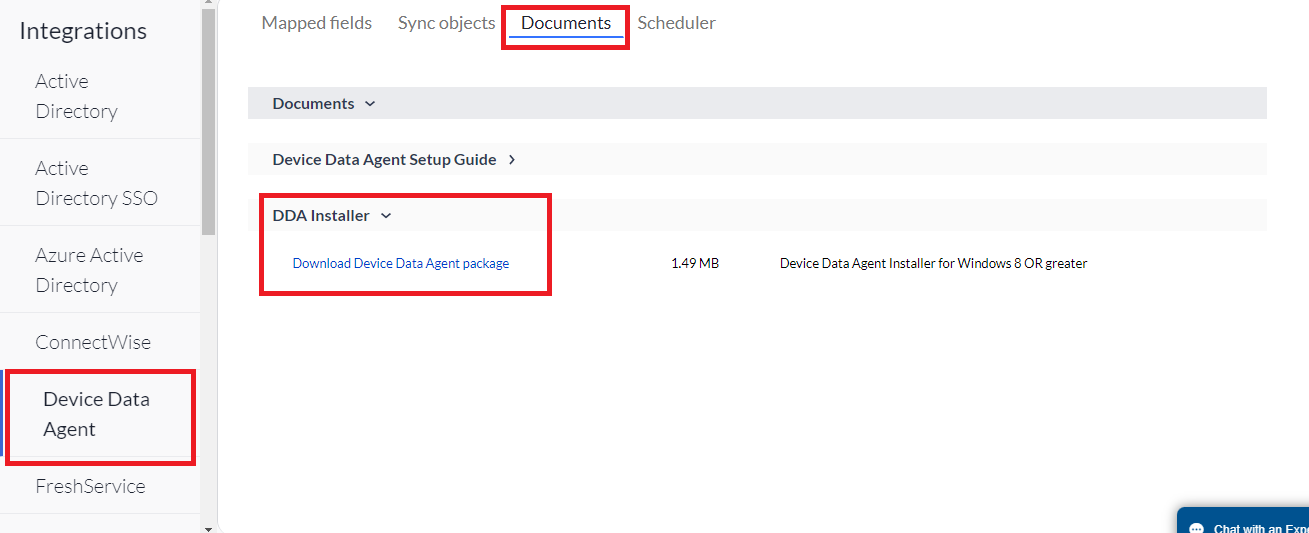
3. Click to open the DDA Installer, and then click to download the latest version of the DDA. (You must extract the file before running the program as it will not function without first doing this.)

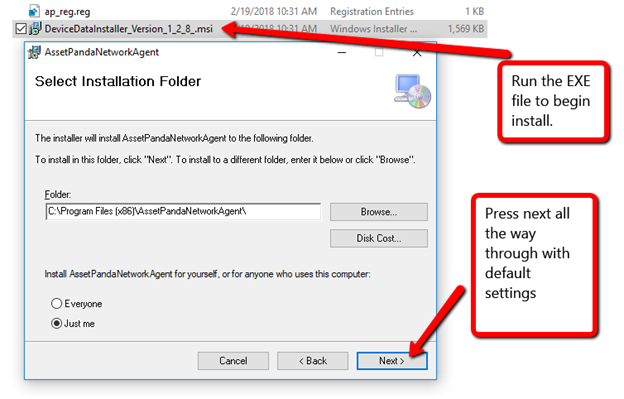
4. Once you've extracted the file, run the DeviceDataAgentInstaller on your machine. (Click Next all the way through the install.)
Once the tool has been installed, you'll see a new panda icon in your task bar. The configuration is done and will now automatically run in the background.

Asset Panda Configuration
Mapped Fields
Once DDA has been installed onto your computer, you'll need to configure Asset Panda, enabling it to accept the data from DDA. To do this:
1. From the Device Data Agent page within Asset Panda, select the Mapped fields tab.
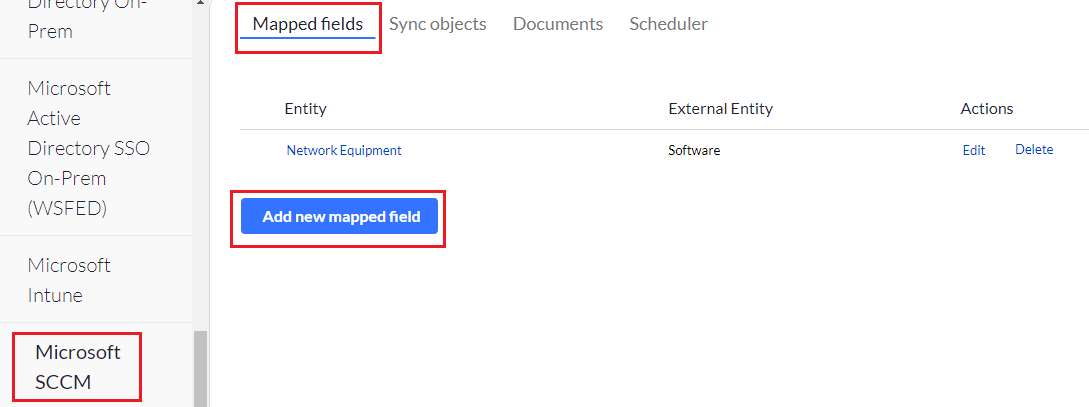
The Field Mappings pages allows you to configure the hardware you wish to pull over into Asset Panda.
2. Use the Entity (Asset Panda groups) and External Entity (DDA entities) drop-down menus to select the entities you wish to pull from.
3. Use the Map from Device Data Agent and Map to Asset Panda drop-down menus to select the fields you wish to map.
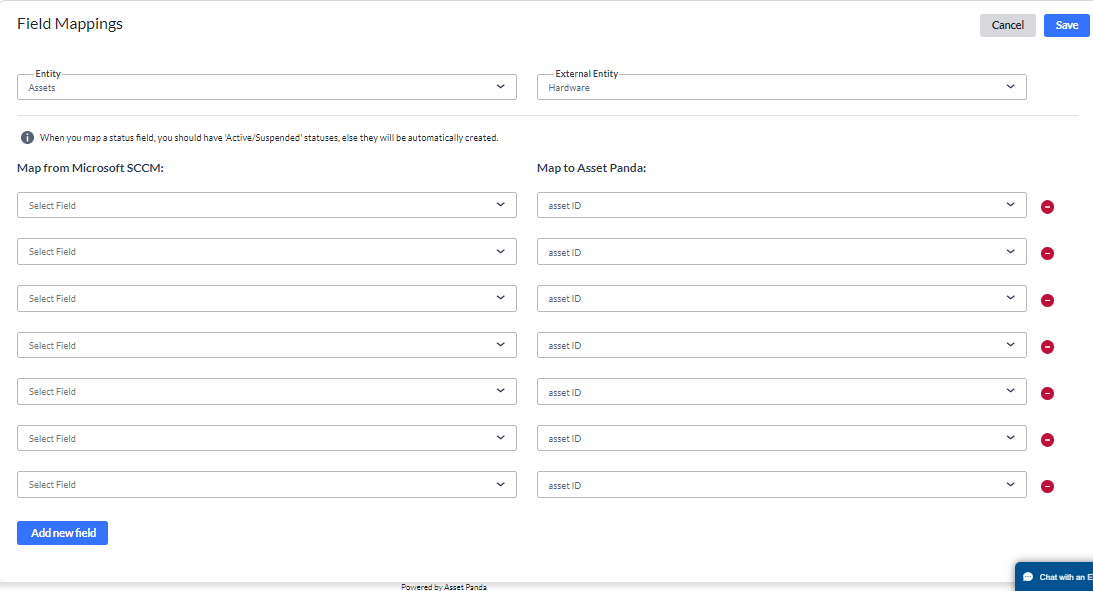
4. You'll have the option to immediately map four fields. Click the Add a new field button if you need to map an additional field.
5. Click Save when you've mapped your fields.
Scheduler
1. Click the Scheduler tab from your main Asset Panda Device Data Agent page, and then click Add new schedule.

2. Complete the required Name field, and then use the Schedule for Field Mapping drop-down menu to select the group you wish to sync to.
The groups included within this drop-down menu are pulled from fields you mapped within the Mapped Fields section.
NOTE: You must create a schedule for each group.
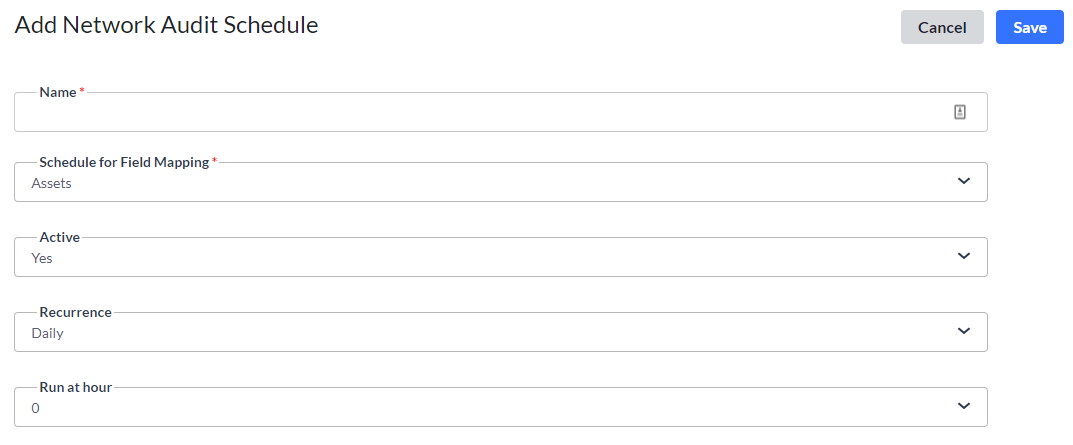
3. Use the Active drop-down menu to select Yes, and to activate your scheduler.
4. Use the Recurrence to select:
- Daily – Select Daily, the hour, and day of the week. (We recommend daily, along with each day of the week. This ensures that all data syncs daily and is ready to go first thing in the morning.)
- Weekly – Select Weekly, the hour, the frequency, and day of the week.
- Monthly – Select Monthly, the hour, and the frequency (includes the frequency of the month such as every month, every other month, etc., and the day of the month).
- Yearly – Select Yearly, the hour, and the frequency (includes the specific month and day of the month you wish to schedule).
5. Click Save.
Sync Objects
Your Sync objects stores all your syncing information and is divided by year and month.
1. Click the Sync objects tab.
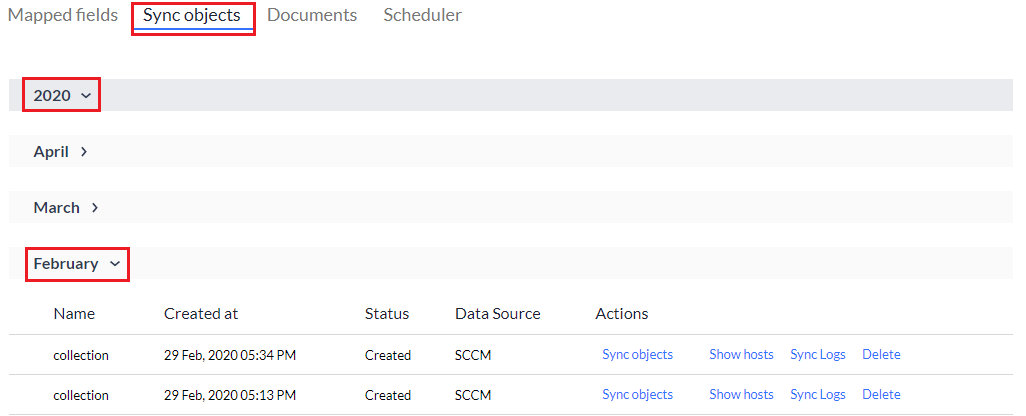
2. Click the arrow  icon to expand your sync objects.
You will initially notice they are grouped by year (if you have multiple years synced).
3. Click the year you wish to view, and then select the month to view logs for that specific timeframe.
4. Click any of the links under the Actions column to view further details of each sync.
Troubleshooting
If the program fails at first sync: You may need to restart your computer before it will proceed.
If you experience permissions issues: Run the program as administrator.
-Running the program as administrator can also help alleviate some permissions issues if they should arise.
If issues continue: We recommend that you zip up this folder and send it to our Support team at: support@assetpanda.com Note that this location may be hidden, so you will need to select View > Hidden Items
C:\Users\<yourusername>\AppData\Roaming\AssetPandaNetworkAgent.