Create an Audit
Auditing is well, it's just cool. It's a great way for you to physically scan your assets, to notate what you have, and to make it easier to find items that may end up missing.
You must be mobile and using a iOS or Android device to perform an audit yet, you there are still some pretty cool features you can do via web. You can view a list of all existing audits and details to each specific audit and, you can also run reports.
So let's get down to the fun stuff and talk about how to actually create some audits.
Enable an audit
You will first need to enable user permissions within the web version of the application (if you have the admin rights to do so).
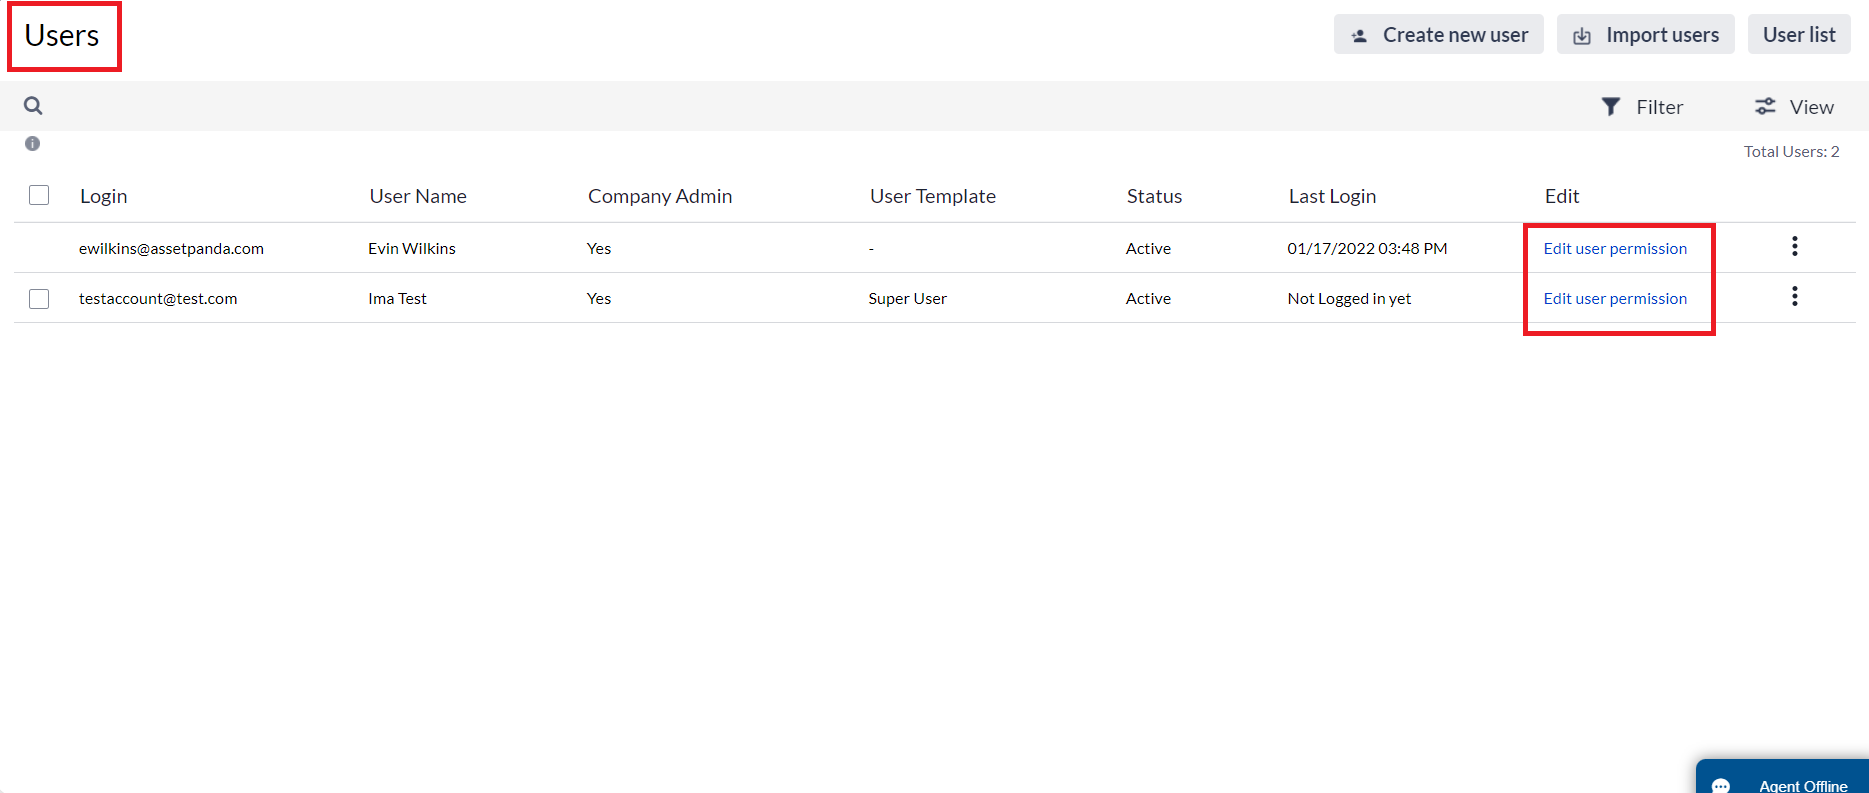
1. Click your settings ![]() icon, select User Configuration, and then select the Edit user permission link or...
icon, select User Configuration, and then select the Edit user permission link or...
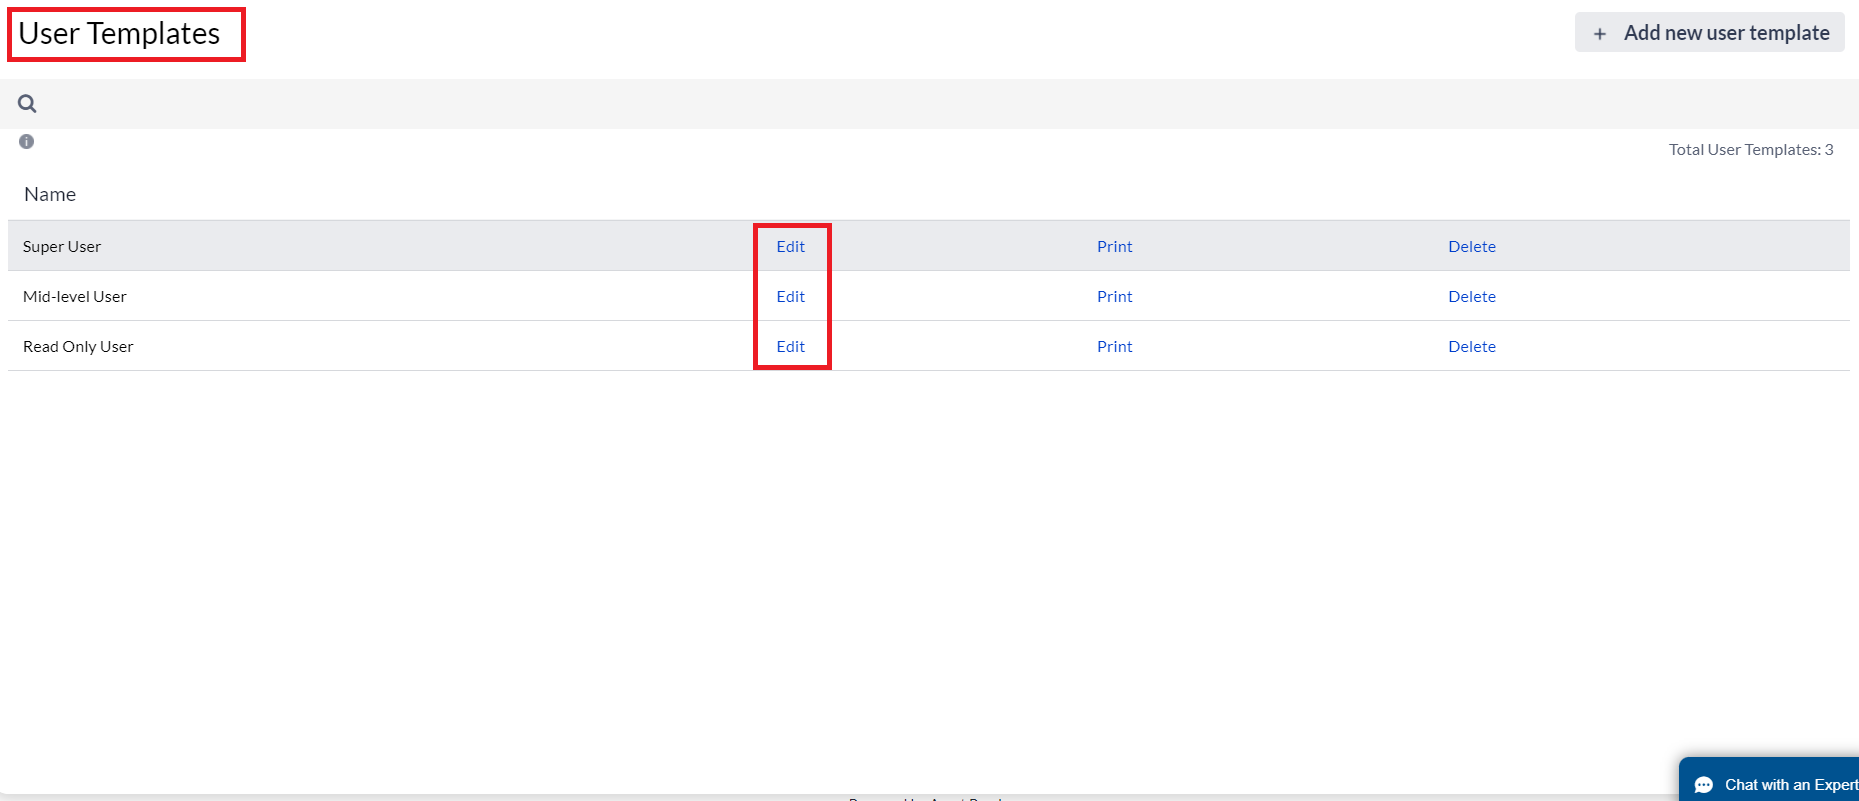
2. Select User Templates, and then select the Edit link.
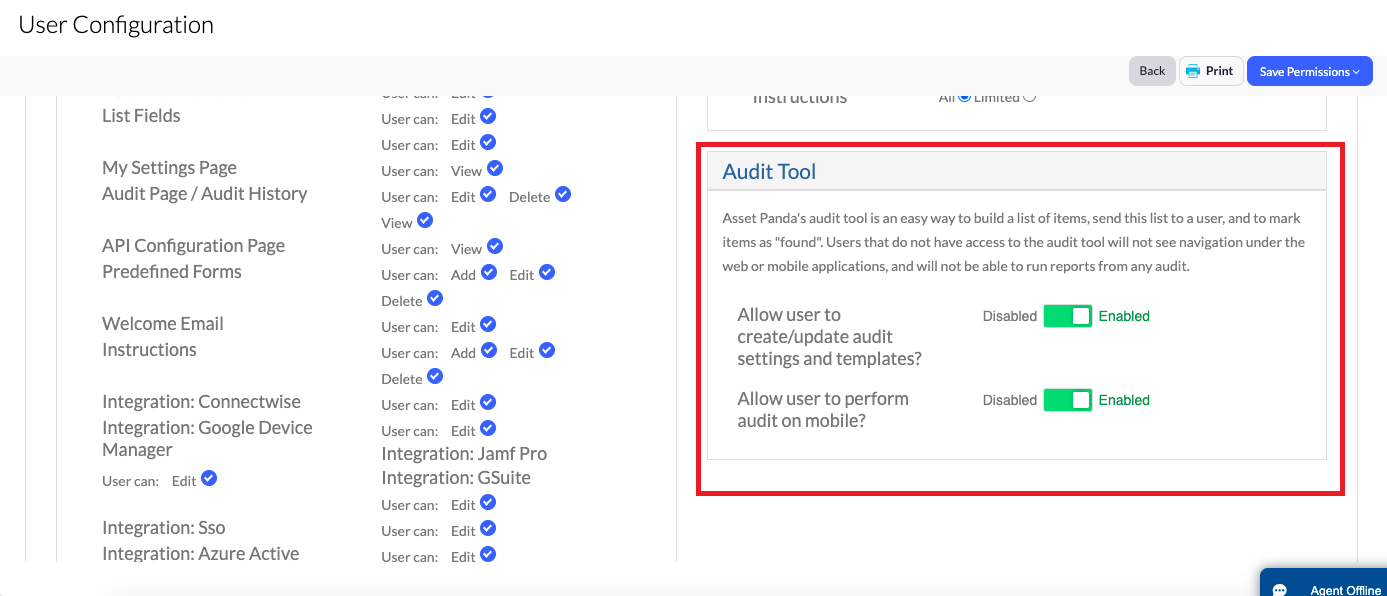
3. Scroll down to the Audit Tool, and then move the Allow user to perform audit on mobile toggle to Enabled.
This step is mandatory to complete audits and is applicable whether you are using User Configuration or User Templates.
Create a web audit
Note that the audit feature is only available for 1:1 assets. Consumables and other quantity-based groups cannot be audited if you are looking to physically scan each individual count.
Let's now jump into the creation of a web audit. (We told you we would!) First, it's important to make sure you have the permissions required to create/edit an audit. Once you're certain:
1. Click your Tools menu, and then select Audit.
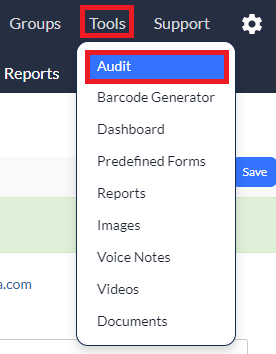
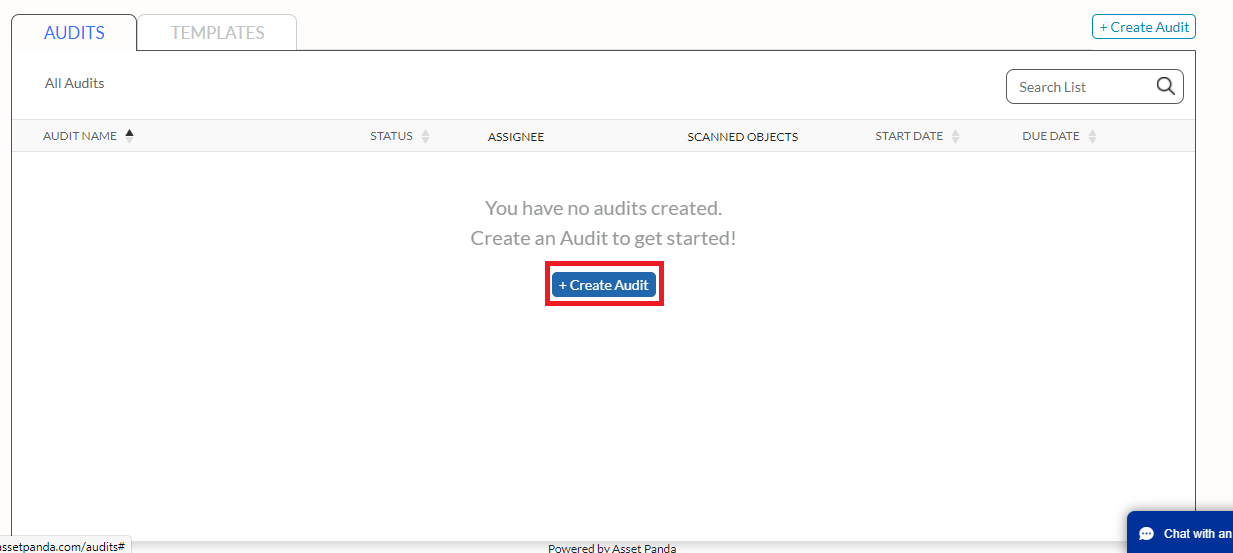
Your Audit page displays with a list of any existing audits (if any).
2. Click Create Audit to create a new audit.
3. Enter the following audit details:
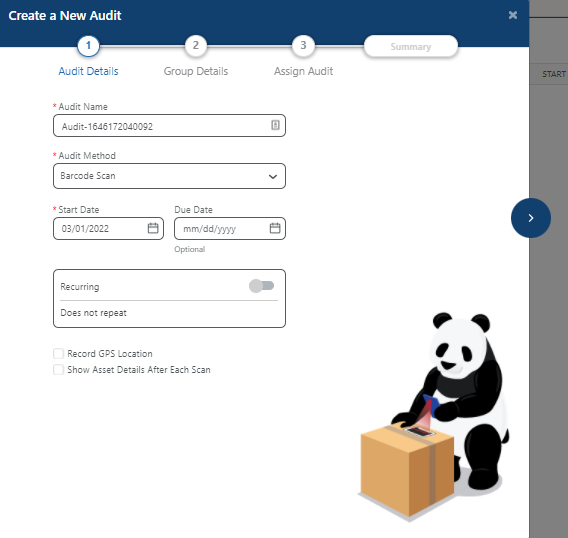
- Audit Name
- Audit Method:
- Barcode Scan: The default option. Users must scan the barcode with this option.
- Manual Enter ID: Allows users to type in a unique identifier rather than scan a barcode.
- Prompt Each Time: Prompts the user each time to either select the barcode scan or manual entry.
- Start Date: Audit automatically defaults to the current date, but can be changed to a future date.
- Due Date (optional):
- Useful if you want the audit to eventually move to a Closed status.
- Select if you would like to add a due date, but allow users to continue to perform the audit past the due date (ONLY if they close out the audit by selecting Finish Audit).
- Entering a due date sends an email notification that the due date is approaching.
- Recurring:
- Toggle ON if you want the audit to repeat at set intervals.
- Audits can repeat either monthly or annually.
- Can be stopped after a specified amount of time, or never.
- Can be used to notify specified users ahead of time of upcoming audits.
- Record GPS Location: Provides GPS coordinates of where the user scanned the item during the audit.
- Show Asset Details After Each Scan: Allows users to view an item's information fields after scanning/entering the barcode.
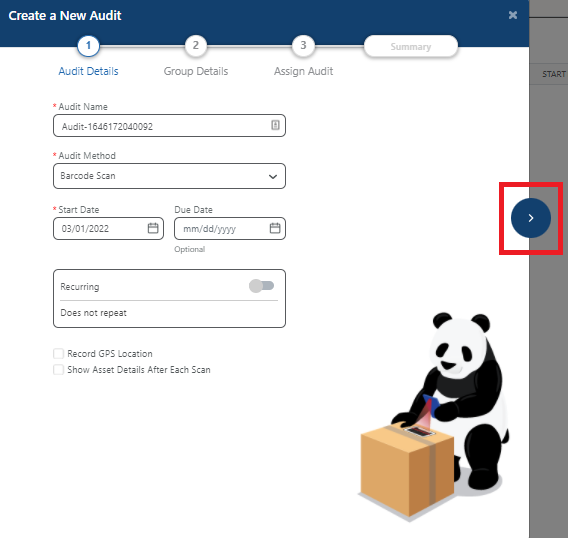
4. Select the arrow to proceed to Group Details (arrow changes to Group Details when you place your mouse over it).
5. Use the Group drop-down menu to select the group that contains the assets you wish to audit. (This step is mandatory.)
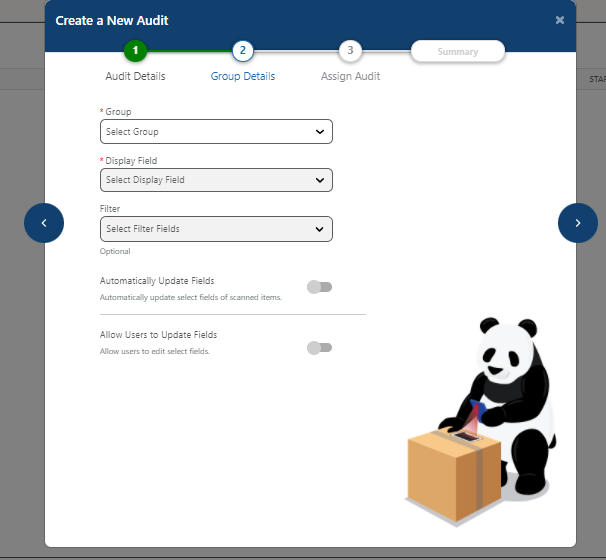
6. Use the Display Field drop-down menu to select the value that displays within your audit list. You are able to display either the serial number of the device, or the name so that users performing the audit know what they are looking for. (This step is mandatory.)
7. Use the Filter drop-down menu to filter and narrow results within your group, rather than to audit all records.
You can select any number of fields and values to filter by, as there is no limit.
8. Use the toggle to Automatically Update Fields (or not, as this is not required). This option automatically changes the selected field(s) with entered values. Moving the toggle to ON then selects the fields to be updated during an audit.
For example, let's say I've set my audit filter to show a specific type of laptop. I want all items scanned to automatically be updated with Laptop in case the category field is displayed as blank or as another type.
9. Use the toggle to Allow Users to Update Fields (or not, as this is not required). Moving the toggle to ON, gives the user the flexibility to update selected fields, and to enter any values within those selected fields.
For example, let's say a new audit has no filters, so the audit list includes every asset within the entire company, across five different locations. You may opt to allow users to make updates to the Location field.
10. Select the arrow to proceed to Assign Audit (arrow changes to Assign Audit when you place your mouse over it).
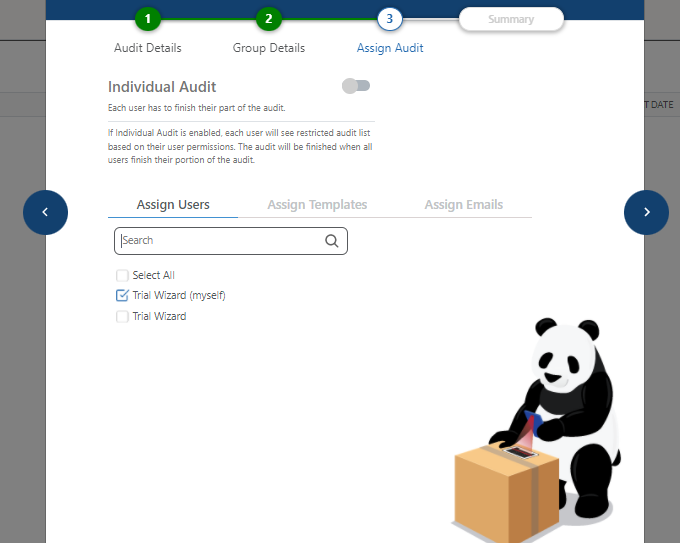
The Assign Audit page offers several options with audit assignments.
11. Move the Individual Audit toggle to ON if you want to give the first user the ability to close their portion of the audit, while leaving it open for other users to still be able to continue and finish their own portions of the audit. (Clicking the Finish Audit button will close out the audit for only the user that clicks it.)
or.....
Leave the Individual Audit toggle in the OFF position (default) if want to give the first user the ability to close the audit for all assigned users. (Clicking the Finish Audit button will close the audit for everyone.)
12. Click the Assign Users tab to search, and then select/assign users to this specific audit.
13. Click the Assign Templates tab to assign user templates, rather than to select users one by one.
14. Click the Assign Emails tab to select which users receive the audit report summary once the audit is complete.
15. Select the arrow to proceed to the Summary (arrow changes to Summary when you place your mouse over it).
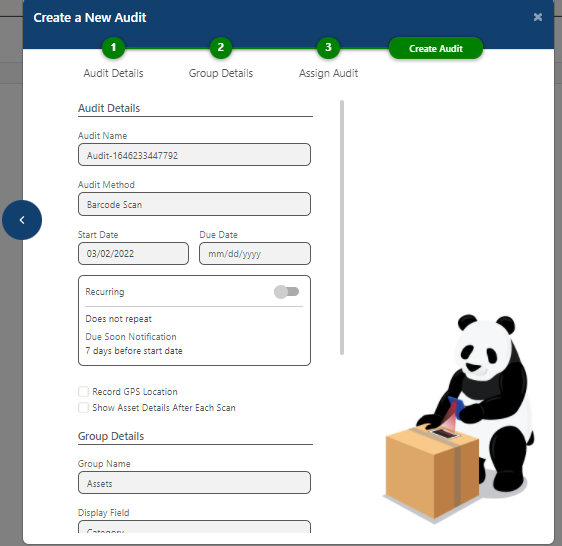
16. Review your audit summary, and make any necessary changes.
17. Click Create Audit.