Action Creating Records
This article will help you to configure an action to create a record within another group.
(We'll be using the example of an action within an Assets group to create a work order ticket.)
To do this:
1. Click to select your settings ![]() icon, and then select Group Settings.
icon, and then select Group Settings.
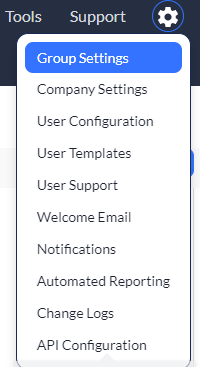
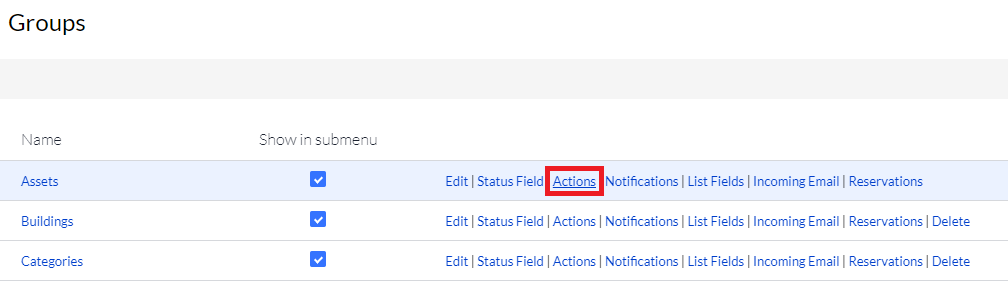
2. Locate Assets, and then select the Action link.
3. Click Add New.

4. Enter a name into the Action field. (We used Create Work Order in our example below.)
5. Select Standard Action from the Action Type drop-down menu (the default selection).
6. Use the toggle to select Yes for the Does this action create records option.
7. Use the Which Group drop-down menu to select the group where the record will exist.
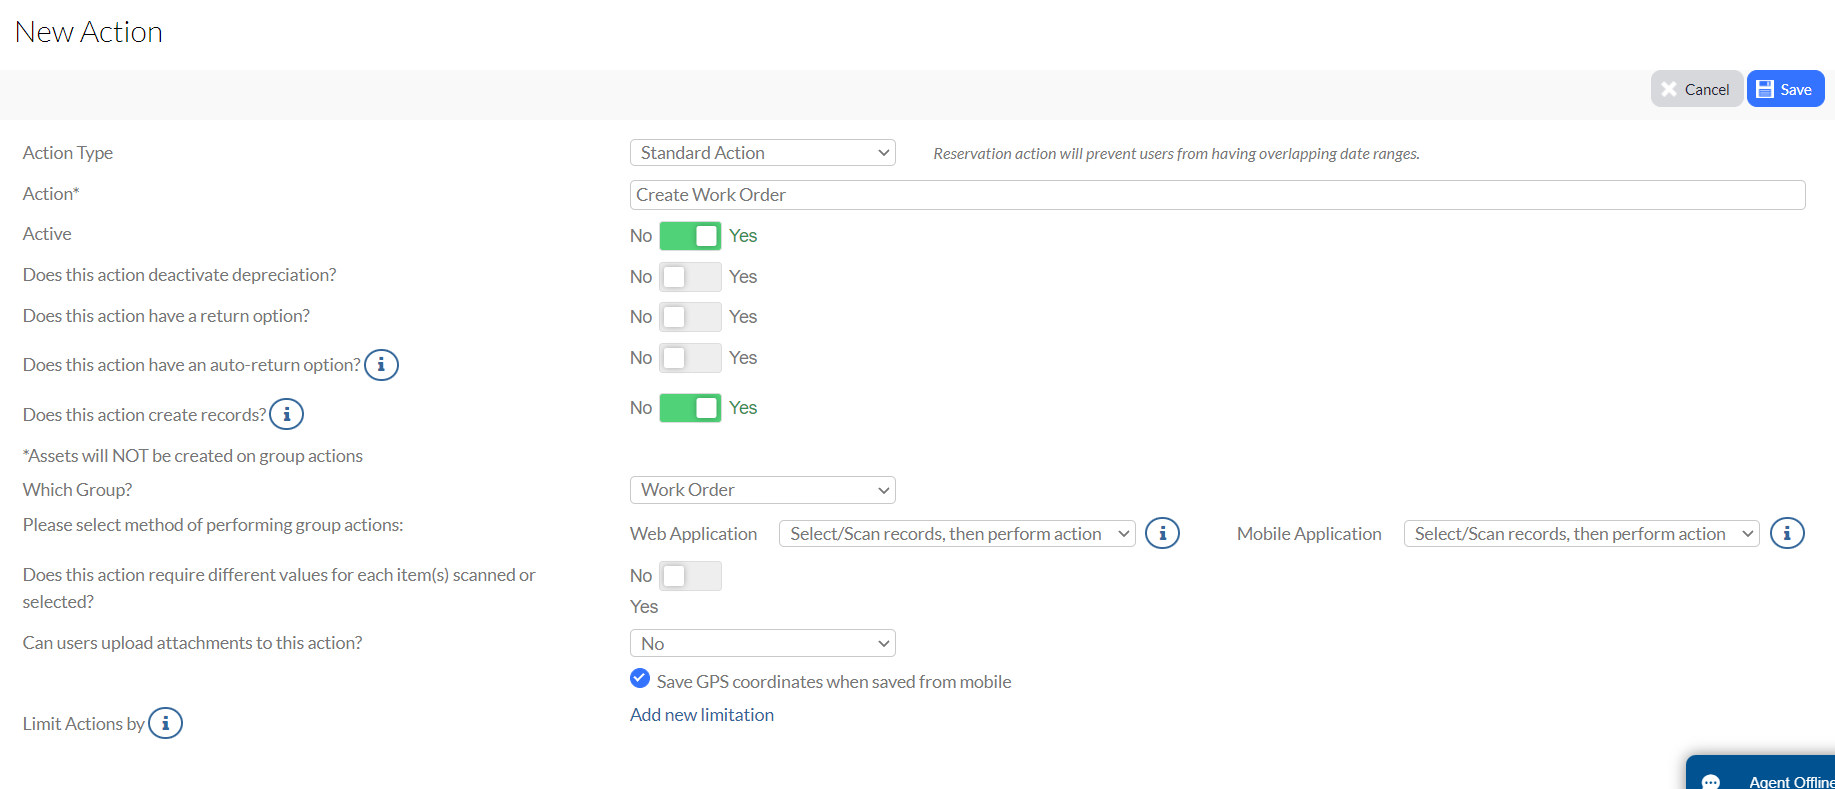
8. Click Save, and then scroll down to the Open Field section.
You will notice the Number of records to be created field. This is a required field and cannot be deleted.

9. Click the Edit link next to the Number of records to be created field. (This step is optional and not required if you do not wish to change anything.)
The Action Open Field window displays.

Although optional, you can change the display names and message, along with the type. You are also able to set a default value for the number of records to be created. You can also simply leave the default options, as shown in the screenshot above.
10. Click Save and Close once you are satisfied with your selections in this window.
We now want to take a look at mapped fields, which will help us to determine any new Open Fields we need to create and then map to.
11. Proceed to our Field Mapping section below.
Field Mapping
The fields created here are the fields that are going to be available when you initiate your action.
1. Click the Field Mapping button.

Your Mapped Fields window displays.
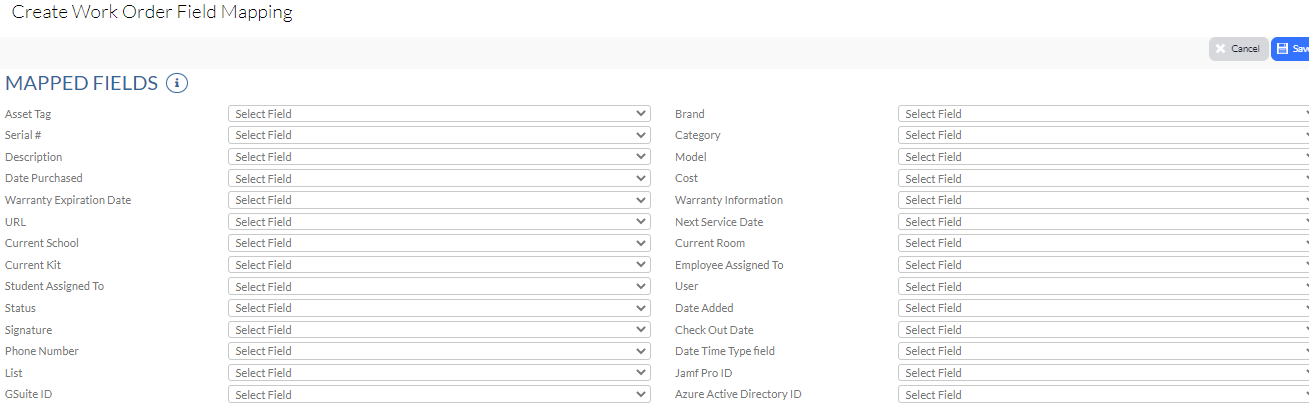
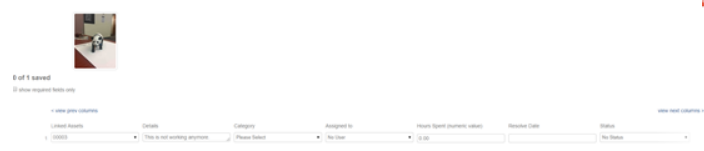
The items that are mapped within our mapped fields are going to be populated within the work order that we just created in our example above.
2. Click the drop-down menus to map the fields you wish to map. There is no requirement to map all or any of the fields. Any can be left as they are, allowing users to fill them in on their own.
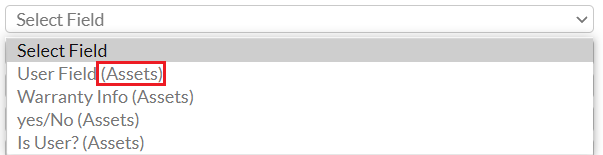
When you open the drop-down menus, you will notice that your selections will contain either the word (Action) or (Assets).
Fields mapped from within the Action will contain the text of Action:

and fields mapped from the Assets group will contain the text of Assets:
3. Click Save if you were able to successfully map your fields. It's also possible that you may not have had the selections you needed to complete your mapped fields. Proceed on to step 4 if you wish to create more.
4. Click Cancel to return back to your Edit Action page, and then scroll back to the Open Field section.
5. Click Add New to add new fields.

6. Click Save and Close once you've entered the information you wish to enter.
7. Repeat this process for any new fields you wish to create.
Once saved, your new action will be available within its Group, allowing you to fill out more information (if needed). This will also allow you to test your new field mapping.