ADFS SAML Setup
Complete the following steps to successfully set up your Active Directory Federation Services (ADFS) and SAML (Security Assertion Markup Language).
Most of the following technical documentation belongs to Microsoft. We have notated where Asset Panda-specific changes are to be applied. (See the original document here: Create a Relying Party Trust | Microsoft Docs.)
NOTE(S): You must have administrator privileges to complete the following steps.
1. In Server Manager, click Tools, and then select AD FS Management.
2. Under Actions, click Add Relying Party Trust.
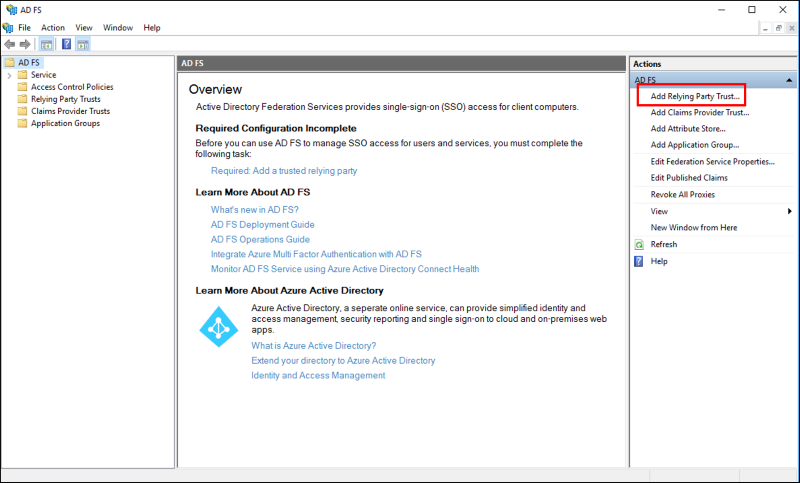
3. On the Welcome page, choose Claims aware and click Start.

4. On the Select Data Source page, click Enter data about the relying party manually, and then click Next.

5. On the Specify Display Name page, type a name into the Display name field, enter a description for this relying party trust into the Notes field, and then click Next.

6. On the Configure Certificate page, if you have an optional token encryption certificate, click Browse to locate a certificate file, and then click Next.

7. On the Configure URL page, select the Enable support for the SAML 2.0 Web SSO protocol check box. Under Relying party SAML 2.0 SSO service URL, type the SAML service endpoint URL of https://login.assetpanda.com/users/auth/saml/callback, and then click Next.

8. On the Configure Identifiers page, enter https://login.assetpanda.com as the identifier for this relying party, click Add to add it to the list, and then click Next.

9. On the Configure Multifactor Authentication Now page, select I do not want to configure multi-factor authentication settings for this relying party trust at this time, and then click Next.

10. On the Choose Issuance Authorization Rules page, select Permit all users to access this relying party, and then click Next.

11. On the Ready to Add Trust page, review the settings, and then click Next to save your relying party trust information.

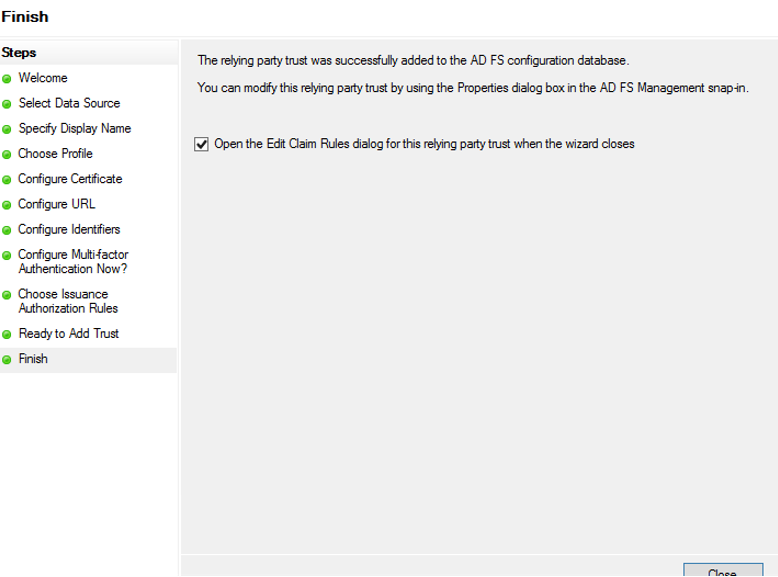
12. On the Finish page, select the Open the Edit Claim Rules dialogue for this relying party trust when the wizard closes box, and then click Close.
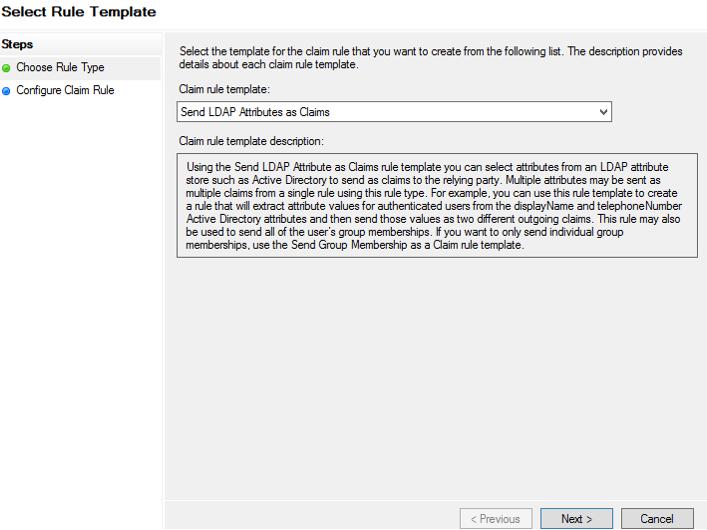
13. On the Select Rule Template page, select Send LDAP Attributes as Claims from the Claim rule template drop-down menu, and then click Next.
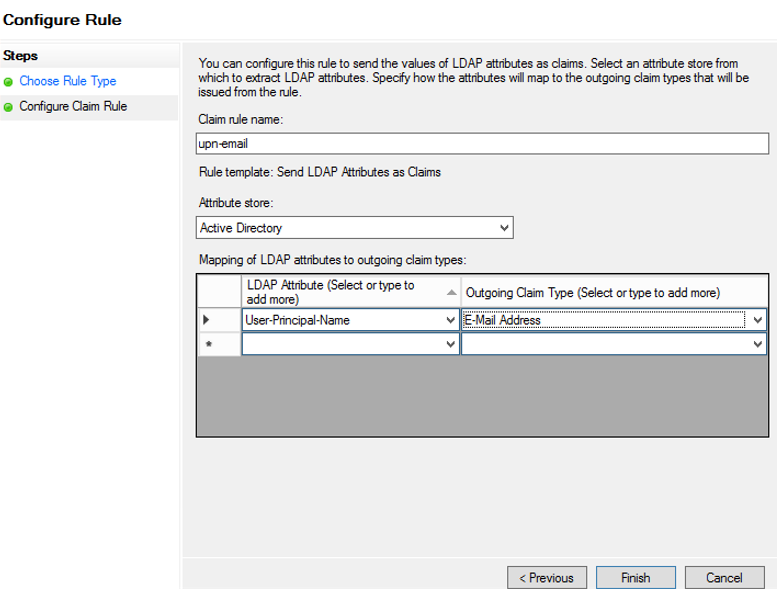
14. On the Configure Rule page, enter upn-email as the Claim rule name, and then select Active Directory from the Attribute store drop-down menu.
15. Select User-Principal-Name and E-Mail Address from the Mapping of LDAP attributes to outgoing claim types drop-down menus, matching those shown below, and then click Finish.
16. Navigate to and run the Windows PowerShell as Administrator.
17. Type Get-AdfsCertificate, and then click ENTER on your keyboard.

18. Copy the Token-Signing Thumbprint value.

19. Log into your Asset Panda account at: https://login.assetpanda.com.
20. Click on the Settings  icon, and then select SSO.
21. Select Fingerprint from the Configuration drop-down menu, and then enter the ADFS domain for the SSO URL.

22. Click Save.
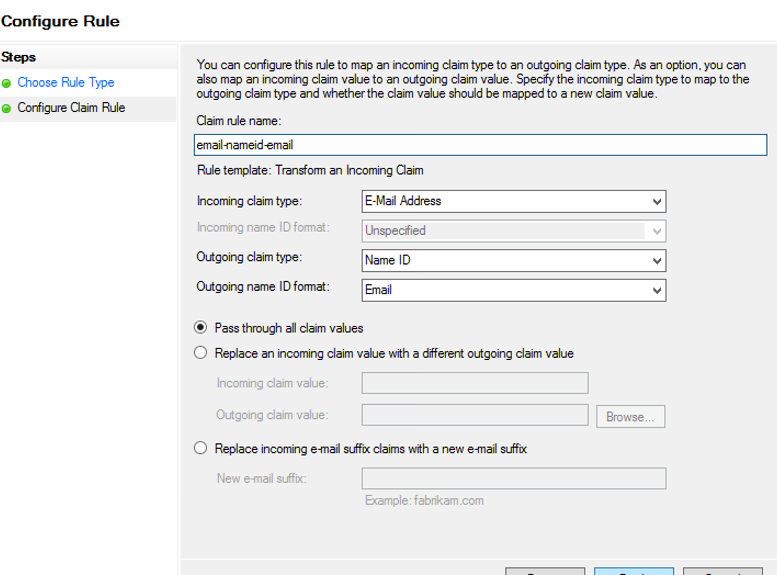
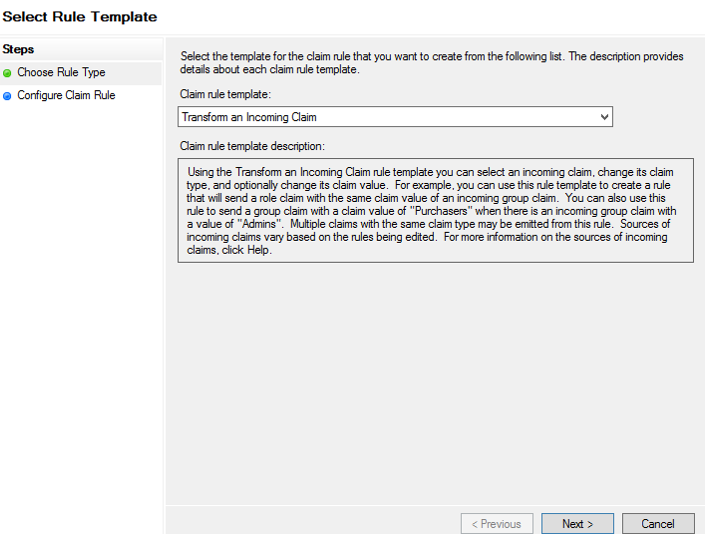
23. On the Select Rule Template page, select Transform an Incoming Claim from the Claim rule template drop-down menu, and then click Next.
24. On the Configure Rule page, enter email-nameid-email into the Claim rule name field, and select E-Mail Address from the Incoming claim type drop-down menu.
25. Select Name ID from the Outgoing claim type drop-down menu, and select Email from the Outgoing name ID format drop-down menu.
26. Select Pass through all claim values, and then select Finish.
